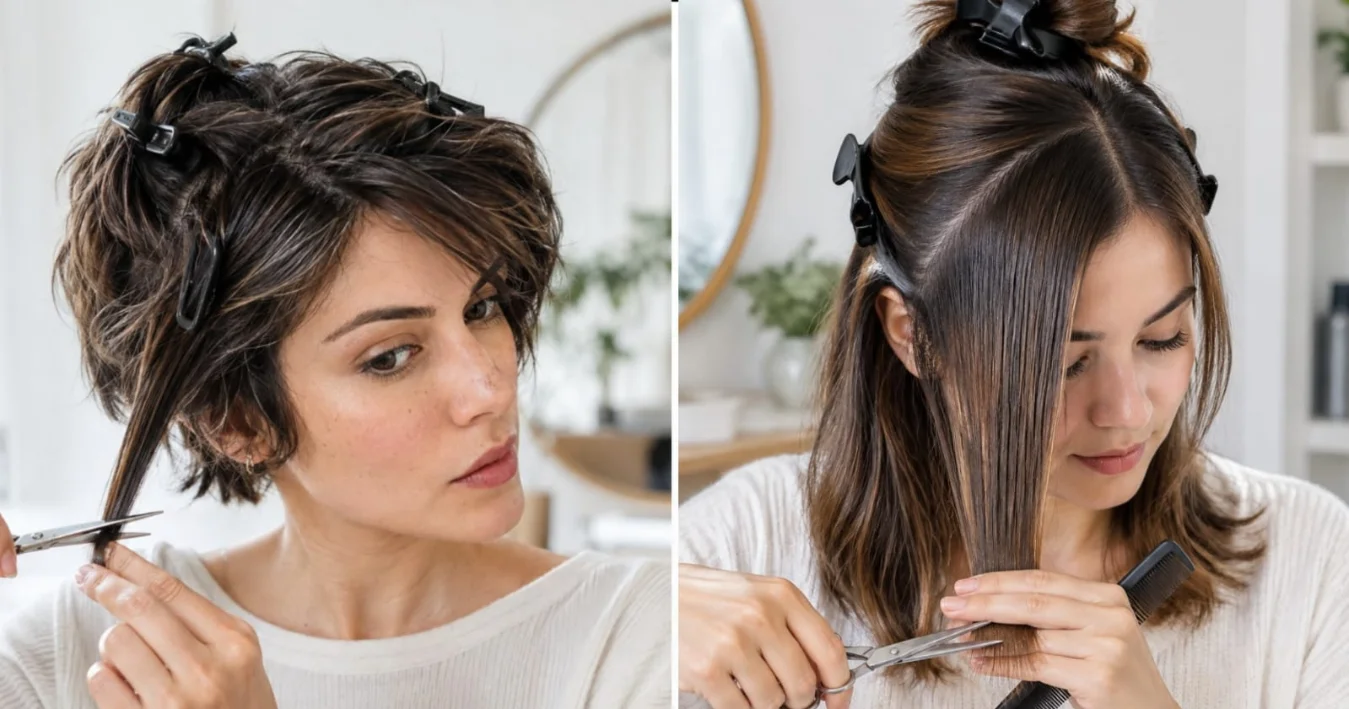
For most people, the fastest and safest way to cut your own hair in layers at home is the ponytail method. Clean, damp hair is gathered into one ponytail, pulled forward over the forehead, and cut straight across with sharp hair cutting shears, removing no more than half an inch to one inch at a time. Curly and textured hair is the exception. It should be cut dry, one curl at a time, since wet curls stretch out and spring back once dry, which can leave the layers far shorter than intended.
Table of Contents
At a Glance: Which Method Fits Your Hair
| Method | Best For | Skill Level | What It Delivers |
|---|---|---|---|
| Ponytail Method | Long to medium straight or wavy hair | Beginner | Soft layers throughout, minimal risk |
| Section by Section (Graduated) | Short to medium hair needing precise shaping | Intermediate | Structured, graduated layers |
| Twist and Snip | Any length, especially split ends or light texture | Beginner | Subtle texture without losing length |
| Finger Cutting (Dry Cut) | Curly or coily hair | Intermediate | Curl by curl shaping that accounts for shrinkage |
Is Cutting Your Own Layers Actually a Good Idea?
Layers are not a niche request. A 2025 survey of nearly 2,750 women found that the layered cut is currently the most popular hairstyle choice among women, ahead of the classic bob and the ponytail, despite the style first becoming popular back in the 1970s. That popularity is part of why so many people want to learn how to recreate it between salon visits.
That data comes from a 2025 survey by Medihair, which polled thousands of women on their current hairstyle preferences.
Doing it at home is also more common than most people assume. Research from consumer insights firm Attest found that 21% of American women have cut their own hair at home, compared with 45% of men. Money is a real factor behind that shift.
According to a 2022 survey of more than 1,000 Americans conducted for Advanced Dermatology and reported by GOBankingRates, women spend an average of $228 a year on professional haircuts, noticeably more than the $168 average for men.
None of this means a DIY layer cut is risk free. It genuinely can go wrong, especially on a first attempt, and a rushed or overly ambitious cut is the single biggest reason people end up unhappy with the result. The goal of this guide is to make that outcome far less likely by walking through the right method for a specific hair length and texture, the tools that actually make a difference, and the mistakes worth avoiding altogether.
What to Gather Before Starting
| Tool | Why It Matters |
|---|---|
| Hair cutting shears, not household scissors | Household and craft scissors have a blunt, uneven blade edge that crushes the hair shaft instead of slicing it cleanly, which leads to split ends almost immediately. A dedicated pair, such as the Tweezerman 2000 Styling Shears that professionals frequently recommend, gives a much cleaner cut. |
| Sectioning clips | Needed to hold hair out of the way in clean sections so nothing gets cut by accident. |
| A fine tooth cutting comb | Used to comb each section smooth right before cutting so the line is even. |
| A wide tooth comb or fingers only | For curly and coily hair, since a fine comb can disrupt the natural curl pattern before cutting. |
| Elastic hair ties | Central to the ponytail method and to sectioning generally. |
| Two mirrors, or one handheld and one wall mirror | Needed to actually see the back and sides of the head while cutting. |
| A spray bottle | For straight and wavy hair that will be cut damp. Skip this for curly hair, which should stay dry. |
| A quality detangling brush | Brushing thoroughly before any cut, using something like the Mason Pearson brush that some celebrity stylists favor, helps prevent snagging and keeps the line clean. |
Choosing the Right Method for Hair Length and Texture
There is no single universal way to cut layers, and the biggest mistake people make is applying a tutorial made for long, straight hair to a completely different hair type. The sections below break down the technique by starting length and texture, since that decision affects everything else.
How to Cut Long Layers at Home (The Ponytail Method)

This is the technique behind most of the tutorials circulating online, and it works well because it treats the whole head as one section, which keeps things simple for a first attempt.
- Wash and dry hair completely, then comb out all tangles. Hair should be clean since product buildup makes an even cut harder to judge.
- Gather all of the hair into a single ponytail directly on the forehead, roughly where a center part would fall. Secure it firmly with an elastic tie.
- Decide how many layers are wanted. Positioning the ponytail higher on the crown creates longer, subtler layers, while pulling it further forward toward the hairline creates shorter, more dramatic ones.
- Comb the ponytail flat and check that it is centered before making any cut.
- Using sharp hair cutting shears, cut straight across the ponytail, removing only a small amount at first, no more than an inch. The tail can always be trimmed shorter, but it cannot be added back.
- Release the elastic and shake the hair out to see the result before deciding whether to take off any more length.
How to Cut Layers in Medium Length or Shoulder Length Hair

Shoulder length hair usually needs more than one ponytail to layer evenly, since a single gathering point does not distribute length the same way it does on longer hair.
- Part the hair the way it is normally worn, then divide it into two to four sections using clips, generally a top crown section and one or two sections on each side.
- Work on one section at a time. Pull it out from the head at roughly the same angle it naturally falls and comb it smooth.
- For subtle texture rather than dramatic layering, try the twist and snip method here. Twist a small section of hair, hold it taut, and the more damaged or longer strands will separate and stick out from the twist. Snip only those protruding pieces rather than cutting straight across the whole section, which removes far less length while still adding movement.
- For more structured layering, cut each section slightly shorter than the one below it, working from the crown down, and check that the lengths blend by combing the hair back into its natural position after every section.
- Cross check the result by combing the hair in a different direction than it was cut, which is a professional trick for catching any section that runs longer or shorter than the rest.
How to Cut Layers in Short Hair

Short hair leaves almost no room for correcting an overly aggressive cut, so patience matters more here than at any other length.
- Work in smaller sections than would be used on longer hair, since even a small miscalculation is more visible at a short length.
- Take sections no wider than about two finger widths, hold each one at the same angle as the surrounding hair, and cut only the very ends first.
- Reassess after every section rather than cutting the whole head before checking anything, since short layers can look uneven quickly if one section is cut before comparing it with its neighbor.
For a soft, textured short cut like a bixie, keep the crown sections shortest and let length build gradually toward the perimeter rather than creating one dramatic jump in length.
How to Cut Layers in Curly or Textured Hair

Curly and coily hair behaves differently enough that it deserves a completely separate method rather than a scaled down version of the straight hair techniques above. The reason comes down to shrinkage. Curls stretch out when wet and pull back up once they dry, sometimes by several inches, so a layer that looks perfectly even while damp can end up dramatically uneven once the hair dries and springs back into shape.
- Start with hair fully dry, either air dried or diffused, and free of any product that would weigh curls down or disguise their true shape.
- Detangle gently with fingers or a wide tooth comb rather than a fine one, which can pull curls out of their natural pattern.
- Work curl by curl or in very small clusters rather than large sections. Hold each curl without stretching it, and cut based on where the curl naturally falls, not where it would sit if pulled straight.
- Remove length in small amounts, since curls are more forgiving of unevenness than straight hair but still cannot have length added back once it is gone.
- Let the hair fall back into its natural pattern after every few curls to check the overall shape before continuing.
For more curl specific cutting and styling ideas once the layers have grown in, this site’s guide to hairstyles for curly hair is a useful next stop.
How to Cut Face-Framing Layers

Face framing pieces are shorter sections cut around the front of the face rather than throughout the whole head, and celebrity hairstylist Andrew Fitzsimons has described them as one of the most versatile additions to any haircut because they soften or accentuate features depending on how they are placed. They also tend to grow out gracefully, which makes them a relatively low risk way to experiment with layers for the first time.
- Take a triangular section starting from the highest point of each eyebrow back to the crown.
- Comb that section straight down and hold it taut.
- Cut at an angle rather than straight across, generally starting shorter near the cheekbone and letting it graduate longer toward the rest of the hair, since a completely blunt line here reads as bangs rather than face framing layers.
Check the framing against the face shape before cutting further. Anyone working from a guide to haircuts for round faces will notice that face framing layers are recommended especially often for softening angles, which is exactly the effect this technique creates.
Point Cutting and Blending

Almost every layering method above will leave some visible lines where one section meets another, and point cutting is the step that makes those lines disappear. Instead of cutting straight across, the shears are held vertically and small, upward snips are taken into the very ends of the hair. This breaks up the blunt edge without removing any real length, and it is typically the last step after the main shape has already been cut. It is worth doing lightly and gradually, since point cutting is difficult to undo if too much is removed at once.
How Much Hair to Cut
This is the single biggest source of at home haircut regret and it deserves real numbers instead of vague advice. As a starting point, most first time layers should stay in the half inch to one inch range per cut, which matches what professional stylists commonly recommend for trims specifically because it is difficult to over correct at that length. Sections themselves should generally be about two finger widths, or roughly two inches, since anything wider makes it hard to keep the cutting line even across the whole section. It is always possible to go back and take off more once the first pass is dry and assessed, but there is no way to put length back once it is cut, so the smaller amount is the safer default whenever there is any doubt.
Common Mistakes and How to Fix Them
- Cutting hair while it is dripping wet. Wet hair stretches, especially at the ends, and shrinks back once dry, which is why a cut that looked even in the mirror can look noticeably shorter than expected. If this happens, the safest fix is usually to wait, since hair that is only slightly shorter than intended can often be blended with light point cutting rather than cut again immediately.
- Using regular household scissors. These have a blunt edge that crushes rather than slices the hair, leading to split ends and a rougher line almost immediately. If the damage has already been done, a proper trim with true hair cutting shears at the next opportunity is really the only fix.
- Cutting one large section instead of several smaller ones. This is the most common cause of visibly uneven layers, since it is nearly impossible to keep a consistent angle across a wide section. Uneven layers can usually be corrected by finding the shortest layer in the group and gently blending the surrounding sections down to match it, rather than trying to add length to the short piece.
- Skipping the point cutting step. Without it, layers can look blunt and stacked instead of soft, which is easy to fix afterward by lightly point cutting the ends once the main shape is finished.
- Cutting bangs into hair that has never had them before, as a way to fix uneven front layers. This tends to create a second problem instead of solving the first, so any new fringe is best planned separately rather than as an emergency fix.
Aftercare and Styling
The finished cut usually looks quite different once it is dry and styled compared with how it looked right after cutting, so it is worth waiting until a full wash and blow dry before judging the result. A round brush blowout tends to reveal any unevenness that was hiding while the hair was still damp, which makes it a useful final check rather than just a styling step.
Layers that were cut correctly for a given hair density should hold their shape and volume between washes. If a set of layers consistently falls flat within a day, the more likely explanation is density mismatch rather than the cut itself, and it is worth comparing the result against this site’s breakdown of why layered haircuts go flat, which covers fixes based on hair density specifically. Re-cutting layers every eight to twelve weeks is a reasonable general guideline for keeping the shape intentional rather than just letting it grow out unevenly.
When to Stop and Call a Professional Instead
Not every situation is a good candidate for a DIY cut, and being honest about that upfront saves a lot of regret. Color treated or chemically processed hair behaves differently under scissors and can be more prone to breakage. A dramatic change in length or style, rather than a light trim or subtle layering, carries a much higher chance of an uneven result that is hard to correct alone. One hairstylist quoted in a Glamour feature on the topic was blunt about it, advising that the safest approach to cutting your own face framing layers is simply not to attempt it and to see a professional instead. That advice holds especially true before an event with photos involved, or for anyone who has never cut hair before and is starting with hair that is already fragile or damaged.
A Quick Note for Men and Anyone Cutting Someone Else’s Hair
Nearly everything above, including the ponytail method, sectioning, point cutting, and the caution around wet curly hair, applies just as well to men’s hair and to cutting a partner’s or child’s hair rather than one’s own. The main practical difference is usually access, since cutting someone else’s hair makes it much easier to see the back and check both sides evenly, which is one of the harder parts of a self cut in the first place.
FAQ
Can someone really cut their own hair in layers?
Yes, and it is more common than most people think. Research from Attest found that 21% of American women have cut their own hair at home. Long, straight to wavy hair using the ponytail method is generally the easiest starting point, while short hair, curly hair, and any color treated hair carry more risk and reward extra caution.
What is the easiest way to cut layers at home?
For most beginners with long to medium length hair, the ponytail method is the simplest starting point, since it treats the whole head as a single section and only requires one clean, straight cut.
Does the ponytail method work on curly hair?
Not reliably. Curly hair should be cut dry, curl by curl, rather than pulled into a wet ponytail, since curls shrink significantly once they dry and a ponytail cut can end up much shorter than intended once it springs back into shape.
How much hair should be cut off for layers?
A half inch to one inch per pass is a safe starting point for a first attempt. It is always possible to remove more once the initial cut is dry and assessed, but length cannot be added back.
Should hair be cut wet or dry for layers?
Straight and wavy hair is generally cut damp for a more precise, controlled line. Curly and coily hair should be cut dry, since wet curls stretch and do not reveal their true finished length until they dry.
How can uneven layers be fixed?
The most reliable fix is to find the shortest section and gently blend the surrounding layers down to match it with light point cutting, rather than trying to add length to the shorter piece.
What scissors should be used to cut hair at home?
Dedicated hair cutting shears, not household or craft scissors. A blunt edge crushes the hair shaft instead of slicing it cleanly, which causes split ends almost immediately. The Tweezerman 2000 Styling Shears are a widely recommended option among professionals for at home use.
Final Thoughts
Cutting layers at home rewards patience far more than confidence. Starting with a small amount, choosing the method that actually matches hair length and texture, and using shears made for the job will solve most of the problems that make people nervous about trying this in the first place. For more ways to work with layers once the initial cut has grown in, this site’s guide to ghost layers covers one of the more low maintenance layering trends currently popular, and the collection of ways to choose a new hairstyle is a useful next stop for anyone still deciding exactly how much change they actually want.

