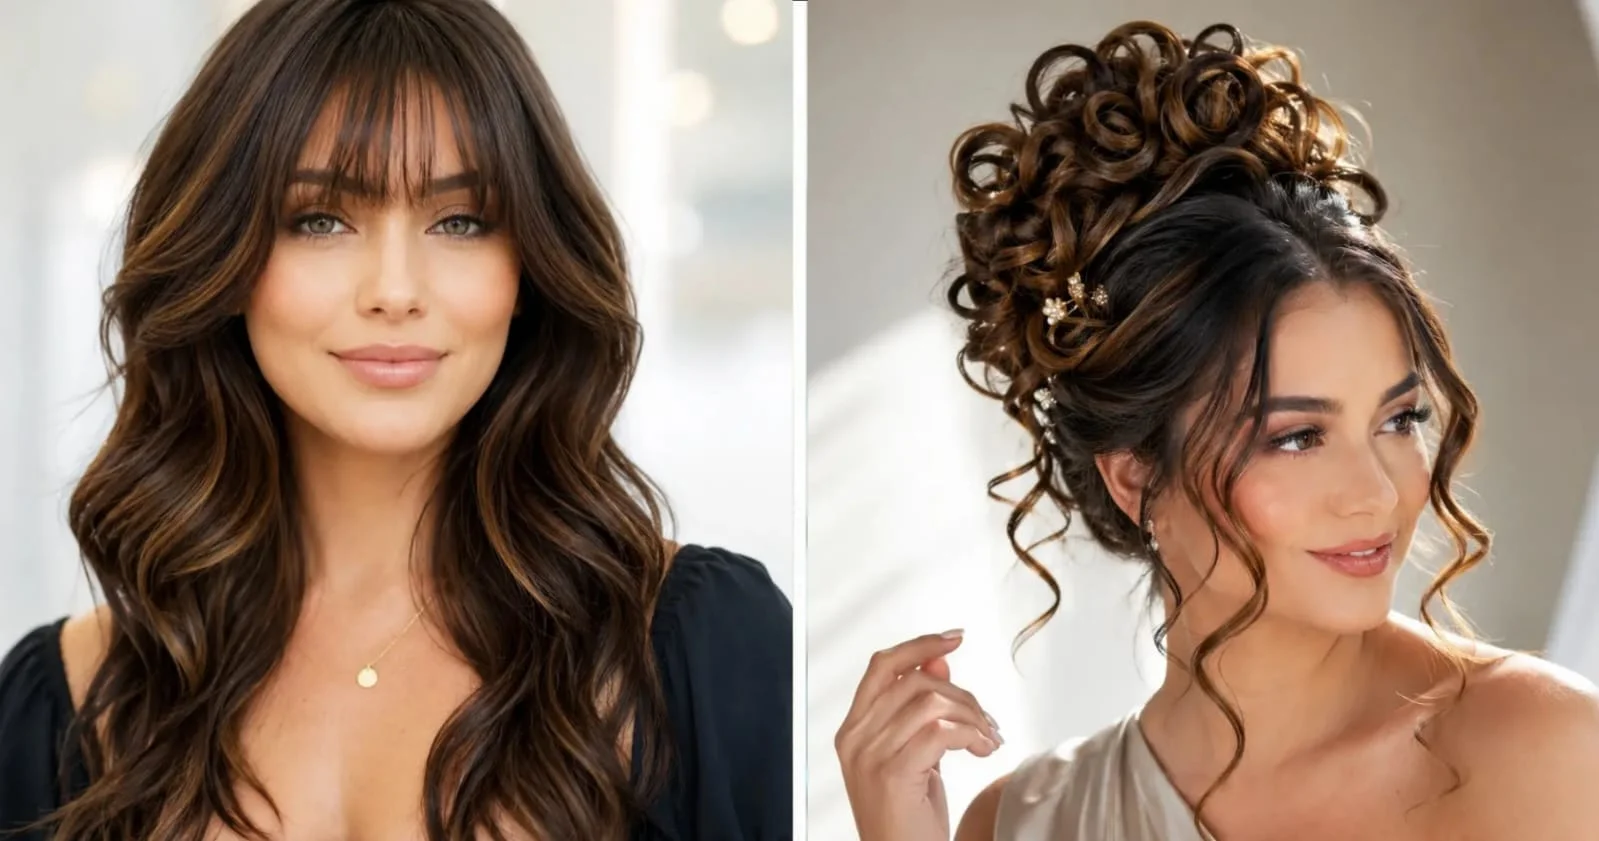
The same Medusa styling technique can create completely different results depending on your hair’s natural texture and the shape of your face. The sections that give thick curls dramatic volume can overwhelm fine strands, while placement that flatters a longer face may not have the same effect on a round or heart-shaped one. Once you start matching the style to your own features instead of copying a single inspiration photo, the look becomes much easier to wear. If you’re still deciding on a cut before styling, our guide to shag haircuts offers plenty of layered options that pair beautifully with bold updos.
That’s why this collection focuses on fit rather than trends. Whether your hair is sleek, wavy, curly, or tightly coiled, you’ll find Medusa hairstyles designed to work with your texture while complementing your face shape. Scroll through the ideas below to find the version that feels like it was made for you.
1. Classic Coil Medusa for Thick Curly Hair (3A–3C)

This is the style people picture when they hear “medusa hairstyle”: individual sections twisted or finger-coiled and pinned to radiate away from a center part, left loose at the ends so they move like the mythological serpents. It works because hair with an existing wave or curl pattern already wants to hold a twisted shape — you’re reinforcing a bend that’s already there instead of fighting straight strands into submission.
Why this works: curl pattern is created by the asymmetric distribution of disulfide bonds across the hair shaft, so curly hair sections naturally rope and hold twist tension without heat.
I had a client with dense 3B curls who’d only ever worn a wash-and-go. We sectioned into 10 pieces, twisted each with a curl cream, and pinned them fanning from a center part — no heat at all, and the coils held their shape through a full day at an outdoor wedding.
Steps:
- Detangle on soaked hair with a wide-tooth comb.
- Section into 8–12 even parts radiating from the crown.
- Apply a curl cream (not gel — gel over-stiffens the twist) to each section.
- Twist each section between two fingers, working from root to tip.
- Pin the twisted coil loosely at the root with a bobby pin, letting the tail hang free.
- Air-dry or diffuse on low heat.
Mistake to avoid: don’t pin too tightly at the root — it restricts movement and the coils sit stiff instead of swaying like the reference look.
2. Sleek Medusa Waves for Fine, Straight Hair

Fine, straight hair has almost no natural grip, so a loose twist-and-pin medusa will simply slide out within an hour. The workaround is to pre-set the wave with a curling iron before sectioning, so you’re pinning hair that already has a bend rather than asking pin tension to create one. This is a cousin of the wave-setting logic used in straight-hair styling generally, where texture has to be manufactured, not coaxed out.
Why this works: a 1-inch barrel curling iron held for 8–10 seconds per section denatures enough hydrogen bonds to create a temporary “S” bend that gives the twist something to grip.
A client with baby-fine, board-straight hair assumed medusa styles were off the table for her. Curling each section first, then twisting and pinning while still warm, gave the look four extra hours of hold at her sister’s engagement party.
Steps:
- Prep with a heat protectant and a texturizing spray at the root.
- Curl 1.5-inch sections away from the face, alternating direction.
- While still warm, twist each curled section and pin toward the crown.
- Set with a light-hold hairspray, not a heavy one that weighs down the wave.
Mistake to avoid: skipping the texturizing spray — fine hair needs the extra grip at the root or pins will slip within the hour.
3. Micro-Braid Medusa for Round Faces

Thick, chunky twists sitting close to the head add width at the temples, which is the opposite of what a round face needs. Swapping in narrower three-strand micro-braids instead of twists keeps the silhouette closer to the scalp and elongates the face rather than widening it — the same principle behind most face-slimming haircut recommendations for round faces.
Why this works: narrow braids create vertical lines running from crown to nape, and vertical lines read as length to the eye — a basic face-geometry principle stylists use across cuts, not just this style.
One client with a very round face wanted the medusa look for a themed party but worried it would look overwhelming. Using pencil-thin braids instead of thick twists kept the silhouette narrow and, in her words, “actually made my face look longer.”
Steps:
- Part into small, even sections — smaller than you’d use for the classic version.
- Three-strand braid each section tightly from root to tip.
- Pin braids so they lie flat against the head near the crown, fanning outward only at the ends.
- Seal ends with a small amount of edge control to prevent frizz.
Maintenance tip: re-braid only the front two sections between wears — the rest hold for 2–3 days if wrapped at night.
4. Bangs-Framed Medusa for Square Faces

A full medusa crown can look severe on a square jaw because every line points outward and reinforces the angles you already have. Adding a soft curtain fringe — similar to what’s recommended in guides on longer curtain bang styling — breaks up the forehead and softens the transition from hairline to jaw.
Why this works: a curtain fringe creates a diagonal line across the forehead, which interrupts the horizontal-vertical grid a square jaw naturally forms, softening the overall shape.
Steps:
- Section off a curtain fringe before starting the medusa twists.
- Style the fringe with a round brush for soft movement.
- Twist and pin the remaining hair into the medusa pattern, keeping the crown looser than in a full radiate style.
- Leave 1–2 face-framing pieces out at each temple.
Maintenance tip: use a small amount of pomade only on the fringe — product on the twisted sections will make them slick and prevent them from holding volume.
5. Half-Up Medusa for Oval Faces

Oval faces can wear almost any variation, so this is more about occasion than geometry — it’s a lower-commitment version for people who want the look without a full head of pinned sections. It borrows structure from half-up styling, twisting only the crown sections and leaving the lower hair loose.
Why this works: limiting the twist to the top third of the head keeps weight and tension off the nape, which is why this version tends to last longest through a full evening.
Steps:
- Twist 4–6 sections from the crown only.
- Pin twists to meet at the back of the head, medusa-style.
- Leave all hair below the ear loose and untouched.
- Curl the loose lengths for contrast against the tighter crown twists.
Maintenance tip: this version re-sets in under 10 minutes the next day since only the crown needs redoing.
6. Coily Medusa for 4A–4C Natural Hair

On tightly coiled hair, individual twists hold shape for days without pins at all once set on stretched hair, so this version is built around durability rather than a single-event look.
Why this works: the tighter the natural curl pattern, the more surface contact between strands within a twist, which is what creates hold — no heat or product needed to “activate” it.
A client transitioning to fully natural hair wanted something low-manipulation for two weeks between appointments. Two-strand twists on stretched (not shrunk) hair, sectioned into a medusa fan, held their shape with only a nightly satin wrap for twelve days.
Steps:
- Stretch hair first (banding or a blow-dry on low heat with a diffuser).
- Section into 10–14 parts.
- Two-strand twist each section with a leave-in and light oil.
- Arrange twists to fan outward from the crown, pinning only the first inch at the root.
Maintenance tip: re-twist just the edges every few days rather than redoing the whole head.
7. Wet-Look Medusa

A gel-set version where every section is slicked and twisted for a glossy, almost sculptural finish. Works best on medium-to-coarse hair that can absorb gel without looking greasy.
Why this works: gel forms a hard, flexible cast around each twisted section as it dries, locking the shape in place far longer than cream or mousse can — which is also why it needs to fully dry before you touch it.
A client with coarse, frizz-prone hair wanted the medusa look to survive a full night out dancing. The gel-set version held completely flat and shiny until 2 a.m., with none of the frizz she usually got from cream-based products.
Steps:
- Apply a strong-hold gel to damp hair, section by section.
- Twist each section tightly and pin flat against the scalp.
- Blast with a hooded dryer or diffuser to set the gel before releasing pins.
Mistake to avoid: releasing pins before the gel has fully dried causes the twists to unravel and go frizzy at the ends.
8. Medusa Updo for Formal Events

A more structured, pinned-flush version designed to survive hours of movement — closer in spirit to a typical formal updo, but with a twisted, radiating base instead of a smooth bun.
Why this works: joining every twisted section into one bun base distributes tension evenly across the head instead of concentrating it at a few pins, which is the real reason this version outlasts a loosely pinned medusa through a long event.
I built this for a client attending a full-day event — ceremony through late reception. Twisting from the nape up and anchoring everything into one low bun meant not a single section had come loose by the time she left.
Steps:
- Twist sections tightly, working from the nape upward.
- Pin each twist into a low bun base, letting the top twists fan outward before joining the bun.
- Set with a strong-hold spray and, for extra security, a light mist of hairspray on a boar-bristle brush pressed over any flyaways.
Maintenance tip: use bobby pins that match your hair color and insert them at an angle, not straight in — angled pins grip more hair and are far less likely to slip out over several hours.
9. Bridal Medusa with Face-Framing Tendrils

Similar structural logic to the formal updo above, but softer — a few curled tendrils are pulled loose at the temples for a romantic finish appropriate for bridal or bridesmaid settings.
Why this works: the eye reads a fully pinned-back style as severe, so leaving just two soft curls at the temples introduces movement without undoing the security of the twisted base underneath.
A bride with thick hair wanted the medusa’s structure but worried it would look too harsh for her dress’s soft, romantic silhouette. Pulling two curled pieces loose at each temple softened the whole look in photos without sacrificing hold through the ceremony.
Steps:
- Follow the medusa updo base described above.
- Pull two thin pieces loose at each temple.
- Curl the loose pieces with a small-barrel iron for soft ringlets.
Maintenance tip: curl the tendrils last, after the twists are pinned, so heat styling doesn’t loosen the base.
10. Two-Tone Medusa (Color-Blocked Sections)

Alternating a base color and a lighter money-piece or balayage section makes individual twists visually distinct, which reads as more dimensional under photography and event lighting.
Why this works: twisting rope-style hair together blends adjacent strands, so without a color break between sections, a monochrome medusa can look like one solid mass rather than distinct radiating pieces — the color contrast is what makes the sectioning actually visible.
A client with subtle balayage wanted her color to show through the twisted style instead of disappearing into it. Sectioning so each twist contained one full color transition made the fan pattern noticeably more dimensional in her event photos than a solid-color version would have been.
Steps:
- Section hair so lightened pieces alternate with natural-color pieces.
- Twist each section individually to keep the color blocks visible.
- Pin loosely enough that both tones show along the length of each twist.
Maintenance tip: avoid over-tight twisting on the lightened sections — over-processed hair is more porous and twists unevenly compared to natural-color strands.
11. Medusa Braid-Out for Second-Day Hair

This is a styling trick rather than a fresh set: braiding the medusa sections overnight and releasing them the next morning for a soft, wavy version with no heat at all.
Why this works: hair holds a bend based on how long it’s kept in a compressed shape, not on heat alone — a full night in a tight braid gives strands enough time to set a wave pattern that a few hours of daytime pinning never would.
A client who didn’t want to repeat a full sectioning session two days in a row braided the same medusa sections at night instead. The next morning’s braid-out gave a softer, wavier version of the original look with zero extra styling time.
Steps:
- Braid damp, product-coated sections in a fan pattern before bed.
- Sleep with a silk or satin bonnet.
- Unravel braids in the morning and finger-separate gently.
Mistake to avoid: brushing out the braid-out with a regular brush strips the wave pattern — separate with fingers only.
12. Short Hair Medusa (Bob-Length)

Shorter hair can’t fully radiate outward in long sections, so this version uses smaller, tighter twists close to the scalp, similar to techniques used for short haircut styling generally, where texture has to be built rather than styled into existing length.
Why this works: at bob length there isn’t enough hair past the ear to fan outward and still stay pinned, so keeping twists small and flat against the scalp lets the pattern read clearly without any loose ends slipping out of place.
A client with a chin-length bob assumed the medusa style needed long hair to work at all. Small, close-to-scalp twists with just the last inch left loose gave her a clear, recognizable version of the look without any length to spare.
Steps:
- Section into small, close-to-scalp parts.
- Twist each section only 2–3 times before pinning flat.
- Leave the last inch of each section loose for movement.
Maintenance tip: use smaller bobby pins than usual — standard-length pins are often too long for the shorter twists and will poke out visibly.
13. Medusa with Undercut Detailing

Pairing the medusa twists on top with a shaved or closely cropped undercut underneath creates sharper contrast and shows off the radiating pattern from every angle.
Why this works: removing bulk underneath the crown makes the top-section twists sit higher and more visible, since there’s no competing hair length beneath them to flatten the silhouette when viewed from the side or back.
A client who already had an undercut wanted a top style that would actually show it off instead of covering it. Twisting the top section into a tight medusa fan kept the shaved sides fully visible from every angle, which a looser style had failed to do before.
Steps:
- Twist and pin the top section into the medusa fan.
- Style the undercut portion separately, keeping it clean and close.
- Leave a visible gap between the twisted crown and the shaved sides.
Maintenance tip: trim the undercut every 2–3 weeks to keep the contrast sharp — grown-out undercut hair blends into the twisted section and softens the effect this style depends on.
14. Boho Medusa with Loose Face-Framing Braids

A festival-appropriate version that mixes thin, loose braids at the front with looser twists at the crown for a relaxed, undone finish.
Why this works: loosening the twist tension and mixing in thinner braids breaks up the uniform look of a fully symmetrical medusa, which is what gives this version its deliberately undone, festival feel instead of looking like a formal updo.
A client heading to a multi-day festival wanted something that could survive dust, sweat, and dancing without needing a mirror to fix all day. Loose twists mixed with a couple of thin front braids held their shape without looking messy, even after two full days outdoors.
Steps:
- Twist crown sections loosely, without pulling tight.
- Add 2–3 thin braids at the front hairline.
- Tousle everything gently by hand rather than combing through.
Maintenance tip: a light dry shampoo at the roots between festival days refreshes this style without needing to redo any of the twists or braids.
15. Medusa Ponytail

All the sectioned twists gather into a single low or high ponytail base instead of pinning flat to the scalp, giving a similar visual effect with faster daily styling.
Why this works: gathering the twisted ends into one elastic instead of pinning each section individually removes most of the pinning time while keeping the same radiating pattern visible at the crown — it’s the medusa’s look with a fraction of the setup.
A client who loved the medusa style but didn’t have 20 minutes to pin each section every morning asked for a faster version. Twisting toward a central point and securing everything in one high ponytail cut her styling time to under five minutes while keeping the same fanned silhouette.
Steps:
- Twist sections working toward a central gathering point.
- Secure all twisted sections into one ponytail with a soft elastic.
- Wrap a small piece of hair around the elastic to hide it.
Maintenance tip: move the ponytail’s position slightly higher or lower each day to avoid tension breakage at the same point on the hairline.
16. Medusa for Fine, Thin Hair (Volume-Boosted)

Fine hair needs volume built in before twisting, or the sections will look thin and stringy rather than sculptural.
Why this works: fine strands have a smaller diameter and less internal structure to hold a twist on their own, so root lift and light backcombing add mechanical bulk the twist can grip — without it, the same twist just collapses flat within an hour.
A client with fine, low-density hair had written off any twisted style as “not for my hair” after a flat attempt years earlier. Adding a volumizing mousse at the root and backcombing lightly before sectioning gave the twists enough base to actually fan out instead of lying flat against her scalp.
Steps:
- Apply a volumizing mousse at the root before any other product.
- Backcomb lightly at the crown before sectioning.
- Twist sections loosely — tight twists on thin hair look sparse.
Maintenance tip: avoid heavy oils or serums on the twisted sections — on fine hair they weigh the twist down and undo the volume you just built in.
17. Medusa with Curly Bangs

A curl-forward variation where the front sections are left as ringlets instead of twisted back, softening the hairline.
Why this works: pulling every section back into twists can expose more forehead than some face shapes want, so leaving the front pieces as loose curls acts the same way a fringe would — breaking up the hairline without committing to a full cut.
A client who liked the medusa look but felt it made her forehead look too bare asked for a softer version. Leaving just the front two inches uncurled and twisted, set as ringlets instead, kept the drama of the style while framing her face more gently.
Steps:
- Twist the crown and back sections as in the classic version.
- Leave the front hairline pieces as natural or set curls.
- Define the curly bangs with a curl cream, avoiding heavy gel that can flatten them.
Maintenance tip: refresh only the curly front section each morning with a spray bottle and a small amount of curl cream — the twisted back sections don’t need daily attention.
18. Minimalist Medusa (3-Section Version)

For anyone new to the style, this pared-back version uses just three larger twisted sections instead of 10+, making it far faster to execute while still reading as a clear medusa silhouette.
Why this works: the visual signature of a medusa style comes from sections radiating outward from a central point, not from the total number of sections — three thick twists placed correctly still read as “medusa” to the eye, just at a larger scale.
I use this version most often on clients trying the look for the first time. One client wanted to test the style before a themed party without committing to an hour-long sectioning process — three twists, pinned in under 15 minutes, gave her the same silhouette she’d seen in reference photos.
Steps:
- Divide hair into three large sections from the crown.
- Twist each thickly and pin loosely so they fan outward.
- Adjust the fan angle by hand for a natural, asymmetrical finish.
Maintenance tip: since each section is thicker, they take longer to dry if styled wet — start with mostly dry hair to avoid damp spots under the pins.
Which Medusa Style Fits Your Hair?
| Hair Type | Best Medusa Variation | Why |
|---|---|---|
| Thick curly (3A–3C) | Classic Coil Medusa | Existing curl pattern holds twist tension without heat |
| Fine, straight | Sleek Medusa Waves | Pre-set curl gives pins something to grip |
| Coily (4A–4C) | Coily Medusa | High strand-to-strand contact holds shape for days |
| Fine, thin | Volume-Boosted Medusa | Root lift prevents a sparse, stringy look |
| Short/bob-length | Bob-Length Medusa | Smaller, closer twists compensate for lack of length |
FAQ
How long does a medusa hairstyle last?
On curly or coily hair with no added heat, a medusa set typically holds 2–5 days with a nightly satin wrap. On straight or fine hair, expect closer to one day, since there’s less natural texture to maintain the twist.
Does a medusa hairstyle damage hair?
Not inherently — the twisting itself is low-tension. Damage usually comes from over-tight pinning at the root or repeated heat-setting on the same sections without a protectant.
Can I do a medusa hairstyle on short hair?
Yes, though the twists need to be smaller and closer to the scalp since there isn’t enough length to fan outward the way longer sections do — see the bob-length version above.
What products work best for a medusa set?
Curl cream or twisting butter for curly and coily hair; a texturizing spray plus light-hold spray for straight or fine hair. Heavy gels tend to over-stiffen the twist and make it look plastic rather than sculptural.
Can I do a medusa hairstyle at home without help?
Yes — most versions only require sectioning, twisting, and pinning, which is manageable solo with a mirror. The formal updo and bridal tendril versions are easier with a second pair of hands since they involve pinning at the back of the head.
Will a medusa hairstyle work on color-treated hair?
It works fine, though color-treated hair is often more porous and can twist unevenly if it’s dry or damaged. A leave-in conditioner before sectioning helps the twists hold a smoother, more even shape.
Final Thoughts
The medusa hairstyle isn’t one fixed look — it’s a technique that bends around whatever hair you’re actually working with. The version that holds all night on coily hair will need heat and product on straight hair, and the version built for a round face will only widen a square one. Start from your own hair type and face shape first, then pick the variation built for it, rather than copying a reference photo and hoping it translates. That’s the difference between a medusa style that lasts through a full event and one that’s unraveling by the time you leave the house.

