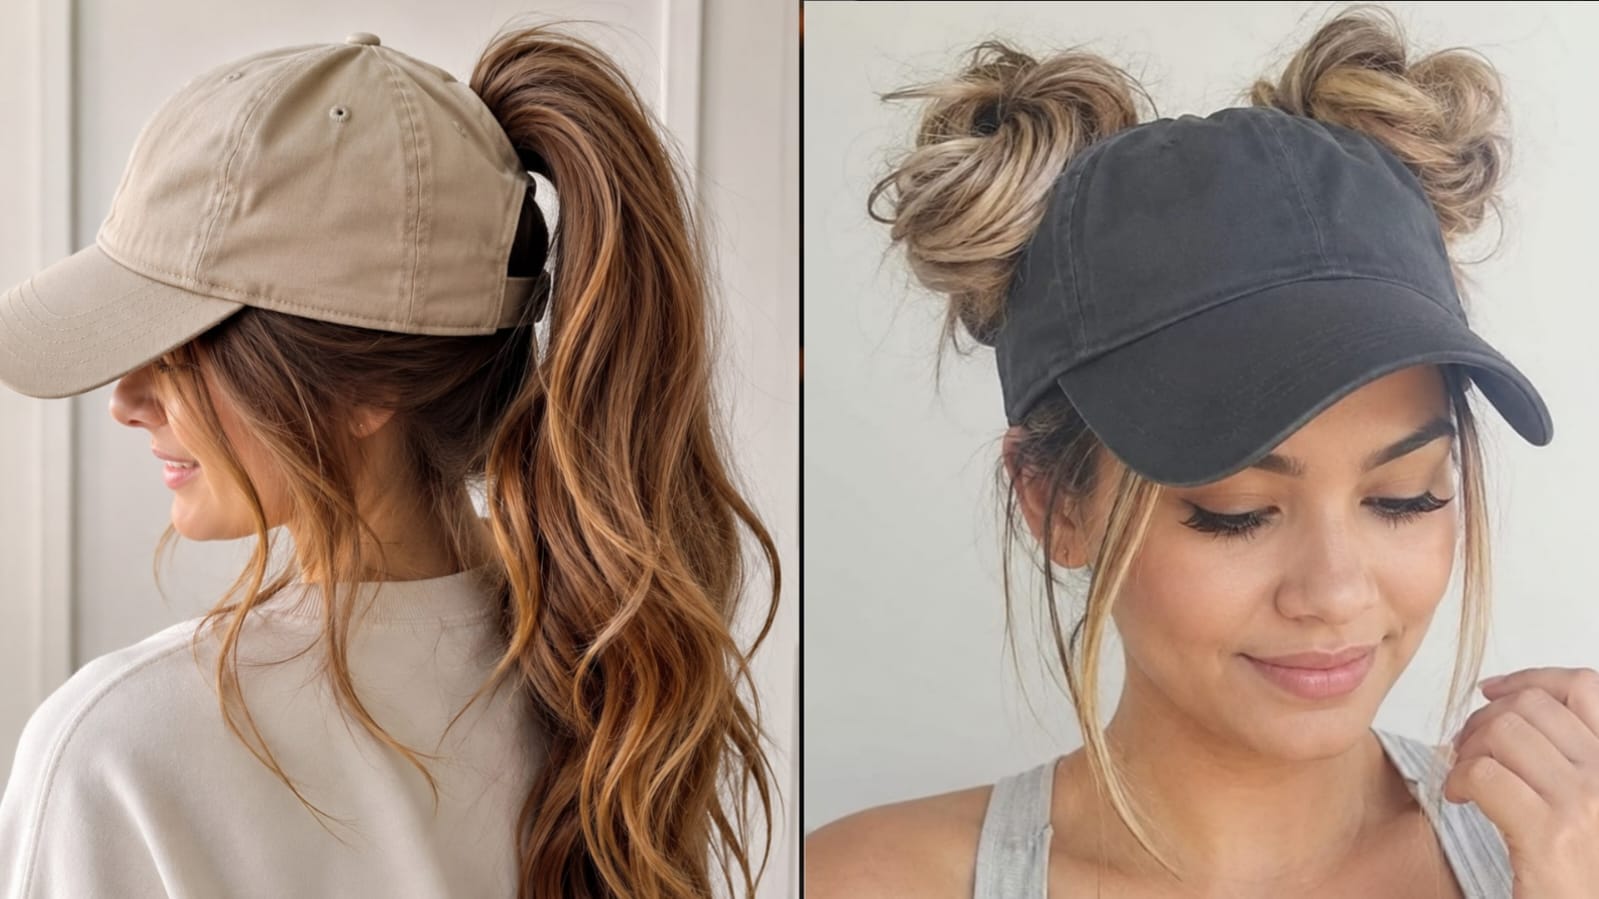
A baseball cap can save a bad hair day in about ten seconds flat — but if you’ve ever pulled one on and felt your bun jam against the back strap, or watched your ponytail leave a weird crease right at your hairline, you know it’s not always that simple. The real issue usually isn’t your hair. It’s that the style you picked doesn’t match the cap you’re wearing.
Snapbacks, strapbacks, fitted caps, and trucker hats all close differently in the back, and that closure decides how much room your hair actually has. A high pony that slides perfectly through a snapback’s notch can get squashed flat under a fitted cap’s solid panel. A bun that sits beautifully under a trucker’s mesh back might not fit through a narrow strap gap at all. Once you start matching the hairstyle to the hat instead of the other way around, baseball caps stop being a fallback for unwashed hair and start being an actual style choice.
Below are 18 ways to wear one, organized so you can find something that works whether you’ve got thin fine hair, thick wavy hair, or hair short enough that “ponytail” isn’t really an option.
Quick Takeaways
| Style | Best Hair Type | Best Hat Style |
|---|---|---|
| Low ponytail through strap | Fine to medium, straight | Strapback |
| High pony through snapback notch | Thick, straight or wavy | Snapback |
| Low messy bun | Any length, medium-long | Any with back gap |
| Double bubble braids | Long, any texture | Snapback or strapback |
| Half-up claw clip | Medium-long | Fitted or snapback |
| Hidden bun (fully tucked) | Greasy or unwashed hair | Strapback (looser fit) |
| Top knot through mesh back | Thick or curly | Trucker hat |
| Short hair tuck | Bob length or shorter | Any |
1. Sleek Low Ponytail Through the Strap

A low pony sits right at the nape, which is exactly where most strap back closures leave a gap — so the two were basically made for each other. Smooth your hair back with a comb, secure it low, then thread the tail through the strap opening so the elastic sits just below the cap’s edge instead of bunching against it. It reads polished without trying, and it doesn’t fight the structure of the hat.
Best For: Oval and heart face shapes; fine to medium-density straight or lightly wavy hair.
Tools & Products: Fine-tooth comb, smoothing serum, thin elastic, edge brush for baby hairs.
How To Style:
- Apply a small amount of smoothing serum from mid-length to ends.
- Comb hair straight back, away from the face.
- Secure low at the nape with a thin elastic.
- Put the cap on, then guide the ponytail through the back strap gap.
- Tug gently at the crown to release any tension from the elastic.
2. High Ponytail Through a Snapback Notch

This is the workout-and-errands combo most people default to, and it works because a snapback’s adjustable notch sits higher and wider than a strapback’s strap, giving a high pony actual room to move instead of getting pinned flat. Thicker hair benefits most here since the notch can handle more volume than a slim strap gap can.
Best For: Thick or medium-density hair, straight or wavy; round and square face shapes (the height adds length).
Tools & Products: Boar-bristle brush, lightweight texture spray, no-crease elastic.
How To Style:
- Flip your head forward and brush hair up toward the crown.
- Secure high with a no-crease elastic.
- Settle the cap onto your head first, snapback notch open.
- Pull the ponytail up and through the notch.
- Spritz texture spray at the base if it feels too flat.
3. Low Messy Bun

A low bun forgives almost everything — second-day texture, a rushed morning, hair that won’t hold a sleek shape. Keeping it loose rather than tight gives it a lived-in look that works under nearly any cap, and twisting the ends before wrapping (instead of smoothing them flat) adds texture that resists going limp by midday.
Best For: Medium to long hair, any texture; round and oval face shapes.
Tools & Products: Texturizing spray, medium elastic, bobby pins.
How To Style:
- Gather hair at the nape, slightly looser than a sleek pony.
- Twist the length loosely rather than braiding it.
- Wrap the twist around the base and secure with an elastic.
- Pull a few strands loose around the bun for texture.
- Settle the cap over it, adjusting the strap if the bun feels snug.
4. Double Bubble Braids

Bubble braids hold their shape under a cap better than a single ponytail does, because each elastic section acts like its own small anchor point, so even if the cap shifts during the day the braid doesn’t collapse. They also distribute the cap’s pressure across two points instead of one, which means less of that single deep crease you get from a regular pony.
Best For: Long hair, any texture; works especially well for round faces since the segmented braids add visual length.
Tools & Products: Small clear elastics (8-10 per braid), edge control, rat-tail comb for parting.
How To Style:
- Part hair down the middle from front to back.
- Gather each side into a ponytail and secure.
- Add an elastic every 1.5–2 inches down the length of each tail.
- Gently pull each segment outward to create the “bubble” effect.
- Put the cap on and adjust the braids to sit comfortably under the back opening.
5. Half-Up Claw Clip

A claw clip handles volume better than an elastic does, since it grips rather than compresses, which means less of the dent you’d get from a tight ponytail elastic sitting right under the cap’s edge. Positioning the clip slightly off-center also avoids the single pressure point that a dead-center clip creates against the crown of the hat.
Best For: Medium to long hair; thick or fine, both work well.
Tools & Products: Medium-to-large claw clip, smoothing serum.
How To Style:
- Section the top half of your hair, ear to ear.
- Twist the section loosely.
- Clip it slightly off-center rather than at the exact crown.
- Leave the rest of your hair down.
- Put the cap on, adjusting the brim around the clip if needed.
6. Space Buns Under the Crown

Two smaller buns distribute pressure more evenly than one large one, which is why they tend to last longer under a cap without slipping. Keeping them low and modestly sized — rather than the bigger, higher version you’d wear without a hat — lets the cap sit naturally over them instead of perching on top.
Best For: Medium to long hair; curly or wavy textures hold the shape well.
Tools & Products: Two small elastics, rat-tail comb for parting.
How To Style:
- Part hair down the middle from front to back.
- Gather each side into a low pigtail.
- Wrap each pigtail around its base into a small bun.
- Secure each with an elastic.
- Put the cap on, settling it just over both buns.
7. Single Fishtail Braid

A fishtail lies flatter against the head than a standard three-strand braid, which is what makes it one of the few braided styles that works comfortably under a fitted cap’s solid back panel instead of needing a snapback or strapback’s open gap.
Best For: Long, straight or wavy hair; oval and heart face shapes.
Tools & Products: Rat-tail comb, small elastic, smoothing serum.
How To Style:
- Gather hair into a low ponytail.
- Split into two sections.
- Take small pieces from the outer edge of each section, crossing them to the opposite side.
- Repeat down the length and secure with an elastic.
- Put the cap on, letting the braid fall below the back opening.
8. Hidden Bun (Fully Tucked)

When your hair genuinely needs a break — second-day grease, a rushed morning, a bad cut grown out — tucking everything into a low bun and letting the cap cover it completely is the most forgiving option on this list. The trick is keeping the bun loose and low rather than tight and high, since a low bun barely shows at all even with the cap pushed slightly back, while a high one can peek out at the front hairline.
Best For: Any hair length down to chin-length; ideal for unwashed or product-heavy hair.
Tools & Products: Texturizing spray (adds grip to second-day hair), bobby pins, medium elastic.
How To Style:
- Gather hair at the nape, slightly lower than a standard low pony.
- Twist into a loose bun and secure with an elastic.
- Pin down any flyaways close to the head.
- Put the cap on with a slightly looser strap setting if needed.
- Adjust the brim forward to balance the lower hair placement.
9. Two Low Dutch Braids

Dutch braids sit closer to the scalp than a standard braid, which is exactly why they survive hours under a cap without unraveling — there’s less loose hair for the cap’s edge to catch and pull at. Starting them low, near the ears, also keeps the braided portion below the cap line entirely, so the texture shows the moment you take the hat off.
Best For: Long, thick hair; curly or coily textures hold the braid shape especially well.
Tools & Products: Edge control, small elastics, rat-tail comb.
How To Style:
- Part hair down the middle.
- Starting near the temple, begin a Dutch braid (under-over instead of over-under).
- Braid down to the ends and secure.
- Repeat on the other side.
- Settle the cap over both braids, letting them hang freely below the back opening.
10. Side-Swept Ponytail

An off-center ponytail sits closer to one ear than the cap’s back opening is centered, which means a strapback’s flexible strap handles the angle far better than a snapback’s rigid notch does. It’s a small adjustment that keeps the style from fighting the cap’s shape all day.
Best For: Medium to long hair; square and heart face shapes (softens angles).
Tools & Products: Smoothing serum, no-crease elastic.
How To Style:
- Brush hair to one side, just behind the ear.
- Secure with an elastic at the side of the nape.
- Smooth any flyaways with serum.
- Put the cap on with the strap loosened slightly.
- Adjust the ponytail’s angle once the cap is settled.
11. Curly Half-Up

Curly hair has the opposite problem from straight hair under a cap — it’s not flattening that’s the issue, it’s volume fighting the crown of the hat. Pulling just the top half up and back relieves that pressure while letting the bottom curls hang free and keep their shape, instead of compressing the whole head’s worth of curl pattern under the fabric.
Best For: 2C-4C curl patterns; round, square, or heart face shapes.
Tools & Products: Curl cream, wide-tooth comb (for sectioning only, not full detangling), satin-lined cap if available.
How To Style:
- Section the top third of your hair from ear to ear.
- Gather and secure with a soft elastic, no tension.
- Leave the rest of your curls down, untouched.
- Put the cap on and gently adjust around the secured section.
- Scrunch any curls flattened by the brim once the cap is on.
12. Straight Hair Down, Center Part

A center part puts equal weight on both sides of the head, which keeps the cap balanced and stops it from sliding toward whichever side has more hair — a common issue with off-center parts under a brim.
Best For: Straight or lightly wavy hair, any length past the chin.
Tools & Products: Rat-tail comb, light hold spray.
How To Style:
- Part hair straight down the middle using a rat-tail comb.
- Smooth each side back from the part.
- Leave hair fully down.
- Put the cap on, checking the part stays centered under the brim.
- Mist lightly with hold spray if hair tends to shift.
13. Twisted Low Side Bun

Twisting rather than braiding before bunning creates a softer outline with less defined edges, which sits more comfortably under thinner cap fabrics like cotton twill that would otherwise show the ridges of a tighter braid.
Best For: Medium to long hair; any texture.
Tools & Products: Medium elastic, bobby pins.
How To Style:
- Gather hair to one side at the nape.
- Twist the length loosely.
- Wrap into a low bun and secure.
- Pin any loose ends flat.
- Put the cap on, adjusting the strap to sit comfortably around the bun.
14. Top Knot Through a Trucker Mesh Back

A trucker hat’s mesh panel is the most forgiving back closure of any cap style, since it stretches rather than catching on hair the way a rigid notch or strap can. That makes it the best match for a high top knot, which needs more room than almost any other style on this list.
Best For: Thick or curly hair; anyone who finds snapback notches too restrictive.
Tools & Products: Strong-hold elastic, edge brush.
How To Style:
- Gather all hair high at the crown.
- Twist into a knot shape and secure tightly.
- Put the trucker hat on, allowing the mesh to stretch around the knot.
- Adjust the snap closure looser than usual to accommodate the height.
- Tuck any loose pieces under the front brim.
15. Braided Crown, Ends Loose

A single braid running along the hairline from temple to temple keeps hair off your face without committing to a full braided look, and because it sits flat against the scalp, it works under nearly any cap style without bulk.
Best For: Medium to long hair; great for keeping bangs or face-framing layers controlled.
Tools & Products: Edge control, bobby pins, small elastic.
How To Style:
- Section a strip of hair along the front hairline, ear to ear.
- French braid this section back toward the crown.
- Secure the braid with the rest of your hair, or let it blend in loose.
- Pin the end flat against the scalp.
- Put the cap on as you normally would.
16. Short Hair Tuck

Tucking shorter lengths behind the ears before putting the cap on prevents the “poof” effect that happens when a brim compresses hair that’s too short to pull back into anything else.
Best For: Bob-length hair or shorter; straight to lightly wavy.
Tools & Products: Light hold gel, edge brush.
How To Style:
- Apply a small amount of gel to the front sections.
- Tuck hair behind both ears.
- Smooth any flyaways at the hairline.
- Put the cap on, brim slightly forward.
- Adjust hair around the ears once the cap is settled.
17. Scarf-Wrapped Cap Combo

Tying the scarf knot at the nape rather than on top of the cap keeps the overall silhouette lower-profile, so the scarf complements the cap’s shape instead of competing with it for visual space.
Best For: Any hair length; works as a styling layer over most of the looks above.
Tools & Products: Square or rectangular silk or cotton scarf.
How To Style:
- Style hair underneath as desired (bun or pony recommended).
- Put the cap on first.
- Fold the scarf into a long strip.
- Lay it over the crown of the cap with ends at the back.
- Tie the ends in a knot at the nape, brim left uncovered.
18. Wavy Beach Hair, Hat Pushed Back

Pushing the cap back off the forehead, rather than wearing it low, keeps the brim from pressing the front pieces flat — letting natural wave pattern show at the hairline instead of getting compressed. This only works with strapbacks and snapbacks; fitted caps are sized to sit close to the head and won’t push back the same way.
Best For: Wavy or loosely curly hair; any length past the shoulders.
Tools & Products: Texturizing or sea salt spray.
How To Style:
- Apply texturizing spray to damp or dry hair and scrunch.
- Leave hair fully down.
- Put the cap on, positioned slightly further back than usual.
- Adjust the strap to keep it secure in this position.
- Fluff the front pieces once the cap is settled.
Why the Hat (Not Just the Hairstyle) Decides What Works
The pattern across all 18 of these comes down to one thing: the cap’s back closure determines how much room your hair gets, and matching style to closure matters more than matching style to hair type alone. Snapbacks and strapbacks have an open gap that handles ponytails, buns, and braids well. Trucker hats with mesh backs stretch, making them the most forgiving for high or voluminous styles like top knots. Fitted caps, with their solid back panel, work best with anything that lies flat — fishtail braids, tucks, hair left down — because there’s no gap to push volume through at all.
Next time a hairstyle “doesn’t work” with a particular cap, it’s worth checking the closure before assuming the style itself is the problem.
FAQ
Does wearing a baseball cap ruin your hairstyle? Not if the style and closure type are matched correctly. The dent or crease people associate with “hat hair” usually comes from a style that’s too tight or too bulky for that particular cap’s back opening, not from the cap itself.
What’s the best baseball cap hairstyle for thick hair? A high ponytail through a snapback notch or a top knot through a trucker mesh back, since both give thick hair the extra room it needs compared to a strapback’s narrower gap.
Can you wear a baseball cap with short hair? Yes — tucking hair behind the ears, a center part with hair left down, or a flat braided crown all work well for bob-length or shorter hair, since none of them rely on having enough length for a ponytail.
How do you keep a ponytail in place under a cap during a workout? Use a no-crease elastic positioned to sit just below the cap’s back opening rather than directly against it, and choose a snapback or strapback over a fitted cap for more room to move.
What’s the difference between a snapback and a strapback for hairstyling? A snapback has a fixed plastic notch with a wider, more rigid opening, which suits high ponytails and top knots. A strapback has an adjustable fabric strap with a narrower gap, which works better for low ponytails and slimmer braids.
Final Thoughts
A baseball cap doesn’t have to mean giving up on your hair for the day — it just means picking a style that actually fits the hat you’re reaching for. Once you start paying attention to the closure instead of just grabbing whatever cap is closest, getting ready takes less time and the results actually hold up, whether that’s through a full workday or a long weekend outdoors. Keep a couple of these in rotation for different cap styles, and “hat hair” stops being something you have to plan around.

