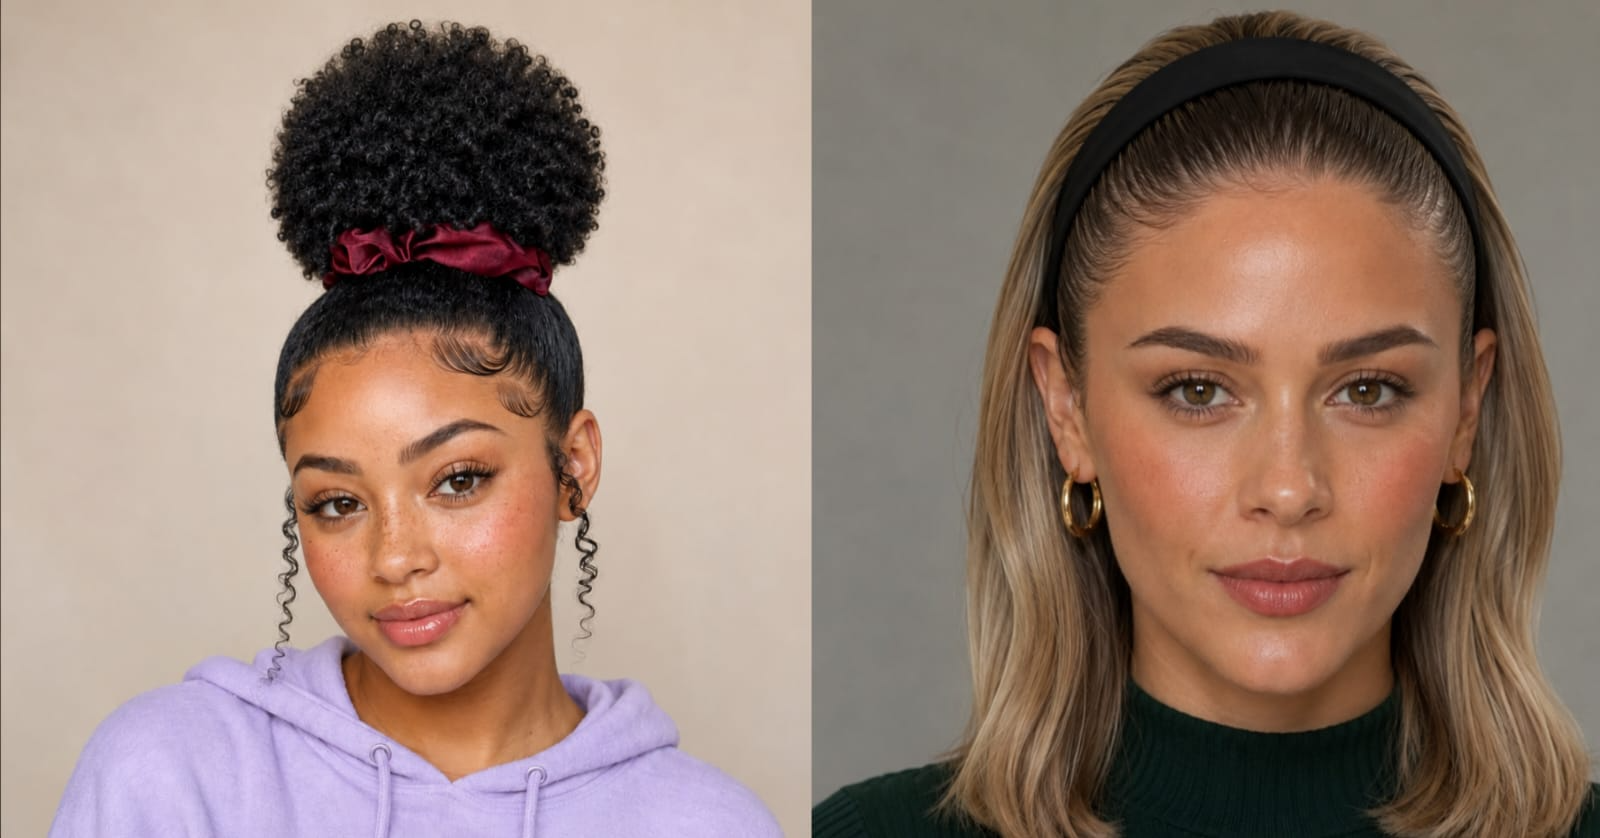
You don’t need a stylist’s chair to get the baddie look. Most of these styles use tools you already own: a flat iron, a comb, maybe a few clips and a can of edge gel. The polish comes from technique, not a salon appointment.
That’s good news if you’re tired of watching tutorials that assume you have three hours and a professional-grade wand. Baddie hair is really about attitude first — sleek parts, sharp edges, high shine, styles that look deliberate even when they took ten minutes. Once you get the basic moves down, you can switch between looks depending on your mood or your day.
If you’re already comfortable with a slick-back style, you’ll recognize a lot of that same confident, no-fuss energy in the looks below. Here are 18 baddie hairstyles you can create at home, no salon visit required.
What Makes a Hairstyle “Baddie” Anyway
It’s not about complicated techniques or spending money at a salon every week. A baddie hairstyle is really just about looking like you made a deliberate choice with your hair. Clean edges, a defined shape, or even strategically messy pieces — it all reads as intentional and that’s the whole point.
The good news is most of these styles need maybe five basic things from your bathroom. A rat-tail comb, some edge control or gel, bobby pins, clear elastics, and a scrunchie or two. Anything beyond that is a bonus, not a requirement.
Quick Everyday Baddie Styles
1. Sleek High Ponytail

The sleek high pony is genuinely the foundation of the entire baddie hairstyle universe. It looks clean, it looks intentional, and it works whether you’re going to class, running errands, or heading out for the night. The style itself is simple but most people get it wrong because they skip the one step that actually makes it work — the edges.
I skipped the edges my first three attempts and honestly it just looked like a regular ponytail. Nothing special. The moment I started laying them down properly with an edge brush and letting them set, the whole look transformed. It went from “threw my hair up” to “okay she’s giving something.”
How to Do It:
- Brush all your hair upward and secure it high on your head with a thick elastic
- Take a small section from the ponytail, wrap it around the base to cover the elastic, and pin underneath with a bobby pin
- Apply edge control along your entire hairline
- Use a soft toothbrush or edge brush to smooth them flat in your desired pattern
- Press a silk scarf gently over the edges for 2 minutes while they set
- Release the scarf and you’re done
2. Space Buns

Space buns feel playful but when done neatly they actually look really elevated and cute. The version that’s trending now is slightly lower placement or even asymmetrical buns rather than the perfectly centered look from a few years ago. That small shift makes them feel more fashion-forward and less costume-y.
My biggest mistake with space buns used to be making them too tight and too perfectly round. Pulling out a few small pieces around the face and letting the buns be slightly imperfect actually makes them look better. Messy on purpose hits different than messy by accident.
How to Do It:
- Part your hair cleanly down the middle from front to back
- Create two equal pigtails and secure each with a clear elastic
- Twist each pigtail around itself in a circular motion
- Pin the twisted bun in place with bobby pins tucked underneath so they’re hidden
- Pull a few face-framing pieces out gently with your fingers
- Optional: wrap a small section around the base to make it look cleaner
3. Low Sleek Bun

The low sleek bun is what I wear when I want to look like I have my life together without actually putting in much effort. It sits right at the nape of the neck, it’s smooth and clean, and it goes with literally every outfit. Casual, dressy, professional — this bun does not discriminate.
The difference between a sloppy low bun and a baddie low bun is gel and a brush. You have to actually smooth the hair before you twist it up. Pulling it back dry and lumpy then twisting it will give you grandma bun energy and we don’t want that.
How to Do It:
- Apply a small amount of gel or edge control through your hair while brushing it back
- Use a paddle brush to smooth everything toward the nape of your neck
- Gather into a low ponytail first, then twist and coil into a bun
- Pin securely with bobby pins crossing over each other for hold
- Smooth any flyaways down with a little extra gel on your fingertips
- Apply edge control to your hairline and lay down with a brush
4. Half-Up Space Puff

This is my absolute go-to when my hair is being difficult and I just need something that looks cute fast. It works best on natural or textured hair but with the right technique it works on straight hair too. The puff on top adds height and dimension while the rest of your hair stays down and natural.
What I love about this style is that it’s forgiving. Unlike the sleek styles where every flyaway shows, the puff is supposed to look a little voluminous and free. It’s one of those rare hairstyles where imperfection is actually part of the look.
How to Do It:
- Section off the top half of your hair from ear to ear
- Gather it up to the top of your head and secure with a thick elastic or satin scrunchie
- Use your fingers to fluff and expand the puff for volume
- Pick at the roots lightly for extra height
- Smooth the bottom half of your hair or leave it naturally textured
- Add edge control to the front hairline and smooth with a brush
5. Slicked-Back Bun with Baby Hairs

This style is the sleek bun taken to the next level. The actual bun is the same but what makes it a whole moment is the baby hair design at the front. Done well, this looks incredibly polished and artistic. Done rushed, it can look a little messy — so this is one where you really do need to give it five extra minutes.
Baby hair art sounds intimidating but it’s genuinely just swoops and swirls. You don’t need to do anything complicated. Even a simple wave or two on each side looks amazing. I watched probably 15 TikTok tutorials before I got mine consistent and now it’s one of my favorite things to do.
How to Do It:
- Pull all your hair back into a high or low bun using gel for maximum sleekness
- Apply edge control specifically to your baby hairs around the hairline
- Use a soft toothbrush or fine-tipped edge brush to create swoops, waves, or swirls
- Work slowly — rushing this part is what makes it look messy
- Press a silk scarf over the design for 3 to 5 minutes to set the shape
- Remove scarf carefully and admire your work
Protective Style Baddie Looks
6. Box Braids

Box braids are one of the best investments you can make in your hair routine. You spend a few hours (or a full day if they’re long) getting them done and then you wake up looking styled every single morning for weeks. No heat, minimal daily effort, and the versatility is unreal. You can wear them up, down, half and half, in a ponytail — they work for everything.
I was hesitant to commit to box braids for a long time because they felt like too big a decision. Then I finally got a set of medium-length knotless box braids and wore them for five weeks. Best five weeks of my hair life. I wish I had done it sooner honestly.
How to Do It:
- Part hair into clean square sections using a rat-tail comb
- Apply a small amount of edge control or braid gel to each section before braiding
- Braid down using knotless technique (feed-in method at the root for less tension)
- Secure the end with a small elastic or hot water to seal if using synthetic hair
- Moisturize your scalp every few days with a light oil like jojoba or peppermint oil
- Wear in a high pony, loose, or half-up depending on the day
7. Knotless Braids with Middle Part

Knotless braids have become the gold standard for a reason — they lie flat at the root, they’re easier on your scalp, and they look incredibly natural compared to traditional braids. A center part specifically gives this style a very clean symmetrical look that photographs beautifully and frames the face really well.
The first time I got knotless braids I thought the stylist was going too slow and I was lowkey impatient. Then I felt how lightweight and comfortable they were compared to my previous regular box braids and I completely understood why the technique is worth it. No tension headache for days afterward — that alone sold me.
How to Do It:
- Ask your braider specifically for knotless technique and a clean center part
- Choose your length and thickness based on your lifestyle (medium is the most versatile)
- For DIY: part in the center first, then work in small sections from front to back
- Start with your own hair at the root and feed in braiding hair gradually as you go down
- Keep tension consistent but not too tight — your scalp should never hurt
- Seal ends with hot water or a small rubber band
8. Fulani Braids

Fulani braids are genuinely one of the most beautiful protective styles out there. The combination of thin braids framing the face, cornrows going back, and loose braids in the back creates this really intricate layered look. Gold cuffs and beads woven in make it look even more elevated and it’s one of those styles that always gets compliments.
I tried doing these myself once and the front thin braids came out okay but my cornrow section was a disaster. If you’re learning to braid, practice the cornrow part separately before attempting the full style. A mannequin head from Amazon is genuinely one of the best practice investments — I learned so much from mine.
How to Do It:
- Part a center section and braid two thin braids framing the face going forward
- Part the rest of the hair and create cornrows going toward the back
- Leave the back section loose or add braids hanging down
- Add gold cuffs or beads throughout for decoration
- Secure all ends neatly
- Edge control along the hairline to finish the look
9. Feed-In Ponytail

A feed-in ponytail looks like something a professional did even when you understand the technique. The cornrows going back into a sleek high or low pony using added hair gives you this really long, full ponytail that doesn’t look fake because the root is natural-looking and smooth.
I had a feed-in ponytail done for a birthday dinner and kept it for almost two weeks. I styled it differently almost every day — loose and hanging, wrapped around the base, half-up with the pony split. That kind of versatility from one style is exactly what makes it worth the time to set up.
How to Do It:
- Create cornrows going straight back toward the crown of your head
- At the crown, gather the ends of the cornrows and secure with an elastic
- Add a weft or braiding hair into the ponytail to add length and volume
- Wrap a section of hair around the base to hide the elastic and pin underneath
- Smooth the front cornrows with edge control for a sleek finish
- Optional: curl or wave the ponytail using flexi rods or a curling wand
Natural & Textured Baddie Styles
10. Defined Twist-Out

A good twist-out on natural hair is one of the most gorgeous things in existence. The stretched spiral pattern, the volume, the definition — when it works it really works. But when it doesn’t work it can look frizzy and undefined and that’s frustrating, especially when you’ve put in the effort the night before.
The mistake I made for months was untwisting too early. I would wake up, touch my hair, think it felt dry enough, and untwist — only to find frizzy half-defined curls. Your hair needs to be completely one hundred percent dry before you touch those twists. Sleep in them if you have to. The patience is genuinely worth it.
How to Do It:
- Start with freshly washed or dampened hair
- Apply a curl cream or shea butter mix to each section before twisting
- Two-strand twist all sections in a consistent direction
- Allow to dry completely — overnight is honestly the safest bet
- Untwist carefully starting from the bottom of each twist working upward
- Separate and fluff gently with a wide-tooth pick starting from the roots
11. High Curly Puff

The high curly puff is like the natural hair equivalent of the sleek high pony. It’s quick, it’s cute, and when your curls are poppin it looks like a whole editorial moment. The key is volume at the crown and clean edges at the front — those two things together make it a baddie style instead of just a convenient style.
I have days where my curl pattern is cooperating and the puff looks incredible with zero effort. And I have days where it’s not and I need to refresh with a little water spray and curl cream before pulling it up. Either way it comes together in under ten minutes which is why it stays in my regular rotation.
How to Do It:
- Spray hair lightly with water if it needs refreshing
- Apply a small amount of curl cream or leave-in to bring curls back to life
- Gather all hair upward to the crown and secure with a thick elastic or satin scrunchie
- Use a pick to lift and fluff the puff from the roots for volume
- Apply edge control to the hairline and smooth down with an edge brush
- Let edges set for a couple minutes before heading out
12. Bantu Knot-Out

Bantu knots are a two-for-one deal. Wear the knots themselves as a style — they look amazing with some gold accessories woven in — or take them down for a beautiful coil pattern that’s completely different from a regular twist-out. Either option is a legitimate baddie look on its own.
The coil pattern from a Bantu knot-out is tighter and more spiral than a twist-out which gives it a different kind of volume. I prefer the knot-out for special occasions because it looks more polished and defined. The knots themselves I wear when I want something edgy and statement-making on a casual day.
How to Do It:
- Section damp hair into equal parts depending on how big you want the coils
- Apply curl cream or a twisting butter to each section
- Twist each section tightly and then coil it around itself into a flat knot against the scalp
- Secure the tip under the knot or with a small pin
- Allow to dry fully overnight
- Unravel gently and separate with your fingers only — no combs through the coils
13. Wash-and-Go with Defined Edges

When your natural curl pattern is healthy and defined, a wash-and-go is genuinely the easiest baddie look you can do. You’re working with what your hair naturally does instead of fighting it, and with the right products the definition can be stunning. Add clean edges and this style goes from casual to complete.
The product layering is everything with wash-and-gos. I found that applying a leave-in first, then a curl cream, then sealing with a light gel on soaking wet hair gives me the best definition without crunchiness. Scrunching upward is important — downward motion disrupts the curl pattern as it’s forming.
How to Do It:
- Wash hair and leave soaking wet — do not towel dry
- Apply leave-in conditioner and rake through with fingers
- Layer curl cream on top and scrunch upward
- Seal with a light-hold gel, scrunching again
- Do not touch your hair while it dries — diffuse on low or air dry
- Once fully dry, scrunch out any crunch gently with your palms
- Finish by laying edges with edge control and an edge brush
Heat-Styled Baddie Looks
14. Beach Waves

Beach waves are one of those styles that looks like it requires skill but once you get the wrist motion down it becomes genuinely automatic. The lived-in wavy look photographs beautifully, works on almost every hair length, and can go from daytime casual to night out without changing anything except maybe your outfit.
One thing I had to learn — you don’t curl the ends. Leave the last inch or so of each section straight. That’s what gives beach waves their natural undone texture instead of a more formal curl. I also stopped curling in alternating directions and just curl everything away from my face. That looks more natural on me personally.
How to Do It:
- Apply heat protectant thoroughly from roots to ends — never skip this
- Section hair into four parts for easier handling
- Take one-inch sections and wrap around a 1-inch curling wand holding for 8 to 10 seconds
- Leave the bottom inch of each section uncurled
- Release and do not touch until completely cooled
- Once all sections are done, shake out gently with fingers
- Finish with a light texturizing spray for hold and movement
15. Big Volume Blowout

A blowout is a style on its own and also the best base for half the styles on this list. Big, bouncy, voluminous hair with a little movement — it looks expensive and healthy and takes your everyday look up several notches. Even just wearing it down straight after a blowout feels like a whole moment.
The round brush technique intimidated me for a long time. I kept burning my fingers and creating weird bends in my hair. The trick is keeping the brush moving constantly — you don’t want to stop on any one section for too long. Once I got comfortable with that, the volume I was able to create at home started rivaling what I was paying stylists to do.
How to Do It:
- Apply heat protectant and a volumizing mousse or foam to damp hair
- Rough dry first to about 80 percent dry using your fingers
- Divide into sections and use a round brush to blow dry each section
- Roll the brush under at the ends and aim the nozzle downward for smoothness
- At the roots, lift the brush upward and blast with heat to create volume
- Finish with a light shine serum on the ends to prevent frizz
- Optional: wrap hair around the round brush and blast with cool air to set the shape
16. Bone Straight with Sleek Edges

Bone straight flat-ironed hair with a clean center part and laid edges is a forever classic baddie look. It frames the face beautifully, it works for every occasion, and there’s something really clean and confident about it. Pair it with a good outfit and hoop earrings and the whole look just makes sense.
Flat ironing has a learning curve. Too much heat and your hair is damaged. Too little and you’re going over sections five times. Finding your hair’s sweet spot takes a few tries but once you know your settings you’ll iron efficiently every time. My straight hair sits at around 380°F with heat protectant but everyone’s hair is different.
How to Do It:
- Start with completely dry, detangled hair — flat ironing damp hair causes damage
- Apply heat protectant spray or serum thoroughly
- Part in the center and divide hair into small sections
- Run the flat iron slowly down each section in one smooth pass
- Overlap slightly at the roots for a polished root-to-tip result
- Apply a shine serum to the ends for a healthy finish
- Complete the look by laying edges with edge control and an edge brush
Accessory-Based Baddie Styles
17. Claw Clip Half-Up

The claw clip has had the most deserved comeback of any hair accessory in recent memory. Done right it looks effortlessly cool and a little undone in a very fashionable way. The trick is not making it too neat — you want a little looseness and texture in both the clipped section and the pieces left down.
I bought an oversized gold tortoise shell claw clip on a whim and it genuinely changed my everyday hair game. I now own maybe eight of them in different colors and sizes. For this style specifically the bigger the clip the better — small ones look like you just pulled half your hair out of your face. Big ones look like a whole outfit choice.
How to Do It:
- Take the top half of your hair from ear to ear
- Twist it loosely just once or twice — no need to be tight or perfect
- Clip it at the back of your head with an oversized claw clip
- Pull a few pieces out at the front to frame your face
- Let the bottom half of your hair fall naturally
- Optional: curl the loose ends slightly for extra polish
18. Headband Slick-Back

This might be the most underrated two-minute baddie hairstyle in existence. A stretchy headband, some gel, and clean edges and you look like you planned your whole look intentionally. It’s one of those styles where simple accessories do all the heavy lifting.
I started doing this on mornings when I genuinely had no time and was shocked by how many compliments I got. People kept asking what I did to my hair and I had to stop myself from saying “literally nothing.” The key is using a headband that sits back about two inches from your hairline — not right at it. That placement is everything.
How to Do It:
- Place a stretchy headband about two inches back from your hairline
- Apply gel to the front section of hair between your hairline and the headband
- Smooth it flat with a brush or your fingertips so it lays completely flat
- Let the rest of your hair fall naturally behind the headband or tuck into a bun
- Apply edge control to the very front hairline below the gelled section
- Lay edges in swirls or waves and let set for two minutes
Mistakes I Made So You Don’t Have To
Skipping edge control entirely and wondering why the style looked unfinished. That one product is doing 40 percent of the work on most of these looks. It’s not optional.
Practicing complicated styles for the first time on a rushed morning. This never ends well. Weekends exist for a reason — use a Sunday afternoon to practice before you need a style for real.
Using too much gel thinking more product equals better hold. It usually just equals crunchy, stiff, flaky hair. Start with less than you think you need.
Touching my wash-and-go while it was drying. Every time I touched it I disrupted the curl formation and ended up with frizz right where my hand went. Keep your hands out of your hair until it’s completely dry.
Products Worth Actually Buying
- ECO Styler Gel — affordable, reliable, works on most hair types
- Got2b Glued Freeze Spray — for serious hold that lasts all day
- Camille Rose Curl Maker — incredible for wash-and-go definition
- Mielle Organics Pomegranate & Honey — great for moisture and curl definition
- Cantu Leave-In Conditioning Cream — detangling and moisture base for natural styles
- Kenra Platinum Silkening Mist — finishing spray for heat-styled looks
Most of these are at Target, Sally Beauty, or Ulta. Nothing on this list will break your budget.
FAQ
Q: What’s the easiest one to start with as a complete beginner?
The claw clip half-up or the sleek high ponytail. Both are low stakes, quick to redo if they go wrong, and look intentional even at the beginner stage.
Q: Do I really need edge control or can I use regular gel?
You can use regular gel but edge control specifically is formulated to lay flat and stay without flaking. ECO Styler works well as a hybrid. For best results though, a dedicated edge control like Murrays or Ebin is worth it.
Q: How do I make my edges stay all day?
Apply edge control, smooth with a brush, then press a silk or satin scarf firmly over them for 3 to 5 minutes. That pressing and drying time is what makes them hold. Without it they tend to lift within a few hours.
Q: Can these styles work on thin or fine hair?
Yes, most of them. The sleek styles work really well on fine hair because smoothness is the goal anyway. For the voluminous styles like the puff or the blowout, a volumizing mousse before styling helps a lot.
Q: How do I keep a protective style looking fresh for longer?
Moisturize your scalp every few days with a light oil, sleep on a satin pillowcase or in a satin bonnet, and re-dip the ends in hot water if they start to frizz. A little maintenance goes a long way.
Before You Go
None of these styles require professional training or a full vanity of products. They require practice, a little patience, and the willingness to mess up a few times before it clicks. I’ve had lopsided space buns, crunchy wash-and-gos, and edges that just absolutely refused to cooperate — and I still figured it all out eventually.
Pick two or three from this list based on your hair type and your current skill level. Practice them when you have no pressure and nowhere to be. Once they’re in your muscle memory, you’ll be doing them in ten minutes without thinking twice.
Start with the ponytail or the claw clip. Build from there. Your hair already has everything it needs — you’re just learning how to work with it.

