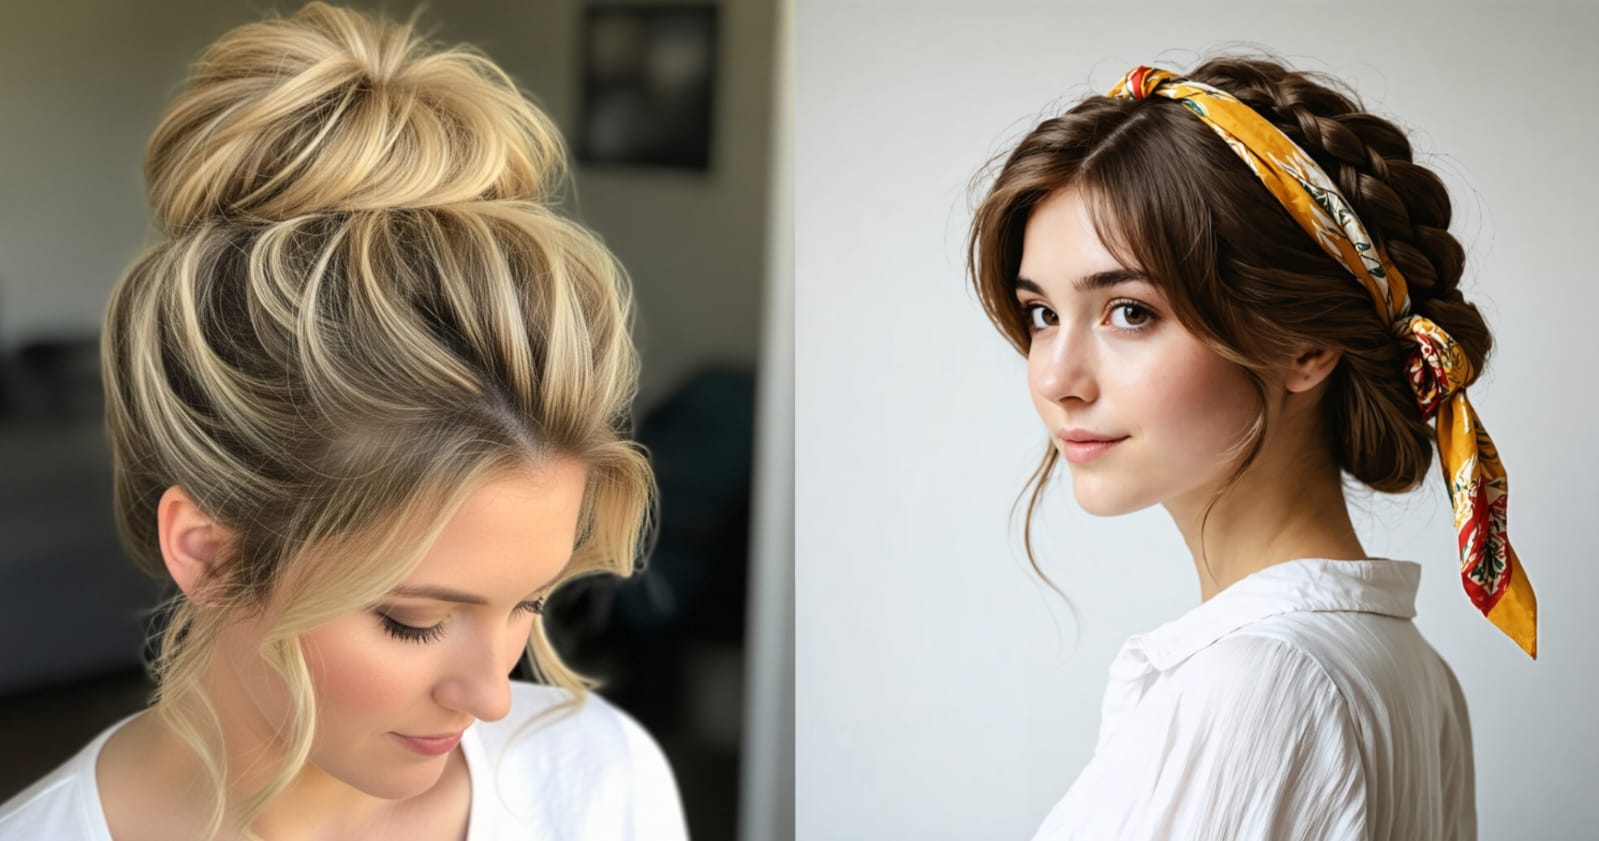
Most “elegant hairstyle” roundups show you a photo and stop there. What they don’t tell you is that almost every old-money look works because of one thing: controlled tension. Whether it’s a bun, a tuck, or a chignon, the polish comes from how tightly (or loosely) the hair is wrapped and pinned — not from the base cut or the amount of product used. Get the tension wrong for your hair’s texture and density, and the exact same style either falls apart by noon or looks stiff instead of refined. That’s the piece most guides skip, and it’s the difference between a style that photographs well for five minutes and one that holds through an actual day.
Quick Guide
- Twist-based updos (low bun, ballerina bun) need thicker hair for grip.
- Fold- and roll-based styles (chignon, tuck, Gibson Girl) are more forgiving on fine hair.
- Two cuts on this list — the Italian Bob and Blunt Mid-Length Cut — rely on precision, not styling technique.
- The most product-dependent look is the Brushed-Back Wet Look; the least is the Tucked-Behind-Ear Look.
The 20 Hairstyles
1. The Polished Low Bun

This is the most forgiving entry point into old-money hair because it relies on low, even tension rather than height or volume. The hair is smoothed back, twisted flat against the nape, and pinned close to the head — no bump, no loose pieces by design. It works best on oval and heart-shaped faces since the low placement doesn’t add width at the jaw, and it suits medium to thick hair that has enough grip to hold a twist without a dozen pins. If your hair is fine, this is also a good match for one of our updos for fine, thin hair if you want more volume-building steps first.
How To Style:
Step 1: Brush hair back fully with a boar-bristle brush to remove flyaways.
Step 2: Gather at the nape and secure with a soft elastic.
Step 3: Twist the ponytail once, then wrap it around its own base.
Step 4: Pin the wrapped section flat, working from the outside in.
Step 5: Set with a light-hold spray, focusing on the crown, not the bun itself.
2. The Architectural Chignon

Where the low bun is soft, the chignon is deliberately structured — this is where the tension theory actually shows up. A chignon is built on a folded, pinned base rather than a twist, which is why it can hold sharp lines and sit slightly off-center without collapsing. It suits square and oblong face shapes particularly well because the visual weight sits mid-head, softening a stronger jawline. It needs hair with some texture to grip; if your hair is very slippery or freshly washed, expect to fight it more than a twist-based bun. For a bridal version of this same structural logic, our short hair bridal hairstyles guide covers pinning techniques for shorter lengths.
3. The Sleek High Ballerina Bun

This one trades the low styles’ gentler pull for high, even tension pulled straight back from every angle — that’s what gives it the clean, lifted look rather than a casual topknot. It flatters round and oval faces by elongating the face vertically, but it’s less forgiving on fine hair, since thin strands show scalp gaps at the crown under that much pull. If you’ve struggled with a sleek high bun looking thin, our half-up half-down hairstyles piece has a lower-tension alternative that still reads polished.
Quick Styling Note:
Use a fine-tooth comb dipped in gel to smooth the crown before securing the ponytail — this is what prevents the “halo” of frizz that ruins the sleek effect within an hour.
4. The Grace Kelly Tuck

Unlike the three buns above, the tuck isn’t built on a twist or fold at all — it’s a rolled tuck secured with just a few pins, which is why it looks effortless but actually requires more practice to get symmetrical. The rolled shape sits close to the head without full-wrap tension, so it suits fine to medium hair that would look sparse in a tighter bun. It’s especially flattering on longer face shapes since the rolled width sits at the sides rather than pulling everything vertical. This is a natural next step if you liked the tuck logic in our 15 formal hairstyles roundup.
Quick Styling Note:
Roll toward the face, not away from it — rolling outward is the most common reason this style looks lopsided in photos.
5. The Modern Gibson Girl

This is the most technically involved style on this list because it combines two tension types — a loose, pouffed front section over a tightly rolled or pinned back section. Getting the balance right matters: too tight at the crown and it loses the soft vintage shape; too loose at the back and the roll sags within an hour. It works well on most face shapes because the volume is adjustable at the front, but it needs hair with enough length to roll under at the nape — usually shoulder-length or longer. For more on face-framing volume control specifically, see our 15 haircuts for round faces guide.
How To Style:
Step 1: Backcomb the crown section lightly for lift.
Step 2: Smooth the backcombed section over with a comb, keeping it loose.
Step 3: Gather the lower section and roll it under toward the nape.
Step 4: Pin the roll in place, hidden beneath the loose top layer.
Step 5: Set the front pouf with a flexible-hold spray so it keeps movement.
6. Glossy Hollywood Waves

This look depends almost entirely on the direction the curling iron barrel faces — reverse the direction on even one section and the wave pattern breaks the S-shape that makes it look “old Hollywood” instead of just curly. It suits oval and heart face shapes since the deep waves add width at the cheekbone, and it needs medium to thick hair to hold the wave’s weight without dropping flat by evening.
How To Style:
Step 1: Section hair into four to six even parts.
Step 2: Curl each section away from the face, alternating direction only at the part line.
Step 3: Pin each curl flat against the head while it cools.
Step 4: Release curls and brush through gently with fingers, not a brush.
Step 5: Finish with a light-hold, high-shine spray.
7. The 90s Supermodel Blowout

Big, bouncy, full of life. The 90s blowout is having a real moment right now and it fits the old money look surprisingly well — mainly because healthy, voluminous hair has always read as a sign of someone who takes care of themselves. Lots of root lift, ends that curve inward slightly, and that general sense that your hair has its own gravitational pull. It’s one of those styles that genuinely looks better the healthier your hair is.
Quick Styling Note:
The volume here comes from blow-drying hair upside down at the roots first, then flipping back and smoothing only the ends — skipping the upside-down step is the main reason this blowout falls flat within an hour.
Best For:
Round and long face shapes; medium to thick hair.
8. The Deep Side Part with Pin Curls

The deep side part isn’t just a cosmetic choice — it shifts the visual weight of the whole style to one side, which is why pin curls placed on the heavier side hold their shape longer than curls on the lighter side. It flatters square and round face shapes by breaking symmetry at the forehead, and it works on fine to medium hair since pin curls don’t rely on thickness the way twist-based buns do.
How To Style:
Step 1: Part hair deeply on one side using a tail comb.
Step 2: Section the heavier side into two-inch pieces.
Step 3: Wrap each piece around a finger and pin flat against the scalp.
Step 4: Let curls set fully before removing pins.
Step 5: Comb through loosely and mist with a flexible-hold spray.
9. Subtle Balayage Waves

Old money style usually prefers solid hair colors — deep brunettes, true blondes, nothing too done. But a very quiet balayage, the kind that looks like your hair has just been in the sun a lot, is perfectly in keeping. Think less “highlighted” and more “I spent last August at a lake house.” Big loose waves are the right setting for this. Anything tighter starts to look too processed.
Quick Styling Note:
This one is as much about color placement as styling — waves only look “subtle” and expensive when the balayage lightens the mid-lengths and ends rather than starting near the root, so the color moves with the curl instead of cutting across it.
Best For:
Most face shapes; wavy to straight hair.
10. Soft Face-Framing Tendrils

Pull your hair up into a neat updo and then let two thin pieces fall forward — one on each side. Wrap them around a wand so they spiral gently, then leave them alone. They should look like they escaped rather than like they were placed there. It softens the whole look considerably and stops a very sleek updo from seeming cold or severe.
Quick Styling Note:
Leave two thin sections loose at the temple before pulling the rest back — cutting these pieces too short is the most common mistake, since they need enough length to curl softly rather than stick straight out.
Best For:
Oval and square face shapes; any hair length past the chin.
11. The Velvet Ribbon Half-Up

The ribbon here isn’t purely decorative — it’s tied over a small backcombed section at the crown, which is what gives the half-up its lift without a full teasing brush-out. It suits heart and oval face shapes since the volume sits high rather than wide, and it needs at least shoulder-length hair so the ribbon has enough hair to wrap around twice.
How To Style:
Step 1: Take a two-inch section from the crown and backcomb lightly.
Step 2: Smooth the top layer over the backcombed section.
Step 3: Gather with the rest of the top hair into a small ponytail.
Step 4: Wrap a ribbon around the base twice and tie in a bow or knot.
Step 5: Set flyaways with a fine-mist spray.
12. The Padded Velvet Headband

These headbands were everywhere a few years ago and they’ve stuck around — specifically the thick, padded kind in neutral tones. Cream, camel, chocolate. They add a bit of height to the crown and make even the most basic blowout look like you thought about it. Honestly one of the easiest ways to look more put-together on a day when you just don’t have the time.
Quick Styling Note:
The padding does the heavy lifting here — it pushes hair back just enough to create shape at the crown without any actual styling underneath, which makes this the fastest option on the list for second- or third-day hair.
Best For:
Most face shapes; any hair length.
13. The Low Ribbon Ponytail

Low ponytail at the very base of the neck, elastic hidden under a length of silk or velvet ribbon tied in a bow. Keep the ponytail itself either dead straight or with the tips curling slightly inward — that little detail at the end makes it look finished rather than thrown together. Simple, but it reads as very deliberate.
Quick Styling Note:
Wrap the ribbon around the hair tie itself rather than over bare hair — this hides the elastic completely and is the small detail that separates a polished ribbon ponytail from one that looks like an accessory glued on top.
Best For:
Oval and long face shapes; medium to thick hair.
14. Natural Texture with Pearl Accents

Old money style in 2026 isn’t just for straight hair. Natural curls and coils fit right in when they’re well-defined and moisturized — that’s the key, really, just making sure your texture looks intentional and healthy. Scatter a few small pearl pins throughout and you’ve got something that looks both modern and classically elegant at the same time.
Quick Styling Note:
Pearl pins hold best when pushed in at a slight downward angle into already-set curls, not straight in — straight insertion is why pearl accents tend to slide out of curly or coily hair by midday.
Best For:
Curly and coily hair textures; most face shapes.
15. The Vintage Scarf Braid

This braid uses the scarf as a structural third strand rather than a decoration wrapped on afterward, which is why it holds tighter and looks more intentional than a braid with a scarf simply tied around it. It suits most face shapes since the braid’s width can be adjusted by how tightly the scarf strand is pulled, and it works on medium to long hair with enough length for at least three full crosses.
How To Style:
Step 1: Fold a long scarf into a thin strip and tie it to a small section at the crown.
Step 2: Divide hair into three sections, with the scarf as one strand.
Step 3: Braid down, keeping even tension on all three strands.
Step 4: Secure the end with a clear elastic.
Step 5: Gently loosen the braid’s outer edges for a fuller look.
16. The Polished Headband Tuck

Place a slim headband across your head, then take the hair at the back and tuck it up and over the band, rolling it into a sort of soft chignon against the nape. It’s part headband look, part updo — a hybrid that looks more complicated than it is. Very vintage-inspired, very intentional, and genuinely different from what most people are doing.
Quick Styling Note:
Tuck hair behind the headband in small sections rather than all at once — doing it in one motion is what causes the bumpy, uneven look this style is meant to avoid.
Best For:
Round and square face shapes; chin-length or longer hair.
17. The Classic Italian Bob

Unlike the styling-based looks above, this one is a cut, not a technique — the “old money” effect comes from a completely blunt, one-length perimeter with zero layers, which is precisely what makes it look expensive and precise rather than casual. It suits oval and heart face shapes best since the blunt line sits cleanly at the jaw, and it needs straight to slightly wavy hair, since heavy curl patterns disrupt the sharp line this cut depends on.
How To Style:
Step 1: Blow-dry hair straight using a round brush for a smooth base.
Step 2: Apply a light smoothing serum to the mid-lengths and ends.
Step 3: Flat iron in small sections, keeping the iron flat against the blunt line.
Step 4: Tuck ends slightly under with the iron for a rounded finish.
Step 5: Finish with a shine spray, avoiding the roots.
18. The Blunt Mid-Length Cut

Hair cut straight across at collarbone length, one color, in excellent condition. That’s it. No layers, no highlights, no texture. The “expensive brunette” and “butter blonde” tones are big in 2026 for this exact look — deep, rich, like the color hasn’t been touched. The bluntness of the cut is what makes it look luxurious. Every millimeter of the ends should be even.
Quick Styling Note:
This cut relies on even weight distribution rather than layering for shape, so the biggest styling mistake is adding curls that break up the blunt line the cut is built around — keep waves loose and low if you curl it at all.
Best For:
Most face shapes; straight to wavy hair.
19. The Tucked-Behind-Ear Look

Long straight hair, center part, both sides tucked behind the ears. Sounds almost too simple to include on a list like this, but it’s actually a quiet power move. There’s nowhere to hide with this style — no curl to distract, no volume to fill space. It’s just your face, your skin, your jawline, and whatever jewelry you chose to wear. That kind of confidence is very old money.
Quick Styling Note:
This one works because of what it removes, not adds — smoothing hair back and tucking it behind both ears clears the face fully, which only looks “polished” rather than plain if the hair is glass-smooth first with no flyaways.
Best For:
Oval and heart face shapes; straight to slightly wavy hair.
20. The Brushed-Back Wet Look

This is the most product-dependent style on the list — the “wet” appearance comes from a gel-and-water combination applied in sections while hair is damp, not sprayed on dry hair afterward, which is the main reason at-home attempts often look greasy instead of sleek. It suits most face shapes since it doesn’t add width or height, and it works best on straight to wavy hair, since very curly textures fight the flat, glass-like finish this style needs.
How To Style:
Step 1: Dampen hair evenly with a spray bottle.
Step 2: Apply a strong-hold gel in small sections, combing through as you go.
Step 3: Brush all hair straight back with a fine-tooth comb.
Step 4: Secure any loose ends with small pins at the nape if needed.
Step 5: Let air-dry fully before touching to avoid disrupting the flat finish.
FAQ
Do these styles work on second-day hair?
Most of them do — chignons, tucks, headband styles, and the wet-look brush-back all hold better on hair that isn’t freshly washed.
Which style needs the least product?
The Tucked-Behind-Ear Look and Padded Velvet Headband need the least, since both rely on the cut or accessory rather than heavy styling.
Are any of these good for curly or coily hair as-is?
Natural Texture with Pearl Accents is built around curl pattern rather than working against it; most of the smooth, blunt-line looks will need heat styling first.
Can I do the Italian Bob or Blunt Mid-Length Cut myself at home?
The cut itself is best left to a stylist since blunt lines show any unevenness, but maintaining the shape between cuts is manageable at home.
What’s the quickest style on this list for a busy morning?
The Padded Velvet Headband and Tucked-Behind-Ear Look both take under five minutes.
Final Thoughts
What makes old money hairstyles work in 2026 isn’t nostalgia — it’s the fact that they’re built around things that actually last. Healthy hair. Clean structure. A bit of patience. These aren’t trends that rely on a specific product or a seasonal color. They work because the principles behind them are solid.
Pick two or three from this list that suit your hair type and your lifestyle. Practice them until they feel easy. That’s really the whole secret — not perfection on the first try, but getting comfortable enough that the style starts to look effortless. Which, honestly, is the entire point.

