My cousin called me on a Sunday afternoon saying her edges were thinning and she needed a break from wigs. I told her to come over. We spent three hours on her kitchen floor, two jars of Shea Moisture between us, and by the end she was crying — not from pain, but because her hair finally felt like hers again. Two strand twists did that. They’ve done it for me too, more times than I can count. Whether you’re just starting your natural hair journey or you’ve been at it for years and feel stuck in the same routine, this guide is going to give you something real to work with.
Why Two Strand Twists Work for Almost Everyone
Before we get into actual styles, let me just say this — two strand twists are genuinely one of the most forgiving natural hair styles out there. They work with any hair texture, from curly to coily to tight-textured hair, and they protect your ends by keeping them tucked away from friction and environmental damage.
You can DIY them entirely at home, they require very little daily maintenance, and they actually tend to look even better the longer you wear them.
The other thing I appreciate? Two strand twists give you access to your scalp throughout the style, which means you can still cleanse and moisturize properly — something a lot of other protective styles don’t allow.
1. Classic Medium-Length Two Strand Twists
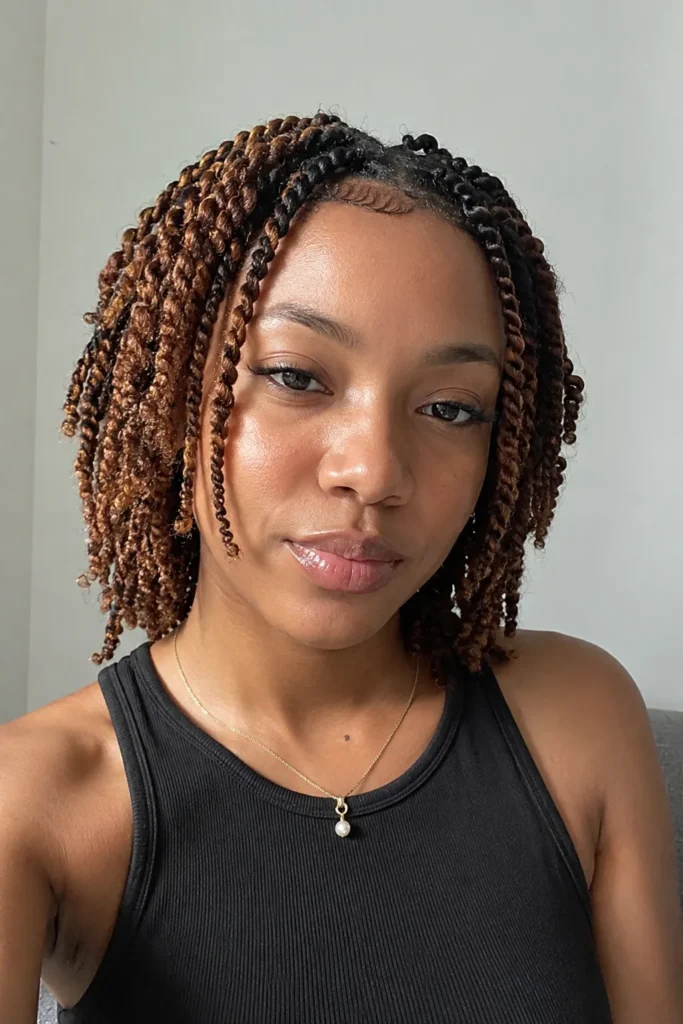
This is the OG. The style that probably came up first when you Googled “two strand twists.” And it deserves its reputation. Medium-sized twists on shoulder-length or longer natural hair give you the perfect balance of definition and fullness.
- Best face shapes: Oval, round, heart
- Maintenance level: Low
- Styling difficulty: Easy to Medium
- Common mistake: Not moisturizing enough before twisting. Dry hair equals frizzy, unraveling twists within days. Always work on damp, well-conditioned hair.
- Stylist tip: Start product application at mid-shaft and work down to ends — roots don’t need as much product and over-applying there causes buildup fast.
- Products to use: Mielle Organics Honey & Ginger Twisting Soufflé, Shea Moisture Curl Enhancing Smoothie
- Realistic upkeep: Re-moisturize ends every 2–3 days. Satin bonnet every night.
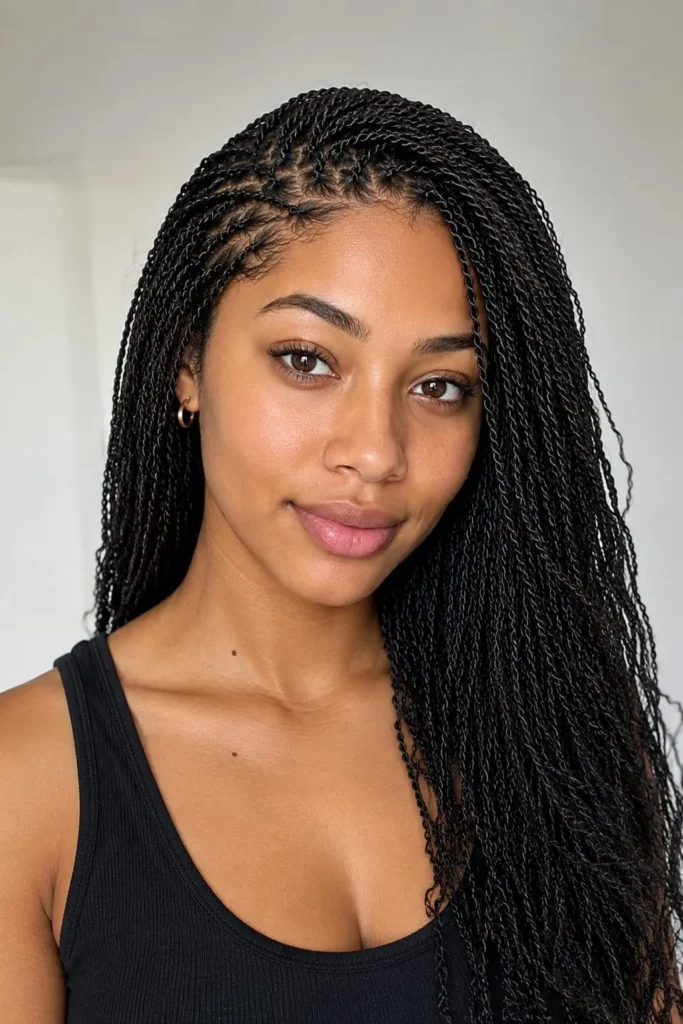
2. Micro Twists (Mini Two Strand Twists)

Micro twists are tiny, thin twists — and the installation is a labor of love. It took me four hours the first time. But the result lasted almost five weeks and looked stunning even by week three. These are especially popular for 4C hair because the tighter coil pattern grips each tiny section beautifully.
- Best face shapes: Long, oval — the density adds fullness at the sides
- Maintenance level: Low (once installed, they basically maintain themselves)
- Styling difficulty: Hard — plan for 4–6 hours
- Common mistake: Twisting too tightly at the roots. This is one of the biggest causes of thinning edges — keep roots loose and secure, not strangled.
- Stylist tip: Work in rows from the back of the head forward using a rattail comb for clean parts. It makes a multi-hour session feel far more organized.
- Realistic upkeep: Minimal daily effort. Sleep in a bonnet, lightly mist with water every few days.
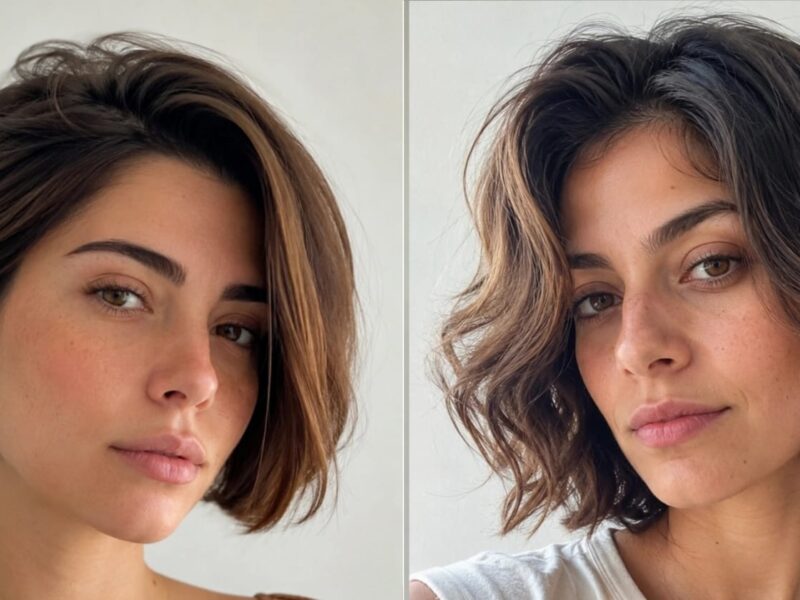
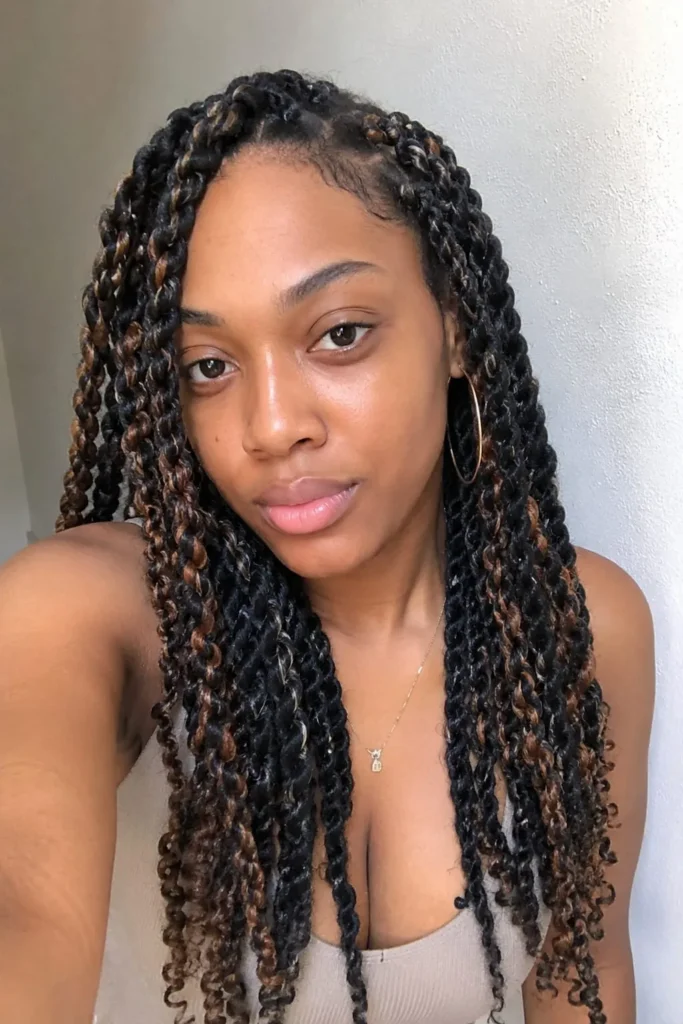
3. Two Strand Twist Out
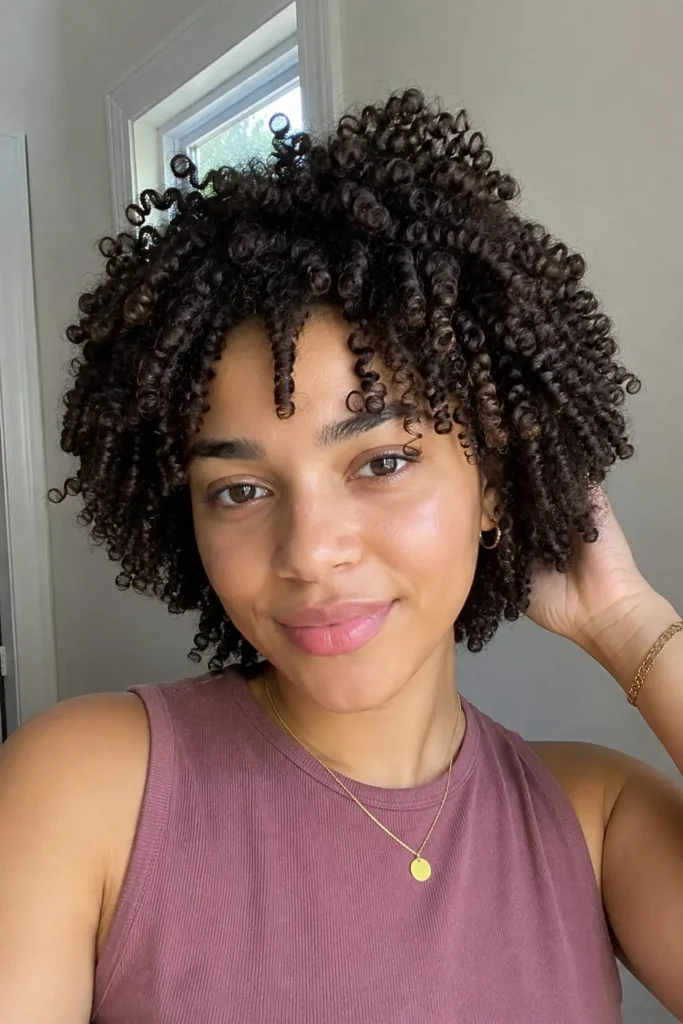
This is the style you get after unraveling your twists — big, defined, stretched curls without any heat. I wore mine to a wedding last summer and got more compliments than I’ve ever received on my hair in my life.
- Best face shapes: All face shapes — the volume is universally flattering
- Maintenance level: Medium
- Styling difficulty: Medium — the unraveling technique matters more than people think
- Common mistake: Unraveling twists before they’re fully dry. I made this mistake for months. Damp twists = frizz, not definition. Let them dry completely first.
- Stylist tip: Apply a light oil like jojoba or argan oil to your fingers before unraveling. It separates the curls without causing frizz.
- Realistic upkeep: A properly set twist out lasts 3–5 days with light re-moisturizing and pineappling at night.
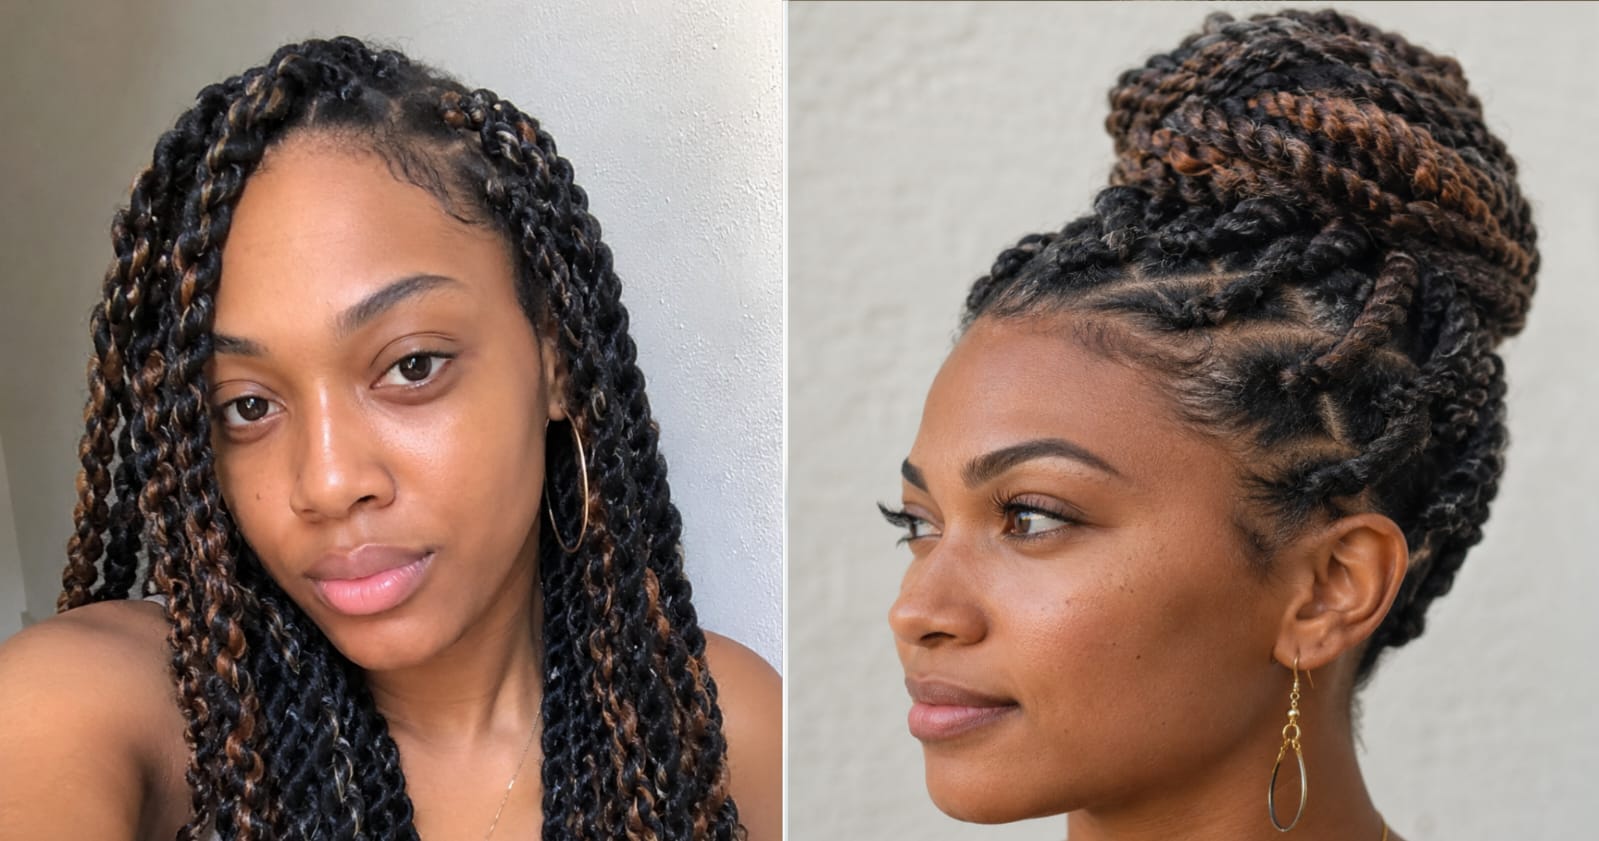
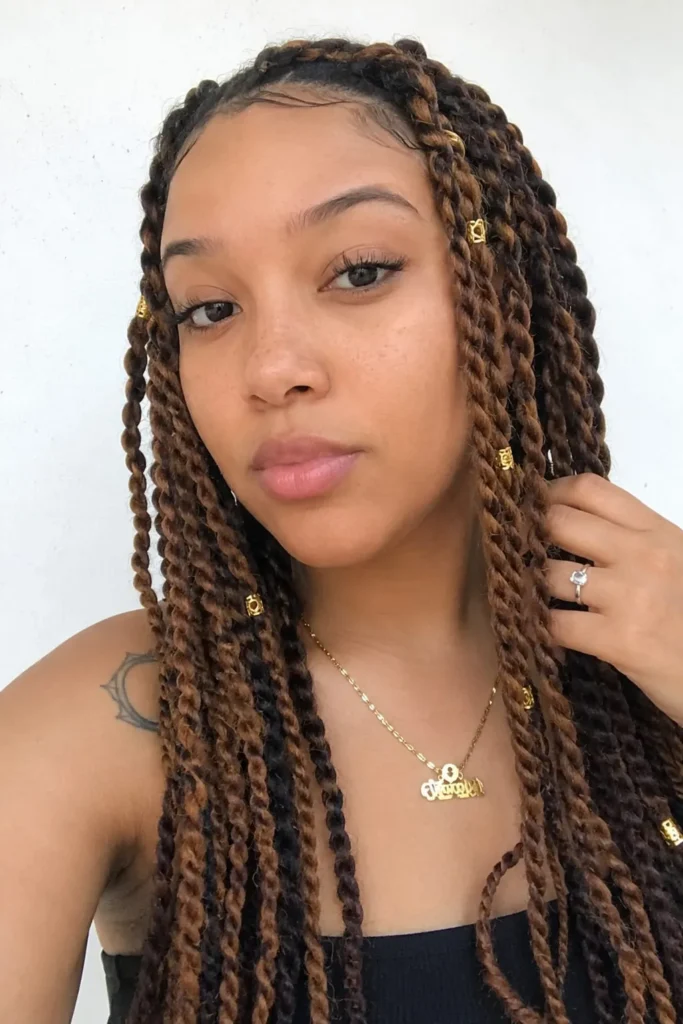
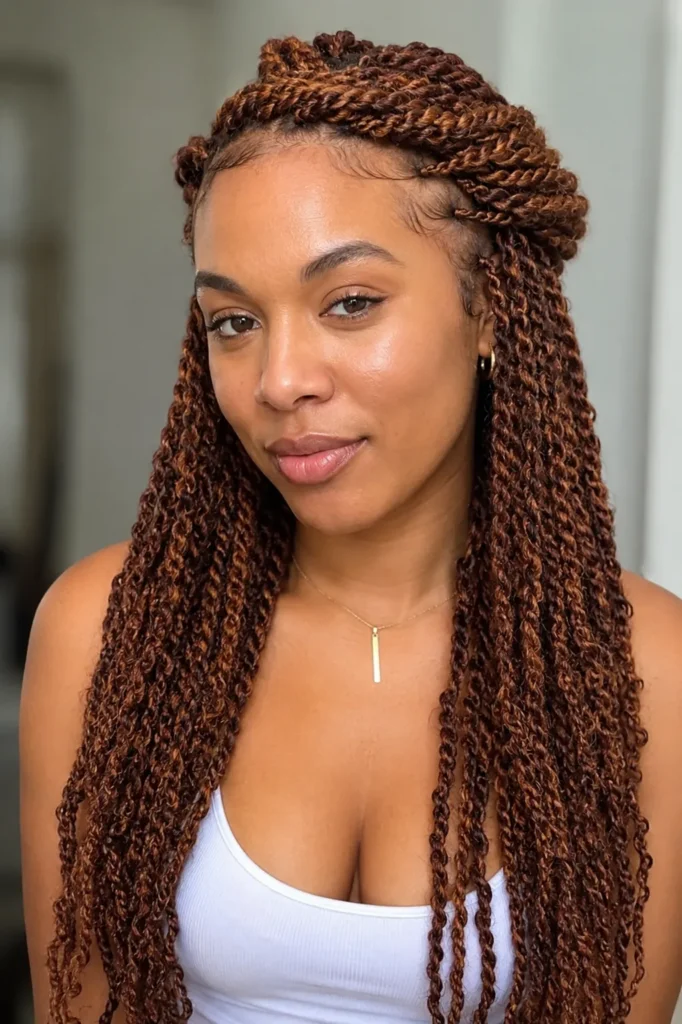
4. Two Strand Twists With Extensions (Marley Hair)
If your natural hair is shorter but you want length and drama, adding Marley or Havana twist hair is a revelation. I went from four inches of natural hair to waist-length twists using Janet Collection Marley hair, and I didn’t recognize myself — in the absolute best way.
- Best face shapes: Heart, oval, square
- Maintenance level: Low to Medium
- Styling difficulty: Medium — blending extension hair smoothly takes practice
- Common mistake: Adding too much extension hair per section. Heavy twists pull on your roots and cause breakage over weeks of wear.
- Stylist tip: Always stretch and prep Marley hair before using it. It removes chemical smell and softens the texture for a more natural blend.
- Realistic upkeep: Refresh edges weekly. Oil scalp every 4–5 days.
5. Flat Twist Updo
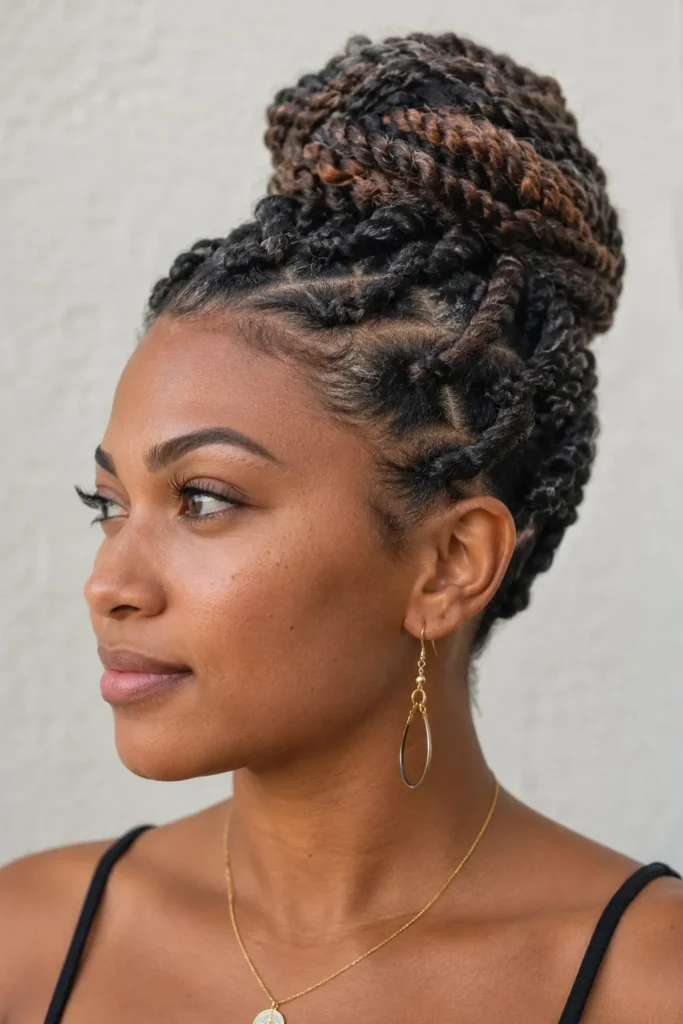
Flat twists lay against the scalp like cornrows but use a two strand technique. Combine several flat twists and gather them into an updo and you get something that looks salon-done even when you’ve done it entirely at home.
- Best face shapes: Round, square — the crown height elongates the face
- Maintenance level: Medium
- Styling difficulty: Medium to Hard
- Common mistake: Inconsistent tension. If some sections are twisted tighter than others, the updo looks uneven when pinned up.
- Stylist tip: Use a fine-tooth comb to part each section before you start twisting. Sloppy parts are the main reason flat twist updos look DIY instead of done.
- Realistic upkeep: Re-pin as needed. Edges may need refreshing by day 3 or 4.
6. Half-Up Half-Down Two Strand Twists

Some days you want your twists worn loose but you also want your face visible. Gathering the top half of your twists into a loose bun or puff is the answer — and it takes about three minutes once your twists are already installed.
- Best face shapes: Oval, heart
- Maintenance level: Low
- Styling difficulty: Easy
- Common mistake: Using a rubber band to gather the top section. It snaps twists and causes breakage at the gather point. Always use a satin-lined scrunchie.
- Stylist tip: Leave a few face-framing twists out of the gathered section. It softens the look and makes it feel more intentional.
- Realistic upkeep: No re-installation needed. Change the top section style as often as you like.
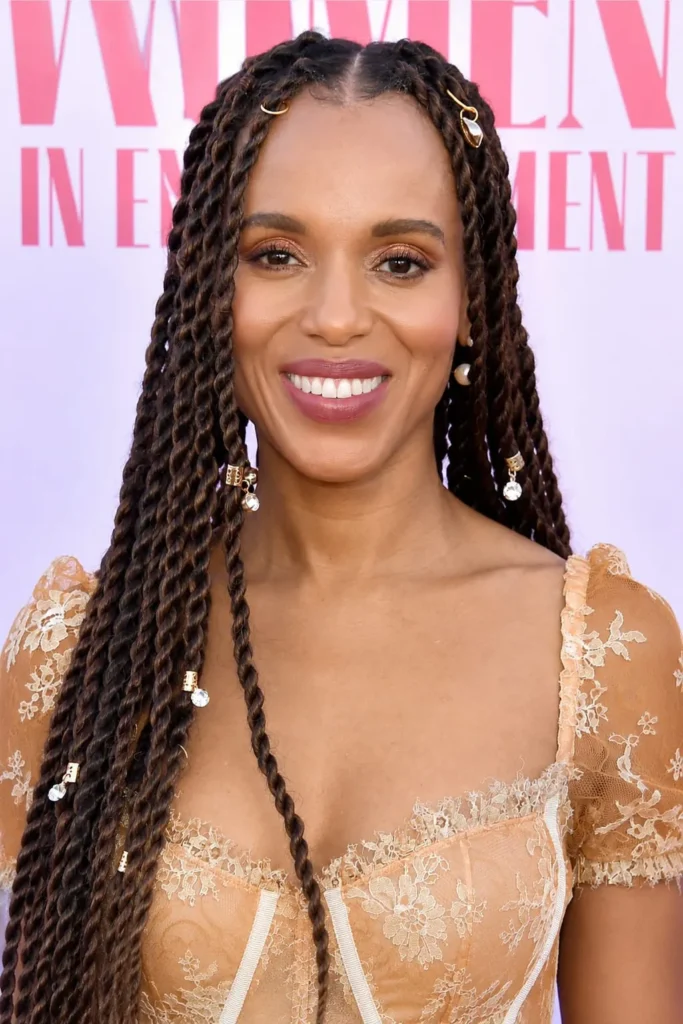
7. Two Strand Twists With Beads or Cuffs
Adding gold cuffs or colorful beads to the ends of your twists turns a protective style into a genuine statement. I’ve been doing this since my grandmother used to add beads to my hair as a kid, and the look never gets tired.
- Best face shapes: All — accessories can be placed strategically to draw attention where you want it
- Maintenance level: Low
- Styling difficulty: Easy
- Common mistake: Using beads with very small holes that snag and require force to thread on. Always use beads specifically made for hair — they have smoother inner surfaces that won’t damage your ends.
- Stylist tip: Seal the ends of your twists with a small amount of edge control gel before adding beads. This keeps the twist from unraveling through the bead hole over time.
- Realistic upkeep: Minimal — just check periodically that beads haven’t slipped down and snagged on other twists.
8. Chunky Two Strand Twists
Thick, bold twists made from large sections of hair. Less detailed than micro twists but gorgeous in their own way — especially on type 4 hair where shrinkage makes even chunky twists look full and rich.
- Best face shapes: Long, oblong — the width adds balance to longer face shapes
- Maintenance level: Low
- Styling difficulty: Easy — chunky twists install in a fraction of the time
- Common mistake: Not using enough product. Chunky twists need generous cream or butter from root to tip. Skimping leads to unraveling within days.
- Stylist tip: Smooth each twist downward with your palm after you finish it. This seals the sections together and gives a neater, more polished finish.
- Realistic upkeep: Expect 1–2 weeks of wear — chunky twists don’t hold their pattern as long as smaller ones.
9. Two Strand Twists on Blown-Out Hair
Instead of twisting on wet or damp hair, you lightly blow out your hair first for stretch, then twist with an oil or light cream. Celebrity stylists have noted that starting with lightly blow-dried hair and twisting with an oil or light cream creates more elongated, lighter, more whimsical-finish twists. My twists from this method hung past my shoulders even though my shrinkage normally takes me back to ear length.
- Best face shapes: All — the elongation is flattering across the board
- Maintenance level: Medium
- Styling difficulty: Medium
- Common mistake: Over-blowing until the hair is completely bone dry. You want just enough stretch to reduce shrinkage — moisture still needs to be present for the twist to hold shape.
- Stylist tip: Use a tension method blow-dry rather than a brush and high heat. It stretches the hair without excessive heat exposure.
- Realistic upkeep: Similar to classic twists — satin bonnet nightly, light oil every few days.
10. Crown Twist with Loose Twists Down
Flat twists create a decorative crown effect along the front and sides of the head, while the rest of your twists hang loose in the back. It’s a protective style that also looks like intentional art.
- Best face shapes: Round, square — the directional lines of the crown visually elongate the face
- Maintenance level: Medium
- Styling difficulty: Medium to Hard
- Common mistake: Making the crown section too wide. Thick crown twists look bulky rather than elegant. Keep the flat twist section narrow and precise.
- Stylist tip: Use a clear elastic band or a bobby pin at the end of each flat twist section to secure it into the updo before pinning. It stays neater throughout the day.
- Realistic upkeep: The crown section may need freshening every 3–4 days while the loose back section holds longer.
11. Two Strand Twists Ponytail
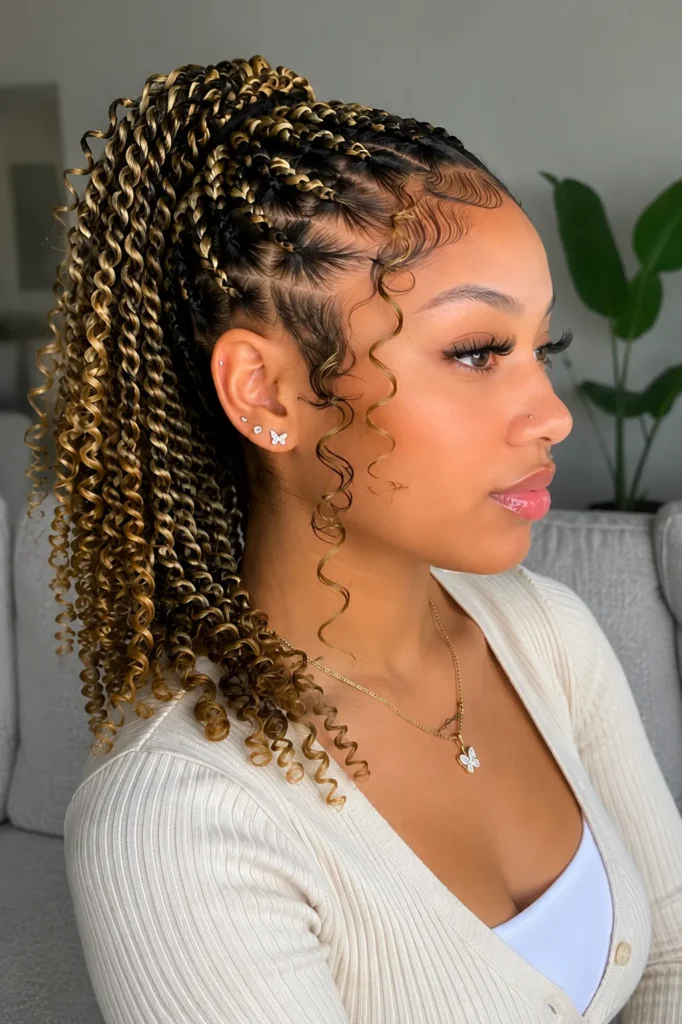
Gathering all your twists into a high or low ponytail is a sleek, polished move that’s easier than it looks. I wore mine in a high ponytail with a jumbo satin scrunchie to a rooftop party and felt completely put-together with zero effort.
- Best face shapes: Oval, heart, oblong
- Maintenance level: Low
- Styling difficulty: Easy
- Common mistake: Using tight elastic bands. Your twists have weight to them, and tight bands at the base of a ponytail cause tension and breakage right at the crown.
- Stylist tip: Wrap a single twist around the base of the ponytail to cover the scrunchie. It looks intentional and more polished immediately.
- Realistic upkeep: Re-gather as needed. Avoid keeping it in the exact same ponytail position every single day.
12. Two Strand Twists with a Headband or Turban
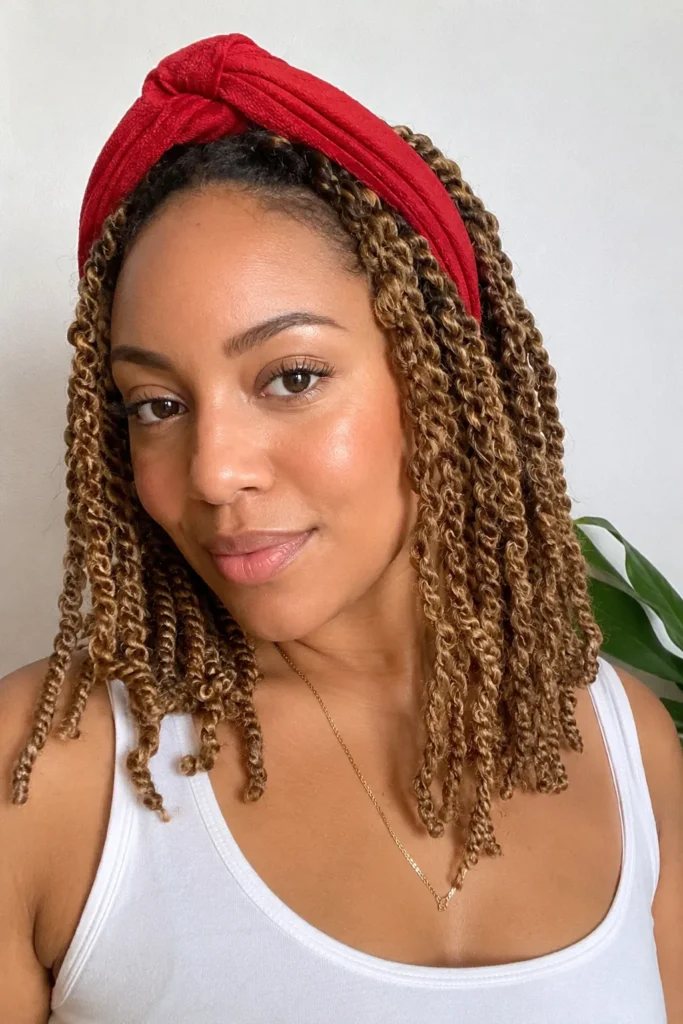
Your twists are already done. You add a printed headband, a silk turban, or a wide fabric wrap. Done. You look intentional and put-together in under 60 seconds. The turban-and-twists combination draws from African heritage styling traditions and looks particularly beautiful when matched to your outfit.
- Best face shapes: All — the wrap frames the face and you control coverage and height
- Maintenance level: Low
- Styling difficulty: Easy
- Common mistake: Choosing headbands with metal clasps or rough edges. These snag the front of your twists and create frizz at the hairline. Satin-lined wraps or soft fabric headbands only.
- Stylist tip: Lay your edges down with a small amount of edge control and a soft brush before wrapping. Even simple wraps look cleaner and more intentional with smooth edges underneath.
- Realistic upkeep: Zero — this style literally just requires you to own a nice wrap.
How to Do Two Strand Twists: The Basics
Step 1: Start with clean, moisturized hair. Wash day first — always.
Step 2: Section your hair into the number of twists you want. Use clips to keep unworked sections out of the way.
Step 3: Apply your twisting product (cream, butter, or soufflé) to each section from root to tip.
Step 4: Split each section into two equal pieces. Wrap one strand over the other consistently in one direction, all the way to the ends.
Step 5: Seal the end. Twirl it around your finger, add a bead, or leave the natural taper.
Step 6: Repeat across your entire head.
Two strand twists can last 1–3 weeks depending on your hair type, the products you use, and your maintenance routine. A satin bonnet every single night is non-negotiable.
FAQ
How long do two strand twists last? With consistent care — nightly bonnet, light edge moisturizing, minimal manipulation — you can get 2 to 4 weeks out of a set. Smaller twists generally outlast chunky ones because the tighter section holds the pattern longer.
Can I do two strand twists on short hair? Yes. You need at least 3 to 4 inches of hair to grip and twist. Very short sections benefit from a small amount of edge control gel at the ends to prevent unraveling.
Do two strand twists cause breakage? Not when done correctly. Gentle root tension, minimal post-install manipulation, and careful removal are the three things that prevent breakage. Never pull or rip twists apart when taking them down.
What is the difference between two strand twists and Senegalese twists? Two strand twists are done on your natural hair. Senegalese twists use extensions and incorporate a rope-like coiling technique as you twist downward, giving them a more polished, elongated finish.
How do I stop my twists from unraveling? Use a product with genuine hold (not just a moisturizer), seal the ends well when you finish each twist, and avoid soaking the twists with water once they’re set. Too much water post-installation loosens the pattern.
Can I refresh older twists without starting over? Absolutely. A light water mist and a small amount of twisting cream on frizzy sections, followed by re-twisting just those pieces, can add another full week to your style without reinstalling everything.
Two strand twists gave my cousin her confidence back on a random Sunday. They’ve given me easy weeks, healthy length retention, and a real relationship with my own hair texture. Whatever style on this list caught your eye — start there. Be patient with yourself through the first few attempts. The technique clicks faster than you’d expect, and once it does, you’ll always have a go-to that actually works for your hair.