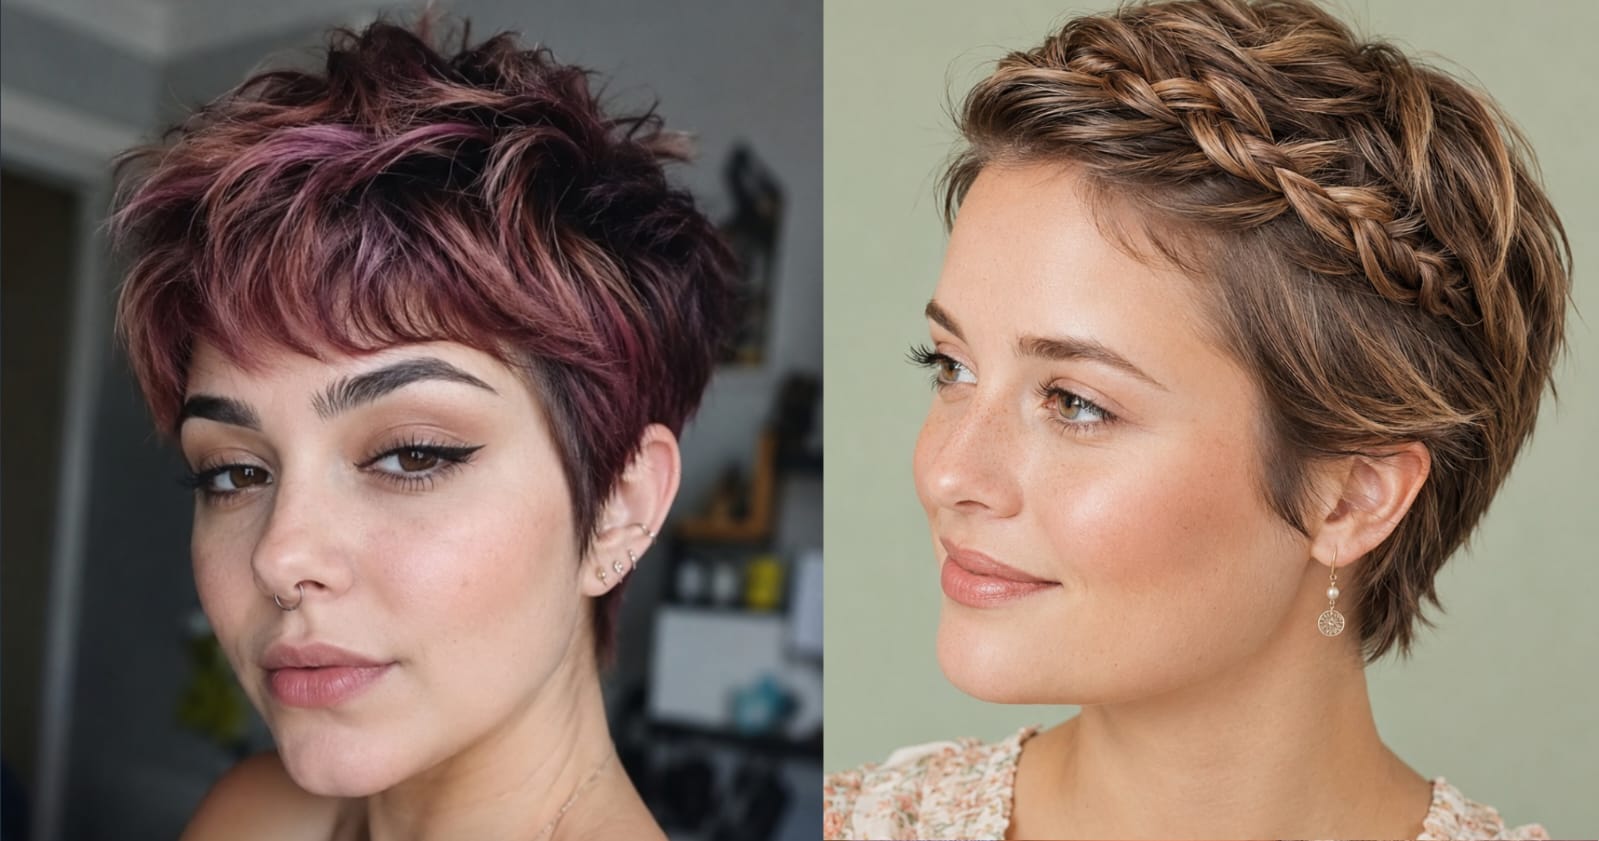
So I cut my hair into a pixie and loved every second of it — until I didn’t. Eight months in, I wanted my long hair back. What nobody tells you before you make that decision is that the grow-out is its own whole journey. The back goes fluffy while the sides are still short. Your ears look weird. You wake up every morning looking absolutely unhinged and no amount of water fixes it.
I tried everything. Some things worked, most things didn’t, and I learned a lot by just figuring it out as I went. These 14 styles are what actually got me through it — real ones, not just stuff that looks good on Pinterest but falls apart by 10am.
Why Growing Out a Pixie Hits Different Than Any Other Grow-Out
Here’s the thing nobody talks about. When a stylist cuts a pixie, they layer and texturize everything heavily so it sits right at that short length. As it grows, those same layers hit at completely wrong spots. You end up with a shape that looks like nothing — not short, not long, not intentional.
Add to that the fact that the top grows faster than the sides, and the back grows faster than both, and you’ve got a three-way race that nobody wins for a while. But every stage has a fix. Here’s what works.
The 14 Best Grown Out Pixie Hairstyles
1. The Textured Pixie Bob

At about 2–3 inches, your stylist can shape everything into a textured bob that sits just below the ear. The key word is textured — you want piece-y, slightly choppy ends, not a blunt line. A slight angle at the back keeps it from going boxy.
Scrunch some salt spray into damp hair and let it air dry. That’s genuinely all it takes. It looks like you paid for this cut on purpose, which is the whole goal.
For you: Best if you want the cleanest transition right at the start without a lot of styling work.
Maintenance tip: Trim every 6 weeks to hold the shape — skip this and it starts going mushroom real fast.
2. The Side-Swept Bang Stage

When the top is getting long but the back is still catching up, a deep side part with everything swept dramatically across your forehead is genuinely flattering. It pulls focus to your face and completely away from the back situation.
A tiny bit of pomade or light styling cream on that swept section keeps it down without making it look stiff. This is one of those styles where less product always wins.
For you: Works really well on oval and heart-shaped faces — it frames everything nicely.
Maintenance tip: Keep the side sections trimmed short so they don’t compete with the sweep and create bulk you don’t want.
3. The Slicked-Back Look

When everything is at that frustrating length where nothing sits right, slicking it all straight back with a medium-hold gel is the move. It looks intentional, a little editorial, and takes maybe two minutes.
Fingers instead of a comb is important here. A comb makes it look overdone. Fingers make it look like you just ran your hands through your hair and walked out the door, which is exactly the energy you want.
For you: Perfect for days when you want something polished without any real effort.
Maintenance tip: Use a gel that rinses completely clean — buildup shows fast on slicked styles.
4. Mini Curtain Bangs

If the front is growing faster than everything else, part it slightly in the center and let those pieces fall toward your cheekbones. Even with a short back, this face-framing detail looks completely modern and put-together.
It softens the whole face and honestly draws so much attention away from the length situation at the back. One of those small things that makes a surprisingly big difference.
For you: Really flattering on round faces — adds vertical line and makes the face look longer.
Maintenance tip: Trim just these front sections every 4–5 weeks so they don’t outgrow the shape and lose the curtain effect.
5. The Tucked-Behind-Ear Style

Once the sides are long enough to tuck behind your ears — do it. Add a small clip or pin if they keep falling forward. Throw on some statement earrings and hit the hair with texture spray on top. Done.
This sounds too simple to be a real style but it genuinely works. The earrings shift all the attention and suddenly nobody’s looking at your hair length — they’re looking at whatever cool earrings you put on.
For you: Low effort, everyday wear, looks put-together without trying.
Maintenance tip: Keep a few bobby pins in your bag because the sides will slip forward throughout the day until they’re long enough to stay on their own.
6. The French Clip Updo

The 4–5 inch mark is where most women want to give up. Hair is too long to leave alone but too short for a real ponytail. A small jaw clip fixes this completely.
Gather everything back loosely, clip it at the crown or nape, and let the pieces that fall out just fall out. Don’t fight them back in. The loose, undone look is what makes this feel intentional rather than like you gave up. This style genuinely carried me through the worst stretch.
For you: A lifesaver for workdays and errands when you just don’t have the energy.
Maintenance tip: Use soft-coated jaw clips, not the cheap plastic ones — they crease and break hair at the weakest point in the grow-out.
7. Braided Headband Detail

Grab a thin section from the front, do a simple three-strand braid, and pin it back across the crown like a headband. That’s it.
It sounds fancier than it is. A loose, slightly messy braid actually looks better than a perfect tight one here — it’s more natural and less “I watched a tutorial for this.” Even if braiding isn’t your thing, this one is genuinely easy.
For you: Great for weekends or brunches when you want something a little more interesting than just leaving it down.
Maintenance tip: Use a small clear elastic at the braid end so it holds without adding visible hardware.
8. Messy Textured Waves

Once the hair hits chin length, waves become possible and they look really good at this stage.
A small curling wand or even a flat iron curled outward gives you the texture you need. The important thing is letting the waves cool completely before touching them — if you run your fingers through too early, they drop and you lose the shape. After they’re fully cool, finger-comb loosely and you’re done.
For you: Works especially well on fine hair because the wave adds body and makes everything look fuller than it actually is.
Maintenance tip: Heat protectant spray is non-negotiable here — hair at this stage has usually been through a lot and needs the protection.
9. The Mini Ponytail with Face-Framing Pieces

A small low ponytail with a couple of loose pieces left out around the face looks genuinely cute — but only when you stop trying to make the ponytail look big. It’s small, it’s simple, and the whole thing works because of the contrast between the pulled-back part and the wispy pieces framing your face.
Fight the urge to slick everything back tight. The loose pieces are doing all the work.
For you: Casual and relaxed — perfect for weekends or any low-key day.
Maintenance tip: A thin coated elastic looks much cleaner than a scrunchie at this length — save the scrunchie for when you have more hair to work with.
10. Half-Up Knot

Grab just the crown section, twist it into a tiny knot or bun, and leave everything else down. Thirty seconds, no skill required.
This solves the specific problem of the top being too long while the sides are still short. The knot deals with the overgrown top section and the rest just hangs. Simple, functional, and it actually looks like a choice rather than a compromise.
For you: Best for hot days or any day you’re just over dealing with your hair.
Maintenance tip: Keep the knot loose — pulling it tight causes breakage right at the elastic, and that’s a rough spot to have damage during a grow-out.
11. The Shaggy Lob

When you finally hit shoulder length — and you will — ask for a shaggy lob. Keep the length, add curtain bangs and face-framing layers, and let the texture do the rest.
A lot of women reach this stage and then just stay here because they love it so much. It’s forgiving, it moves well, and it suits almost every face shape and hair type. You’ll get more compliments on this cut than you expect.
For you: Works on practically everyone — one of the most universally flattering cuts there is.
Maintenance tip: Trim every 8 weeks to keep the layers looking shaggy and not just grown-out and shapeless.
12. Accessory-Heavy Styling

During the weeks where nothing is working, accessories are not a backup plan — they are the plan.
A bold headband, a silk scarf tied loosely around the head, a few embellished bobby pins clustered on one side — any of these shift the focus completely away from length and toward what you put in your hair. It’s one of those things that feels like cheating but genuinely works.
For you: Perfect for events or photos where you need to look pulled-together without a fight.
Maintenance tip: Avoid tight elastic headbands worn in the same spot every day — they cause breakage right along the front hairline where it shows the most.
13. The Grown-Out Pixie with Color

Color during a grow-out is a strategy, not just a style decision. Highlights or a balayage add enough dimension and visual movement that uneven lengths start to look intentional. The eye follows the color instead of stopping at the awkward spots.
This is exactly what a lot of celebrities do when they’re growing out a short cut and their hair always looks like they meant it. Now you know the trick.
For you: Especially good for fine or thin hair — color adds depth and makes hair look thicker than it is.
Maintenance tip: Balayage grows out much more gracefully than single-process color — less upkeep, less obvious regrowth, better for a grow-out timeline.
14. The Undone Bob with Texture Spray

The last stage before you’re officially back to a real bob. Let it air dry, hit it with texture spray, scrunch once, and walk out.
No tools, no fussing, no tutorial needed. The natural movement is the whole point. After months of working around your hair, this stage is where you finally get to stop thinking about it — and it looks better for it.
For you: The ultimate reward style for anyone who just wants low-maintenance hair that still looks great.
Maintenance tip: Oribe Dry Texturizing Spray or Bumble and Bumble Surf Spray are both worth it here — the hold and texture are genuinely different from the drugstore versions.
Things I Wish I Knew Before Starting the Grow-Out
- Go see your stylist every 6–8 weeks for shape trims — skipping appointments makes everything harder, not easier
- Pick one style per stage and actually commit to it instead of trying something new every morning
- Biotin supplements and scalp massages consistently over time do make a real difference in growth speed
- Photograph your hair every few weeks — when you’re deep in a frustrating stage, looking back two months helps you see how far things have actually come
FAQ
How long does growing out a pixie actually take? About 12–18 months to reach a full bob or shoulder length. The first 6 months are the most frustrating stage-wise.
Should I keep trimming while it grows? Yes — but only the nape and sides to clean up the shape. Leave the top and front sections completely alone if you want them to catch up in length.
What’s the worst stage of the whole grow-out? Somewhere around the 3–4 inch mark when everything puffs out at ear level. Styles 6, 7, and 10 in this list were written specifically for that phase.
Does color actually help during a grow-out? It really does. The dimension makes uneven lengths look deliberate instead of accidental — it’s one of the most effective tricks for the whole process.
Growing out a pixie takes patience but it genuinely is an adventure when you stop fighting every stage and start working with it instead. Some of the best hair moments of my whole life happened during the grow-out — not before it or after it. Give yourself grace, keep some jaw clips on hand, and trust that the weird stage you’re in right now is just a few weeks away from being something you actually love.

