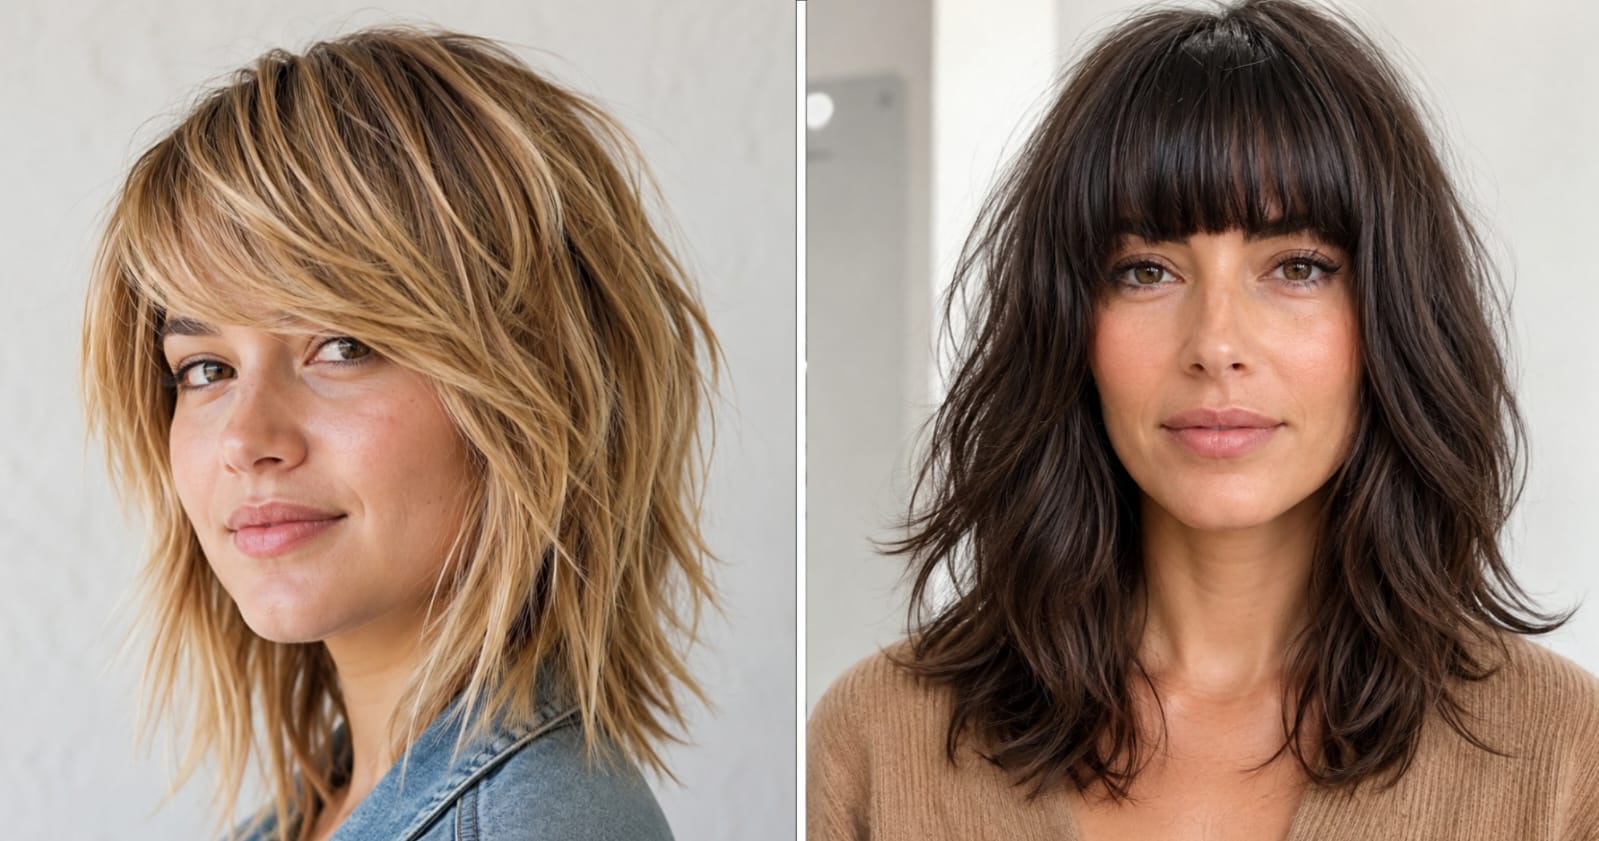
Layer placement is the entire mechanism behind a shag. Move the heaviest layers two inches higher or lower on the head, and the same haircut will either soften a strong jawline or make it look heavier than it actually is. That’s why a shag that looks incredible on one face shape can flatten or widen another — it’s not the cut itself, it’s where the layers land relative to your jaw, cheekbones, and chin.
This list sorts 18 medium shag variations by the structural job each one does: drawing the eye up, narrowing a wide jaw, adding width to a long face, or breaking up a strong angular line. If you’ve ever copied a shag from a photo and had it look “off” without knowing why, this is usually the reason — the same layer-mapping logic applies at shorter lengths in 15 Haircuts for Round Faces.
Quick Takeaways
- Best for round faces (narrowing the cheek line): Curtain Shag, Long Layered Shag with Center Part, Choppy Shag with Sideswept Bangs, C-Curve Shag
- Best for square/strong jaw (softening angles): Feathered Shag, Wispy Bottleneck Shag, Soft Piecey Shag, Butterfly Shag
- Best for long/oval faces (adding width, breaking length): Shag with Full Fringe, Blunt-Ended Shag, Layered Shag with Side Bangs, 70s Flip Shag
- Best for heart-shaped faces (balancing a narrow chin): Shag with Chin-Grazing Layers, Mullet-Inspired Shag, Textured Bob-Shag Hybrid
- Best for diamond faces (widening cheekbone area): Curly Shag with Volume, Side-Parted Shag, Disconnected Layered Shag
For Round Faces: Narrowing the Cheek Line
1. Curtain Shag

Curtain bangs split at the center and the heaviest layers sit right at cheekbone height, which pulls the eye toward the center of the face instead of out toward the sides of a round jaw. On a round face, anything that adds width at the cheek (like blunt, jaw-grazing layers) makes the face look wider — curtains do the opposite by creating a vertical frame.
That vertical frame is the actual mechanism: two soft pieces falling alongside the face create a line the eye follows up and down, not across. It works specifically because round faces lack strong vertical lines naturally, so the cut is supplying one.
2. Long Layered Shag with Center Part

A center part divides the face into two visually equal halves, which is the single most reliable way to make a round face read as longer rather than wide. Layers cut long and graduated (not chunky) keep weight low, near the chin and below, instead of bulking up at the cheek.
If the layers started higher, at cheekbone level, they’d add horizontal volume exactly where a round face doesn’t need it. Keeping the layer line low is what makes this version specifically round-face-friendly rather than just “a shag.”
3. Choppy Shag with Sideswept Bangs

Sideswept bangs create an asymmetrical diagonal line across the forehead, which breaks up the symmetry that makes round faces look fuller. A fully round forehead with no bang or a blunt, straight-across bang has nothing to interrupt that roundness.
The diagonal angle of the bang is doing the structural work — it’s the same reason a diagonal scarf print looks slimming where a horizontal stripe doesn’t. Choppy ends throughout the rest of the shag keep the texture from looking too severe against that one clean diagonal line.
4. C-Curve Shag

This shag curves inward toward the jaw and chin, literally tracing a “C” shape along the face’s edge. On a round face, this curve doesn’t add new width — it follows the jaw rather than extending past it, which is the opposite of what flipped-out, blunt layers do.
Flicked-out ends (popular in ’70s shags) push hair away from the face and exaggerate roundness. The C-curve does the reverse, hugging the jawline so the haircut’s outer edge and the face’s actual edge stay close together, minimizing the appearance of width.
For Square Faces: Softening Strong Angles
5. Feathered Shag

Feathering means the layers are cut to taper gradually rather than ending in one heavy blunt line. For a square jaw, a single heavy line at the jaw (like in a blunt bob) sits right on top of the angle and emphasizes it. Feathered ends break that line into several lighter ones.
Each lighter strand-end creates a soft edge instead of a hard stop, so the eye sees gradual movement instead of one strong horizontal. This is why feathering specifically — not just “adding layers” — is the relevant mechanic for jaw-softening.
6. Wispy Bottleneck Shag

A bottleneck shag is narrow through the layers but flares slightly at the very ends. On a square face, this means the narrowest part of the haircut sits at jaw height, pulling visual width away from the angle rather than adding to it.
The slight flare at the ends happens below the jawline, not at it, so any added volume shows up where the jaw has already narrowed into the neck — a spot where extra width doesn’t compete with the angular jaw at all.
7. Soft Piecey Shag

Piecey, separated strands (rather than one solid mass of hair) prevent light from reflecting off the hair in one flat plane. A solid, unlayered mass at jaw level acts like a mirror, bouncing light evenly and making the jaw’s edge look crisp and defined.
Breaking that mass into separated pieces scatters the light instead, which visually blurs the jawline’s hard edge — a literal optical effect, not a styling suggestion. It’s why piecey texture is specifically useful here, where a sleek, glossy finish would do the opposite.
8. Butterfly Shag

The butterfly shag’s signature is very short, heavy layers up top combined with longer pieces underneath — most of the structural “softening” weight sits high, around the cheekbones, not at the jaw itself. For square faces, that means volume is intentionally pulled away from the jawline.
Because the shortest layers frame the upper face, attention shifts to the cheekbones and temples first, and the eye reaches the jaw last and with less emphasis.
For Long Faces: Adding Width, Breaking Length
9. Shag with Full Fringe

A full, horizontal fringe visually shortens a long face by adding a strong line across the upper third — the same logic as why full bangs are recommended for long foreheads generally, but here it’s paired with shag layers so the rest of the face isn’t left untouched.
Without the fringe, a long oval face has nothing breaking up the vertical distance between hairline and chin. The horizontal bang line does that job at the top, while the shag’s layers do it lower down, working together rather than each handling it alone.
10. Blunt-Ended Shag

Most shags taper the ends to look wispy, but for long faces, blunt (not feathered) ends at the bottom create a visual “stopping point” — a horizontal line that ends the vertical movement of the face. Wispy, tapered ends fade out gradually and don’t create that stop.
That stopping point matters because long faces are already elongated; tapering the ends just lets that elongation continue visually past the chin. A blunt edge cuts it off cleanly instead.
11. Layered Shag with Side Bangs

Side bangs sit diagonally across the forehead, shortening how much bare forehead is visible — directly addressing the long, narrow forehead common on oval and long face shapes. A center part with no bang leaves the entire forehead height exposed.
The diagonal angle also breaks the straight vertical lines that a long face already has (long nose, long chin, long forehead), introducing the only non-vertical line in the whole face. That single diagonal does a lot of the width-adding work.
12. 70s Flip Shag

Ends that flip outward at the jaw and below add horizontal volume exactly where a long face is narrowest — at the lower jaw and chin. This is the deliberate opposite of the C-curve shag’s “hug the jaw” approach used for round faces above.
Where round faces need width minimized, long faces need it added, so the same flicked-out, voluminous ending that flatters a round face’s opposite (a square or heart face) reads as flattering on long faces too, since the core mechanic — added horizontal volume at the jaw — is identical in both directions.
For Heart-Shaped Faces: Balancing a Narrow Chin
13. Shag with Chin-Grazing Layers

A heart-shaped face is widest at the forehead/temples and narrowest at the chin. Layers that hit and graze right at the chin add visual width at the one point that’s naturally too narrow, balancing the wider top half of the face.
If the layers stopped higher, at cheek height, they’d just add more width to a part of the face that’s already wide enough. The chin is specifically where heart-shaped faces need help, which is why layer placement here is non-negotiable.
14. Mullet-Inspired Shag

A mullet-shag hybrid keeps length and weight concentrated at the back and lower sides rather than at the temples, which avoids adding any further width to an already-wide heart-shaped forehead. This back-weighted layer logic borrows directly from the Modern Mullet Haircut, where the same weight distribution is used to similar effect.
Because the top stays shorter and the bottom carries more visual weight, the haircut’s overall silhouette tapers downward — which mirrors a heart shape’s natural taper into the chin instead of fighting it.
15. Textured Bob-Shag Hybrid

This length sits right at the jaw, which is the exact spot a heart-shaped face needs the most visual width. Texture (rather than a sleek, smooth finish) adds the appearance of extra volume at jaw height without requiring any additional length.
A smooth, sleek version of the same length would lie flat and add no real width — texture is what generates the illusion of fullness precisely where a narrow heart-shaped chin needs it most.
For Diamond Faces: Widening the Cheekbone Area
16. Curly Shag with Volume

Diamond faces are widest at the cheekbones and narrower at both the forehead and jaw. Natural curl pattern, left unweighted by heavy layering, adds volume at the temple and cheek area — exactly where a diamond face’s narrowest upper section needs balancing.
Cutting curly hair into a heavily thinned shag removes the very volume that does this balancing work. Leaving more weight in means the curls can expand outward at the cheekbone line instead of collapsing close to the head.
17. Side-Parted Shag

A deep side part shifts more hair volume to one side of the head, which breaks the strict bilateral symmetry that makes diamond faces’ narrow forehead and narrow jaw both stand out at once. A center part leaves both narrow points equally visible and unbalanced.
Pushing volume to one side means at least one of those narrow points (the forehead) gets partially covered, while the rest of the shag’s layers can still do their work at the cheekbone and jaw.
18. Disconnected Layered Shag

Disconnection means there’s a visible, intentional gap in length between the top layers and the bottom layers, rather than a smooth gradient. For diamond faces, this lets the top layers stay short and tight near the narrow forehead while the lower layers flare separately near the wider cheekbone, treating each zone differently instead of blending them into one shape that has to compromise between two different width needs.
That separation is the entire point — a smoothly graduated shag would force one layer length to serve both the narrow forehead and wide cheekbone, and it can’t do both well at once.
Maintenance & Texture Comparison Table
| Haircut | Trim Frequency | Best Hair Texture |
|---|---|---|
| Curtain Shag | Every 8–10 weeks | Straight to wavy |
| Long Layered Shag with Center Part | Every 10–12 weeks | Straight, fine to medium |
| Choppy Shag with Sideswept Bangs | Every 6–8 weeks (bangs grow fast) | Wavy, medium density |
| C-Curve Shag | Every 8 weeks | Straight to slightly wavy |
| Feathered Shag | Every 6–8 weeks | Fine to medium, straight |
| Wispy Bottleneck Shag | Every 8–10 weeks | Fine, low density |
| Soft Piecey Shag | Every 6 weeks | Medium to thick, textured |
| Butterfly Shag | Every 8 weeks | Medium density, wavy |
| Shag with Full Fringe | Every 4–6 weeks (fringe only) | Straight, fine |
| Blunt-Ended Shag | Every 10–12 weeks | Thick, straight |
| Layered Shag with Side Bangs | Every 8 weeks | Medium, wavy |
| 70s Flip Shag | Every 6–8 weeks | Thick, straight to wavy |
| Shag with Chin-Grazing Layers | Every 8–10 weeks | Fine to medium |
| Mullet-Inspired Shag | Every 10–12 weeks | Thick, straight to wavy |
| Textured Bob-Shag Hybrid | Every 8 weeks | Medium, slightly wavy |
| Curly Shag with Volume | Every 12–16 weeks | Curly, coily |
| Side-Parted Shag | Every 8–10 weeks | Fine to medium |
| Disconnected Layered Shag | Every 6–8 weeks | Thick, medium-coarse |
FAQ
How do I find my actual face shape instead of guessing?
Pull hair back, look straight into a mirror, and trace the outline of your face on the mirror with a dry-erase marker or lipstick. Step back — the traced shape (not what you assume your face shape is) tells you whether your jaw, cheek, or forehead is the widest point.
Can layer placement actually change face shape perception, or is that just marketing?
It’s based on contrast and line direction, not magic — the eye follows the strongest line in an image first. A heavy horizontal layer line at jaw height draws the eye across the jaw; a vertical line (like curtain pieces) draws the eye up and down instead. This is measurable in basic visual perception research, not unique to hair.
My jaw is square but also narrow — which face-shape category am I in?
A square face has a wide jaw and minimal taper toward the chin. A square jaw that’s narrow front-to-back (not wide) combined with a long face often falls into “rectangle,” which generally takes the same softening logic as square but benefits from slightly more length to avoid looking boxy.
Will a medium shag work if my hair is very fine?
Heavy layering on fine hair can make ends look thin and see-through rather than wispy, since there’s less hair per layer to begin with. If your hair is fine, ask your stylist for fewer, slightly longer layers rather than the maximum layer count.
How do I know if my stylist placed the layers in the wrong spot for my face shape?| Look at where the shortest layer sits when your hair is dry and styled. If it lands at the exact widest point of your face shape (jaw for square, cheek for diamond, forehead for heart), that’s usually a placement mismatch — the shortest layer should generally sit near your face’s narrowest point, not its widest.
Final Thoughts
The right medium shag isn’t about finding the trendiest version in a photo — it’s about where the heaviest layers land relative to the widest and narrowest points of your own face. Once you know which point needs softening and which needs width, picking from this list (or directing your stylist toward one) becomes a lot less like guesswork.

