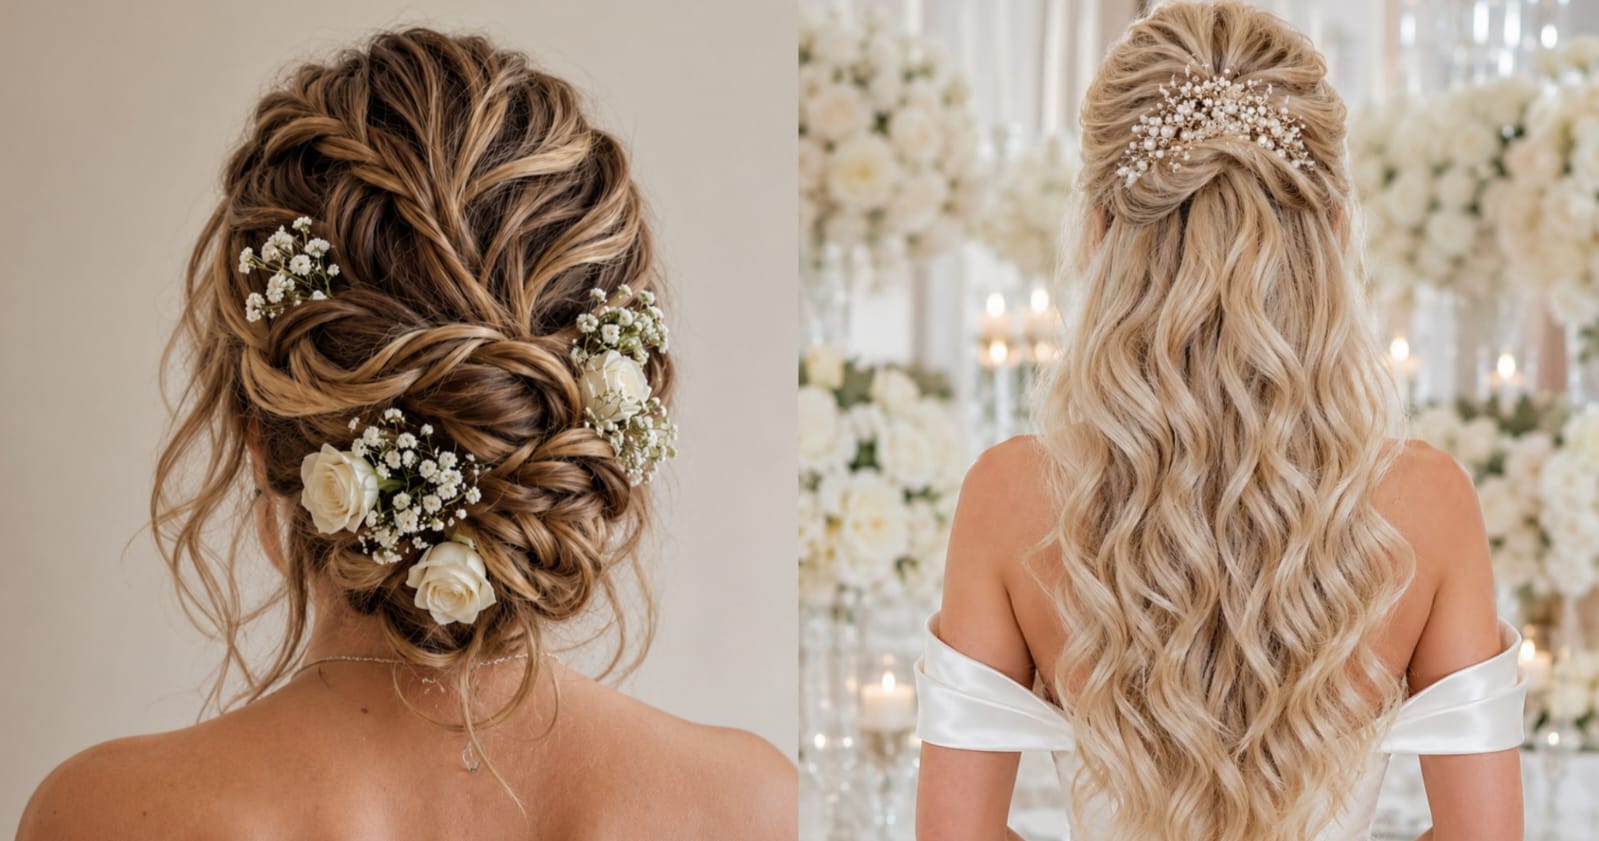
Three hours before my college roommate’s wedding, her carefully pinned updo started falling apart. Not slowly — dramatically. Bobby pins hitting the bathroom tile one after another while she stood there in her robe trying not to cry. We ended up rebuilding the entire style from scratch using YouTube tutorials and whatever pins we could find in the bottom of her makeup bag.
That morning taught me more about wedding hair than any salon visit ever did. This guide is everything I learned — the hard way.
Why Long Hair Needs a Real Strategy
More length means more options, but it also means more things that can go wrong. Heavy hair pulls pins downward. Silky hair slips out of braids. Summer heat turns a perfect style into a frizzy situation by the time appetizers are served.
Here is the one thing that changed everything for me — stop washing your hair the morning of. Freshly washed hair is too smooth and slippery for any style to grip properly. Wash it the night before and your pins, braids, and twists will actually hold.
15 Hairstyles Worth Pinning
1. Classic Ballroom Updo

Walk into any formal wedding anywhere in the country and you will find at least one person wearing this style — because it simply works. Smooth, swept back, completely polished. It photographs well under every type of lighting and holds its shape better than almost anything else when done correctly.
The night before the wedding, skip the shampoo. Day-old hair has natural texture that gives pins something to grip. Ask your stylist to use the cross-pin technique — two bobby pins pressed in an X at every anchor point. I watched a stylist do this on a bride who danced for four straight hours and not a single pin moved.
- Styling Tip: Medium hold finishing spray only — stiff lacquer makes the style look plastic and dated in photos
- Best For: Black tie receptions, church ceremonies, brides wearing cathedral length veils
2. Loose Boho Waves

The style that looks like you were just born with incredible hair and happened to throw on a wedding dress. Soft waves, a few pieces loose around the face, nothing too structured or stiff. It works especially well in outdoor natural light where the movement and texture really show up beautifully.
Curl everything away from your face using a one and a quarter inch wand. Here is where most people go wrong — they grab a brush to separate the curls. Put the brush down. Use only your fingers to pull the waves apart, then scrunch upward gently while misting with a flexible hold spray. That combination gives you soft texture that lasts instead of a stiff curl that drops within two hours.
- Styling Tip: Moroccanoil Curl Defining Cream worked through ends before curling controls frizz even in humid outdoor conditions
- Best For: Garden weddings, beach ceremonies, outdoor venues, bohemian settings
3. Braided Crown

Two Dutch braids wrapped around the head and pinned at the back. Looks intricate, holds all day, and keeps everything completely off your face and neck — which you will appreciate more than you expect after a few hours of hugging guests and taking photos in warm weather.
Start with hair that has a little texture rather than being freshly washed and slippery smooth. Work a tiny amount of light pomade between your fingertips before braiding — it adds grip and stops flyaways from escaping. Very thick hair should be worked in smaller sections because large chunky braids wrapped around the head look heavy rather than elegant.
- Styling Tip: Braid tighter than feels comfortable — styles always loosen by roughly twenty percent as the day goes on
- Best For: Outdoor summer weddings, all day events, anyone who tends to run warm
4. Half-Up Half-Down with Curls

The most requested bridal style for good reason. Top half pinned back neatly, bottom half in soft curls. You get structure and romance in the same look without fully committing to either. It photographs beautifully from every angle and is flattering on nearly every face shape.
The placement of the pinned section makes or breaks this style. Too low and it reads like a ponytail that slipped. It needs to sit high enough — roughly level with the tops of your ears — to look deliberate and polished. Use pearl pins or decorative clips rather than plain bobby pins because they will be visible in every photo. Curl the bottom half and leave it completely alone after that.
- Styling Tip: Secure the base with a clear elastic first, then layer decorative pins over it so the hold is strong but completely invisible
- Best For: Almost any wedding setting — church, outdoor, ballroom, backyard
5. Low Chignon with Textured Finish

Looks like a low bun but carries itself like something you would see on a runway. The textured version means you lightly pull the surface after pinning to create that artfully undone quality — structured underneath but soft and relaxed on the outside. Long veils attach perfectly just above it without any visual competition.
Throw out your regular bobby pins for this style and pick up spin pins instead. They are spiral shaped and screw directly into the bun rather than just sitting on the surface. Two spin pins in a low chignon provide more security than fifteen standard bobby pins, especially for thick or heavy hair that starts pulling downward by mid-afternoon.
- Styling Tip: Tease the surface lightly with a small brush before final pinning to build that intentional textured finish
- Best For: Brides wearing veils, formal evening receptions, black tie events
6. Waterfall Braid

The style that makes people stop mid-sentence to look at your hair. A braid that runs along the side of the head while releasing sections of hair downward as it goes — like water moving through it. It sounds complicated and looks incredibly impressive but once you understand the technique it comes together faster than you would expect.
Search for waterfall braid tutorials from Kayley Melissa on YouTube — her explanation is clear enough that most people have it figured out within an afternoon of practicing. The style needs textured hair to hold its shape so work some sea salt spray through dry hair before starting. Attempting this on freshly washed silky hair is a frustrating experience that ends with the whole thing unraveling.
- Styling Tip: After finishing, go back through each loop of the braid and pull it gently outward to create more fullness and dimension
- Best For: Romantic outdoor ceremonies, garden weddings, brides wanting something memorable without a full updo
7. Sleek High Ponytail

Chronically underestimated as a wedding style and that needs to change. A properly executed high ponytail — smooth from root to base, one thin piece wrapped neatly around the elastic, clean glossy length — looks intentional and fashion forward. Paired with statement earrings it reads as a deliberate style choice rather than a casual one.
Everything depends on the execution at the base. A boar bristle brush smooths all the hair upward without any bumps or ridges. Strong elastic, thin section wrapped and pinned underneath, done. Then add one more small elastic about two inches from the ends of the ponytail. This one small step prevents the style from drooping forward by lunchtime.
- Styling Tip: A small amount of Olaplex No. 7 Bonding Oil worked through the length creates a high shine finish that photographs beautifully
- Best For: Modern minimalist weddings, city venues, fashion forward brides and guests
8. Twisted Rope Braid Updo

Regular braids are lovely but rope braids have a completely different texture — tighter, more defined, almost architectural when you look closely. When two rope braids are pinned into an updo they create a style that looks like it required serious skill and significant time, even when it actually took under thirty minutes.
Mousse through the hair before twisting adds definition and keeps the twists tight throughout the day. Make two rope braids starting from just behind each ear, bring them together at the nape, and pin into a bun shape. After everything is secured, pull a few small pieces loose around the face. Without this step the style can read as severe — those loose pieces soften the whole look significantly.
- Styling Tip: Lightly backcomb each section before twisting to add grip and make the rope texture appear fuller
- Best For: Bridesmaids and guests wanting something polished and a little unexpected
9. Fishtail Braid Over One Shoulder

Woven texture draped over one shoulder reads as both romantic and refined. The fishtail photographs well up close — the intricate crossing pattern shows up beautifully in detail shots — and the over-the-shoulder placement means it is visible from the front rather than just from behind.
Fishtail braids loosen. Accepting this and planning for it makes the whole experience much smoother. Start tighter than you want the final result to look. Once complete, go back through every section and pull it gently outward to create deliberate fullness rather than accidental looseness. Then spray the braid specifically with a firm hold product rather than a light finishing mist.
- Styling Tip: Tuck a few small flowers or greenery into the braid to elevate it from pretty to genuinely stunning
- Best For: Rustic venues, bohemian weddings, outdoor afternoon ceremonies
10. Voluminous Blow-Out with Soft Waves

No pins, no braids, no structure — just great hair. A proper blow-out with a round brush followed by soft waves through the mid-lengths creates a look that is effortlessly polished and works beautifully in natural light. Guests and bridesmaids consistently underestimate this option until they see it done well and realize it holds its own against any updo in the room.
Skip the heat protectant and you will have dull, damaged ends showing up in every photograph — that is not a risk worth taking. Moroccanoil Protect and Prevent Spray is what working stylists reach for. Blow dry each section downward around a round brush for smoothness and root volume, then use a large barrel wand through the mid-lengths and ends only for soft movement without tight curls.
- Styling Tip: Flip upside down at the end and spritz roots with volumizing spray for a full bouncy finish that holds for hours
- Best For: Rehearsal dinners, wedding guests, brides who prefer natural flowing hair
11. Messy Bun with Tendrils

Not messy like rushed — messy like intentional. A low or mid-height bun with carefully curled tendrils left out around the face and along the neck. The tendrils do most of the work here, softening the whole look and framing the face in a way that reads as genuinely romantic rather than just practical.
Curl the tendrils before pulling everything else into the bun. Trying to work a curling iron around an already finished updo is awkward and usually ends with accidental burns. Small barrel wand for the tendrils — the curls should be delicate and wispy, not bold and bouncy. After curling each one, pinch it and pull gently downward to give it a natural wave shape rather than a perfect corkscrew.
- Styling Tip: Leave more hair out around the face than feels right in the mirror — it consistently photographs better than it looks standing in front of you
- Best For: Bridesmaids, casual outdoor receptions, relaxed venue settings
12. Braided Updo with Floral Accents

A standard updo becomes something else entirely when braids are woven in before pinning and fresh flowers are tucked throughout the finished style. The combination of texture and organic detail creates a look that feels genuinely custom rather than pulled from a template. It also photographs remarkably well from behind — which matters more than most people realize given how much ceremony photography happens from that angle.
Call your florist ahead of time and ask for a small handful of extra stems for hair use. Baby roses, stephanotis, and baby’s breath all work well and fresh flowers always read more naturally in photos than fabric alternatives. Keep flowers away from the bottom of the updo where they will be crushed every time you sit back in a chair or lean against a headrest.
- Styling Tip: Have flowers placed at the venue rather than during getting-ready time so they arrive fresh and stay in place without shifting during travel
- Best For: Spring and summer weddings, outdoor ceremonies, venues with strong floral design elements
13. Deep Side-Parted Waves

The same waves look completely different with a deep side part. What reads as simply pretty with a center part becomes dramatic and editorial when everything shifts to one side. The asymmetry adds visual interest without requiring any additional styling and the result has a timeless quality that holds up beautifully across different lighting conditions and photography styles.
Carve out a clean sharp part with a rat-tail comb before doing any other styling — relocating a part after waves are set is a frustrating process that rarely ends well. Curl everything in the same direction away from the face so the waves flow together naturally when they settle into the side part instead of conflicting with each other.
- Styling Tip: Sleeping in two loose braids the night before gives you a natural wave pattern that works almost perfectly for this style with very little additional work
- Best For: Vintage themed weddings, art deco venues, evening receptions, guests who need something impressive done efficiently
14. Updo with Braided Crown Accent

The full braided crown made more modern and wearable. One braid runs along the side of the head as an accent detail and feeds into a larger updo at the nape rather than two braids wrapping all the way around. The result keeps the intricate quality of the full crown while feeling more relaxed and contemporary.
Keep the accent braid slim. A thin delicate braid woven into an updo looks like a deliberate design decision. A thick one looks like it belongs to a different hairstyle entirely. After pinning, loosen each loop of the braid slightly by pulling outward — this makes the whole style look effortless rather than rigid.
- Styling Tip: This style was built for drop earrings — the braid draws the eye upward and makes longer earrings look like they were chosen specifically for this look
- Best For: Any wedding setting, especially flattering on oval, heart, and round face shapes
15. Elegant Low Side Sweep

Everything gathered to one side, loosely twisted, pinned behind the opposite ear, curled ends falling forward over the shoulder. Clean, romantic, and genuinely reliable. This style holds up well throughout a long day because gravity is helping rather than working against the pins, which is a significant advantage for anyone with thick or heavy hair that tends to pull styles apart.
The execution is straightforward — gather, twist once at the nape, pin firmly just behind the ear on the opposite side. Two or three pearl or crystal pins placed in the twist point add a bridal detail without feeling overdone. Leave the curled ends completely alone and let them fall naturally over the shoulder.
- Styling Tip: Strong hold spray on the twist and pinned section only — keep the rest of the hair light and natural so the style has movement
- Best For: Evening receptions, formal dinners, brides who want dependable elegance without complicated styling
Practical Advice That Actually Matters
Wash hair the night before. Day-old hair holds pins and styles dramatically better than freshly washed hair. This single change makes a bigger difference than any product you could buy.
Book a trial run. At least four weeks before the wedding, not the week of. That window gives you real time to change direction if something does not work without any pressure.
Tell your stylist about the venue. Outdoor ceremony in July heat requires completely different products than an indoor air-conditioned ballroom. The conditions on the day affect everything from product selection to how many pins are needed.
Keep a small kit in your bag. Five bobby pins, one clear elastic, travel hairspray, and a wide tooth comb. You probably will not need any of it. That is exactly why you should have it.
FAQ
When should I wash my hair before a wedding? The night before. Day-old hair holds styles significantly better than freshly washed hair and this applies whether you are the bride or a guest.
What works best for very thick long hair? Braided styles and textured low updos work with the volume rather than against it. The braided crown, fishtail braid, and textured chignon all perform well on thick hair throughout a long day.
Can guests wear updos or is that just for the bridal party? Guests can absolutely wear updos. Avoid anything so dramatically bridal that it competes visually with the bride. Styles seven, ten, eleven, and thirteen from this list are all strong guest options.
How do I make a hairstyle last through dancing? Use layered hold — mousse at the roots, working product through the lengths, finishing spray over the completed style. Replace standard bobby pins with spin pins wherever possible. Use flexible rather than stiff hairspray so the style moves without falling apart.
Fresh or fabric flowers in hair? Fresh flowers photograph better and look more natural. Request extra stems from your florist at booking. Have them placed at the venue rather than during getting-ready time so they stay fresh longer.
The best style on this list is not the most complicated one or the one with the most Pinterest saves. It is the one that suits your hair, fits your venue, and lets you move through your entire day without thinking about it once.
That is what good wedding hair actually does — it disappears. You stop worrying about it and just enjoy the day. Everything on this list, done right, can give you exactly that.

