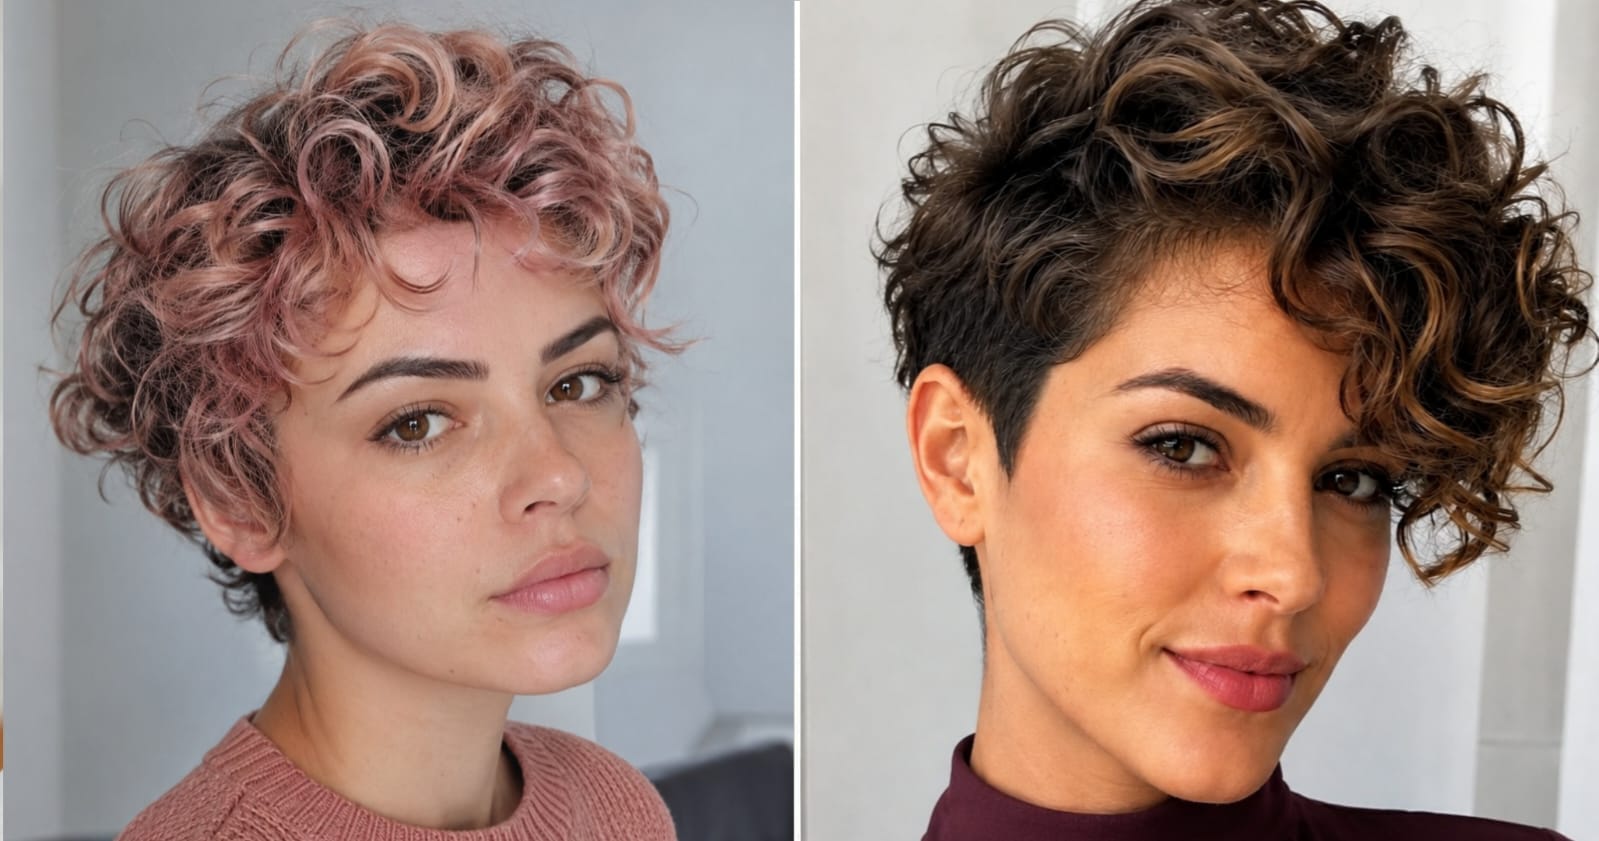
Curly hair shrinks. That single fact changes everything about how a pixie cut behaves on your head — and yet most style guides treat curly pixies like they’re just shorter versions of straight ones. They’re not. The placement of volume, the direction of curl fall, and how much length your stylist leaves to account for shrinkage all determine whether you walk out looking lifted and youthful or like the cut is wearing you. Once you understand that, choosing the right curly pixie stops being guesswork.
These 14 cuts are broken down not just by how they look, but by why they work — structurally, for your face shape, your curl pattern, and your lifestyle. Whether your curls are loose waves or tight ringlets, there’s a version here that’s going to do something genuinely flattering for you.
1. The Tapered Curly Pixie

The tapered curly pixie is the foundation style — the one everything else branches from. The sides and back are cut close, tapering gradually from very short at the nape to progressively longer toward the crown. Because curls are left longer on top, shrinkage actually works for you here: what looks like two inches of curl on top might have started at three and a half. That built-in volume sits right where you want it — high on the head, pulling the eye upward and giving your face a naturally lifted appearance.
This cut is forgiving across face shapes because the taper removes bulk from the widest horizontal point (the sides) while keeping height. It’s particularly powerful for round and square faces, where that upward visual pull breaks up the horizontal width.
How To Style
- Apply a curl-defining cream to damp hair, section by section, scrunching upward from the ends.
- Diffuse on low heat, lifting the roots with your fingers every minute or so to encourage lift at the crown rather than letting curls fall flat.
- Once dry, break up any clumps gently with fingertips — never a brush.
- Finish the tapered sides with a light edge control product if you want a clean outline, or leave them soft for a more relaxed feel.
Best For: Round, square, and oval faces. Works on all hair densities; thicker hair benefits most from the taper keeping bulk in check.
Tools & Products: Diffuser attachment, Denman brush (for detangling wet only), curl cream with medium hold, light edge control gel for the nape.
2. Side Parted Curls

A deep side part on a curly pixie does something most people don’t expect: it creates asymmetry that reads as youthful energy rather than a structured “done” look. The heavier side sweeps across the forehead at an angle, and because curls have natural body, that sweep stays airy instead of flat — you get movement without weight.
The side part also shifts where volume concentrates. Instead of sitting symmetrically above both temples (which can widen the face), volume stacks on one side and falls away on the other, creating a diagonal line across the face that’s naturally slimming.
Quick Styling Note: The most common mistake here is parting too far — go just slightly past the center of your eyebrow arch, not all the way to your ear. A part that’s too deep flattens the top completely and removes the lift that makes this cut work. If your curls are on the looser side, a small amount of mousse applied before diffusing helps the side-swept section hold its shape without going stiff.
3. Layered Pixie with Highlights

Layers in a curly pixie serve a structural purpose beyond just adding “movement” — they remove weight at the mid-length of each curl, which lets the curl spring tighter and sit higher. Without layers, curls in a pixie can pull themselves slightly straighter under their own weight, especially on denser or longer strands. Strategic layering solves that.
Highlights amplify this effect visually. When lighter pieces catch the light at different depths, the cut reads as more three-dimensional. The eye perceives depth as fullness, which translates to that lived-in, healthy look that takes years off. Stick to highlights that are two to three shades lighter than your base rather than going platinum-bright — the subtler the contrast, the more natural the dimension.
How To Style
- Section damp hair and apply a lightweight curl mousse, not a heavy cream — layers need something that holds without weighing individual strands down.
- Scrunch each section upward rather than smoothing downward.
- Diffuse until about 80% dry, then air dry the rest to avoid frizz from over-manipulation.
- Separate the layers gently once fully dry to see the full effect.
- A tiny drop of shine serum on your fingertips, pressed lightly over the top layer, brings the highlights forward.
Best For: Oval and heart-shaped faces. Fine to medium density hair benefits most — the layering creates the appearance of more volume than is actually there.
Tools & Products: Lightweight curl mousse, diffuser, small amount of frizz-control serum for the finish.
4. Asymmetrical Curly Pixie

One side longer, one side shorter — and on curly hair, that difference reads as more dramatic than it would on straight hair because the longer side has actual curl volume while the shorter side sits close. The contrast is the whole point. This isn’t a subtle cut; it’s a statement, and it looks anything but aging because asymmetry signals deliberateness and confidence.
The key detail most guides skip: the longer side should be cut to account for shrinkage. If you want that side to fall just below your cheekbone, tell your stylist you want it to land there after the curl springs up. Ask them to cut it wet and check it dry before you leave the chair.
How To Style
- Define curls on the longer side first using a curl cream, working from root to tip.
- Smooth the shorter side close to the head with a light gel for a clean contrast.
- Diffuse with the longer side facing down so curls hang and dry with more natural separation.
- Once dry, flip everything back and adjust the longer side’s direction by hand.
Best For: Oval, long, and heart-shaped faces. Works best on type 2c through 3b curls where the length difference stays visible — very tight curl patterns may need extra length on the longer side to maintain the contrast after shrinkage.
Tools & Products: Curl defining cream, light hold gel, diffuser, wide-tooth comb for wet detangling only.
5. Voluminous Curly Top with Undercut

The undercut version of a curly pixie takes the taper concept to its extreme — the sides and back are shaved or cut very close, and all the length and curl volume is concentrated on top. The result is maximum height with zero bulk at the sides. On curly hair, the top section can spring up dramatically, creating the kind of crown lift that genuinely changes how tall and angular your face looks.
This cut is particularly effective for women whose hair has thinned at the sides or temples, because removing that area entirely means there’s nothing to look thin — the eye goes straight to the lush, full top section instead.
Quick Styling Note: The biggest maintenance issue with an undercut is grow-out. The line between the close-cut sides and the longer top can look harsh as it grows — plan for a shape-up every three to four weeks at minimum to keep the contrast clean. If that feels like too much upkeep, the tapered version (#1) gives you a similar effect with softer grow-out.
6. Soft Wispy Curly Pixie

Not every curly pixie needs bold volume. The wispy version works with finer, looser curl patterns — think 2a to 2c — where trying to build dramatic height just results in frizz. Instead, this cut embraces delicacy. Longer, feathered layers at the ends create movement without bulk, and the overall silhouette stays close to the head with soft tendrils framing the face rather than springing outward.
The youth factor here is in the softness. Harsh lines and heavy volume can actually read as older on some face shapes; the wispy pixie plays into a lightness that feels effortless.
How To Style
- On damp hair, use a curl-enhancing milk rather than a cream or mousse — fine curls need weight-free products.
- Scrunch lightly, don’t oversaturate — too much product pulls fine curls down.
- Air dry when possible, or use a diffuser on the lowest heat setting.
- Finish with a light mist of flexible-hold hairspray to tame any flyaways without creating stiffness.
- Separate the face-framing pieces with your fingertips to keep them wispy, not clumped.
Best For: Oval and long faces. Fine, low-density hair with loose wave to curl patterns.
Tools & Products: Curl-enhancing milk, diffuser, flexible-hold hairspray, wide-tooth comb.
7. Silver Fox Curly Pixie

Gray and silver curly hair has a texture difference that most people don’t account for when styling. Gray strands tend to be coarser and slightly more resistant to curl, which means they need more moisture to stay defined rather than going wiry. A curly pixie on silver hair only works at its best when the curl pattern is properly hydrated — and when the cut itself is shaped to let the natural curl direction do the work rather than fighting it.
The reason this style looks so striking — and so youthful — is that it reads as completely intentional. There’s nothing apologetic about it. The silver color against a well-shaped pixie is a combination that turns heads precisely because it signals someone who’s fully comfortable with who they are, which is its own kind of energy.
Quick Styling Note: Gray hair benefits from a purple or blue toning conditioner used once a week to neutralize any yellow cast that develops between salon visits. Apply it to wet hair, leave for five to seven minutes, and rinse — it keeps the silver bright and the overall look crisp without touching the cut itself. Check out our guide on caring for silver and gray hair at home for the full maintenance routine.
8. Shaggy Curly Pixie

The shaggy pixie is defined by its intentional lack of polish. Longer layers, a curtain-style fringe, and a deliberately undone finish give this cut a rock-and-roll looseness that works beautifully on wavy to loosely curly hair. The layers are cut with texture shears rather than straight cuts, creating that frayed, lived-in edge that reads as low effort even when it isn’t.
What makes it look younger specifically is that it rejects the “set” look — the kind of hairstyle that says you spent a long time on it. The shaggy pixie looks like you just woke up with great hair, which is an effect that’s harder to pull off as we get older and therefore more impressive when you do.
How To Style
- Apply a salt spray to damp hair to encourage natural texture and separation.
- Scrunch and squeeze, then leave it mostly alone — the less you touch it, the better this style looks.
- Diffuse loosely without scrunching during drying, just hover the diffuser under sections.
- Once dry, tousle with your fingers to break up any structure that formed.
- A tiny amount of matte pomade worked between your fingertips and pressed through the ends enhances the undone texture.
Best For: Oval and heart-shaped faces. Wavy to loose curl textures (2b–3a). This cut works better on medium to thick density — very fine hair may struggle to hold the layered weight.
Tools & Products: Salt spray, diffuser, matte pomade or texture paste, texture shears (for the stylist).
9. Tight Ringlet Pixie

Type 3c and 4a curl patterns in a pixie cut create a silhouette that’s genuinely unlike anything you can achieve with looser curls — the ringlets stack and spring in a way that creates a rounded, crown-like shape above the head. The density of tight curl patterns means this style naturally has impressive volume without any product lift required.
The structural note worth knowing here: shrinkage is at its most dramatic with tight ringlets. What looks like half an inch of hair at the nape might be two inches stretched. Communicate clearly with your stylist about how much shrinkage your particular curl pattern has — ask them to make decisions about length while your hair is dry and at its true curl size, not wet.
Quick Styling Note: Tight ringlet pixies thrive with the LOC method (Liquid, Oil, Cream) applied in that order on wash days. Skip the L step between washes and just refresh with water and a small amount of cream to reactivate the ringlets without stripping the moisture you’ve already built in. This is the maintenance detail that keeps the ringlets defined and separated rather than fusing into a single mass.
10. Curly Pixie with Bangs

Bangs on a curly pixie are their own commitment — curly bangs behave completely differently from straight bangs and need to be cut with that in mind. They should be cut dry, or at minimum checked dry before you leave the salon, because the shrinkage factor can turn a forehead-grazing fringe into something that barely reaches the middle of your forehead.
When done right, they’re incredible for a younger look. Bangs break up the forehead area, soften the top third of the face, and draw attention toward the eyes. On curly hair, the natural bend and bounce of the fringe keeps it from looking severe, which is a risk with blunt straight bangs.
How To Style
- Separate the bang section from the rest of your hair first and work with it individually.
- Apply a curl cream to the bangs, gently pressing the curls into their natural pattern rather than pulling.
- Diffuse the bang section facing downward so the curls set with a slight forward movement rather than springing back.
- Style the rest of your hair, then lightly mist the bangs with water to tweak their position if needed once dry.
Best For: Round, oval, and long faces. Works on medium to loose curl patterns (2c–3b) — very tight ringlets in the bang area can create a very small fringe that may not achieve the coverage you’re looking for. See our post on styling curly bangs for more detail on managing the grow-out phase.
Tools & Products: Curl cream, diffuser, fine mist spray bottle for refreshing.
11. Messy Beach Wave Pixie

The beach wave pixie occupies the loosest end of the curl spectrum — it’s for 2a to 2b hair that has natural wave but doesn’t form defined curls. The messiness is structural: soft, slightly tousled waves in a short cut create a relaxed, coastal feel that’s particularly flattering because it softens every feature without adding hard lines.
The key is resisting the urge to over-define. Using products meant for tighter curls will make the waves look overworked and stiff; what you want is a barely-there wave that looks like it arrived naturally.
Quick Styling Note: Salt spray is your best friend for this style, but the timing matters. Apply it to hair that’s about 50% dry, not soaking wet — on very wet hair, salt spray can pull moisture out before the wave has a chance to form. Scrunch in and leave it alone. The less heat you use, the more natural the wave looks. If you want to explore more low-heat styling options for wavy pixie cuts, we’ve covered the full range.
12. Slicked Back Curly Pixie

Taking all your curls straight back from the face is a bold move, and it works because it puts your features completely front and center. There’s nowhere to hide, which is exactly why it looks so confident and striking. The curls themselves stay visible from the side and top — you’re not suppressing them, just directing them backward instead of outward.
This is the ideal style for defined curl patterns (3a and above) because the hold is coming from the curl structure itself, not from fighting it. Gel applied on wet hair and then left to dry without touching it creates a natural hold that keeps the shape without crunchiness once you break the cast with your hands.
How To Style
- Apply a strong-hold gel generously to soaking wet hair, starting at the front hairline and working everything back with your palms.
- Use a wide-tooth comb to keep everything moving in the same direction, then put the comb away.
- Diffuse on medium heat, keeping the airflow pointed backward rather than forward.
- Once fully dry, scrunch firmly with your hands to break the cast — this is what removes the crunchiness and reveals soft, defined curls.
- Finish with a light oil on your hands pressed over the surface for shine.
Best For: Oval and long faces — this style adds length and projects forward energy that elongates rounder face shapes more than it should. Medium to high density hair holds the slicked shape best.
Tools & Products: Strong-hold gel (flaxseed or aloe-based gels work beautifully), diffuser, wide-tooth comb, light finishing oil.
13. Pastel Colored Curly Pixie

Color on curly hair behaves differently than on straight hair — the pigment deposits in the outer layer of each curl, which means on a curly pixie, you see color and dimension at the same time. When curls catch the light, some pieces appear lighter, some deeper, and the overall effect is far more interesting than the same color on straight hair would be.
Pastels specifically — lavender, rose, soft teal, dusty pink — add a softness that reads as youthful without trying hard. They work on all curl types, though keep in mind that achieving a pastel on darker natural hair requires lightening first, which affects curl pattern temporarily. Plan for a deep conditioning treatment in the weeks before and after any lightening service.
Quick Styling Note: Pastel colors fade faster than deeper tones, especially on hair that’s been lightened. Washing with cool water extends the color significantly — hot water opens the cuticle and releases pigment. A color-depositing conditioner in the same pastel shade, used once a week, keeps the tone fresh between appointments without a full salon visit. For more on maintaining color-treated curly hair, we’ve broken down the full at-home routine.
14. Face Framing Curly Pixie

The face framing pixie is arguably the most strategically youth-focused cut on this list. Longer, curved pieces are left to fall around the temples, cheekbones, and jaw — and because those pieces are curly, they frame with softness rather than sharp lines. The effect is that your face looks more defined in the center while the edges are gently blurred.
The structural reason this works: as we age, the face loses volume in the cheeks and the jaw softens. Face-framing curls replace that visual softness artificially — they hug the area just outside your natural contour and create the impression of a more structured, lifted face shape without anything invasive.
How To Style
- Apply curl cream to the framing pieces first, coiling them forward with your fingers to encourage them to curl toward your face rather than away from it.
- Style the rest of the hair normally with your preferred method.
- Diffuse with the framing pieces loosely held toward your face so they set in the right direction.
- Once dry, adjust the framing pieces by hand — twist any that sprung the wrong direction around your finger and hit with a brief blast of warm air to reset.
- Secure everything with a light-hold spray, focusing on the framing pieces since those are the ones that need to stay put.
Best For: All face shapes, particularly square and round faces where the curved framing softens angular or wide lines. Works on all curl types; looser curls create a softer frame, tighter curls create a more defined one. This is one of the most adaptable styles if you’re just starting to explore curly pixie cuts for your face shape.
Why These Cuts Actually Make You Look Younger — The Structural Case
The youth effect in curly pixie cuts isn’t magic, and it’s not just about being “cute.” It comes down to two mechanical factors: vertical volume and face proximity.
Vertical volume — height at the crown rather than width at the sides — creates an upward visual pull on your entire face. The eye follows the shape of a silhouette, and a silhouette that goes up makes everything below it look lifted. Curly hair is uniquely positioned to deliver this because natural curl spring gives volume without the need for teasing, backcombing, or product buildup.
Face proximity is about what the hair is doing around your features. When curls fall close to the face — framing the cheeks, grazing the temples, curving toward the jaw — they create a soft border that makes features look more contained and defined. Straight cuts worn away from the face have the opposite effect; they leave features visually isolated.
The cuts that score highest on both factors — the tapered pixie, the face framing pixie, the voluminous undercut — are the ones that do the most work for you structurally. The others trade one factor for something else: the slicked back style maximizes face exposure, the shaggy pixie prioritizes texture and casualness, the side part prioritizes asymmetry and diagonal lines. None of those are wrong — they’re just making a different trade.
Understanding this means you can look at any curly pixie you’re considering and ask the two questions that actually matter: Where does the volume sit? And how does the hair interact with my face? The answers will tell you more than any “face shape guide” ever will.
Frequently Asked Questions
Can I get a curly pixie if I’ve never had short hair before?
Yes, but go in with realistic expectations about how your curl pattern will behave at this length. Curls that were weighed down by length may spring up considerably once cut short — ask your stylist to do a curl assessment first and cut gradually if you’re nervous rather than taking off everything at once.
How often does a curly pixie need to be trimmed?
More often than most people expect — every four to six weeks to maintain the shape. The good news is that because curly texture hides unevenness better than straight hair, you have a slightly longer window before the grow-out looks messy. The undercut and tapered versions need the most frequent upkeep; the shaggy and wispy versions are more forgiving.
Will a pixie work on very tight curl patterns like 4b or 4c?
Absolutely, though the shrinkage factor is significant. Be explicit with your stylist about your shrinkage percentage and always check the length dry before leaving the salon. The tight ringlet pixie (#9) is the most relevant style to look at for type 4 hair.
What’s the best way to refresh a curly pixie between washes?
A fine mist spray bottle with water and a tiny amount of leave-in conditioner mixed in. Spray lightly, scrunch, and leave alone. Avoid touching it while it’s damp — that’s where frizz comes from. For styles with strong-hold gel, re-wetting and re-scrunching reactivates the curl without needing a full wash.
Do curly pixies require a lot of product?
Less than you’d think when the cut is right. A well-shaped curly pixie works with your natural texture, which means the curl does most of the work. One product — a cream, mousse, or gel depending on your pattern — is usually enough. Over-layering products on short hair tends to weigh curls down and create buildup faster.
Will this style work if my curls are inconsistent across my head?
It can, and a skilled stylist who works with curly hair regularly will account for that. Mention it in your consultation — some sections may need to be cut slightly differently to account for varying pattern strength across your head. This is actually one area where curly pixies beat longer curly styles: the shorter length means inconsistency matters less because there’s less hair for the difference to compound across.
Conclusion
A curly pixie isn’t just a short haircut — it’s a cut that works differently on curly hair than it does on anything else, and understanding that difference is what gets you from a result that’s “fine” to one that genuinely looks great on you. Focus on volume placement, account for shrinkage before you leave the salon, and choose a style that frames rather than hides your features. The rest is just product and practice.

